HubSpot Integration
This comprehensive guide walks you through the process of setting up the Message2Give integration within HubSpot and how to use it. Designed for HubSpot Technical Administrators, this documentation covers the essential steps to configure HubSpot to leverage Message2Give's powerful engagement and communication toolkit.
Prerequisites
Before you begin, ensure you have:
- Administrative access to your HubSpot instance
- Message2Give API key (see Get Started guide)
Setup on Portal
Installation
Access Integrations
Navigate to the Integrations tab of the Portal. If you don't have access, contact a system administrator.
Initiate Connection
- Click
Manage Hubspot Integration. - Click on the link prompting you to create a connection between your workspace and HubSpot account.

Configuration
Select Integration
- Navigate to the Integrations tab of the Portal.
- Click
Manage Hubspot Integration.
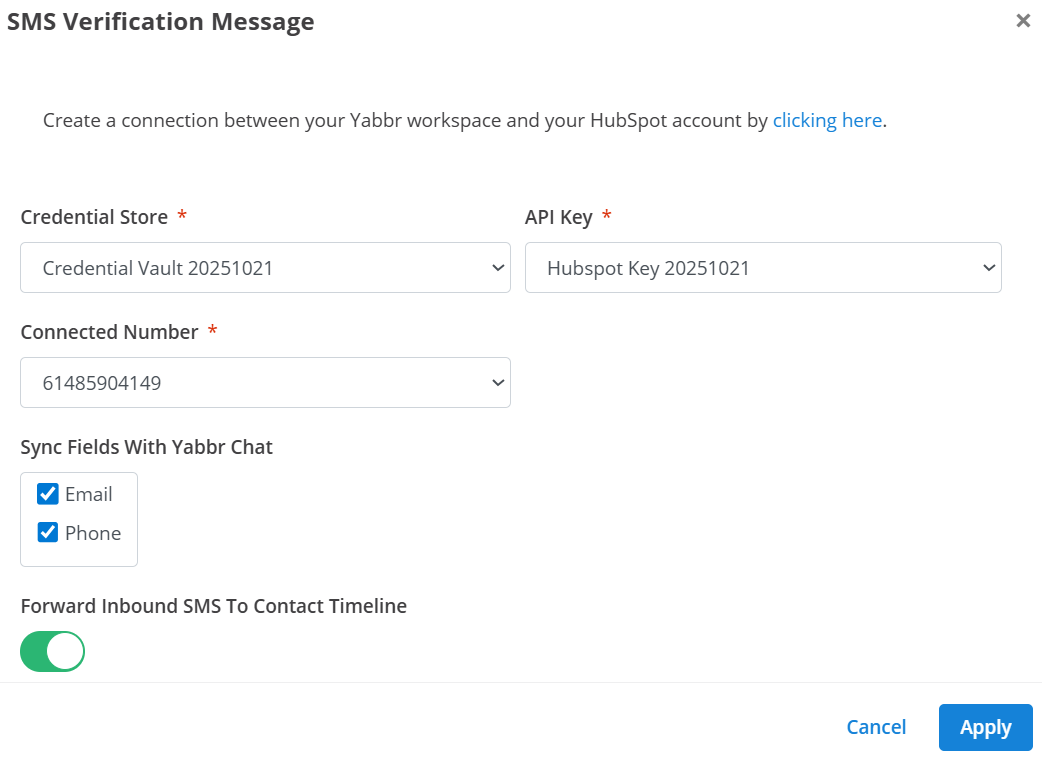
Review Pre-filled Credentials
The Credential Store and API Key will be prefilled upon connecting your workspace to your HubSpot account. These can be left as is.
Configure Settings
- Connected Number: Choose a Virtual Number under
Connected Number. This is the number that will be used by the integration to send and receive messages. - Field Syncing: Select the Message2Give contact fields you wish to sync with your HubSpot contact fields. These need to match the name of the fields in HubSpot.
- Timeline Activities: Toggle the checkbox to
Forward Inbound SMS to Contact Timelineif you want inbound messages to be added to the HubSpot contacts' activity timeline.
Using the Integration
Sending Messages
With the integration connected, contact pages will now have a ‘Message2Give’ card added to the page.
Locate Contact
In HubSpot, navigate to Contacts and then select one of your contacts.
Open Message2Give Card
Scroll down on the right hand sidebar and look for the 'Message2Give' card.
Compose & Send
Clicking the link will open a page allowing you to:
- Select the correct mobile number for the contact.
- Enter a message.
- Send it as an SMS.
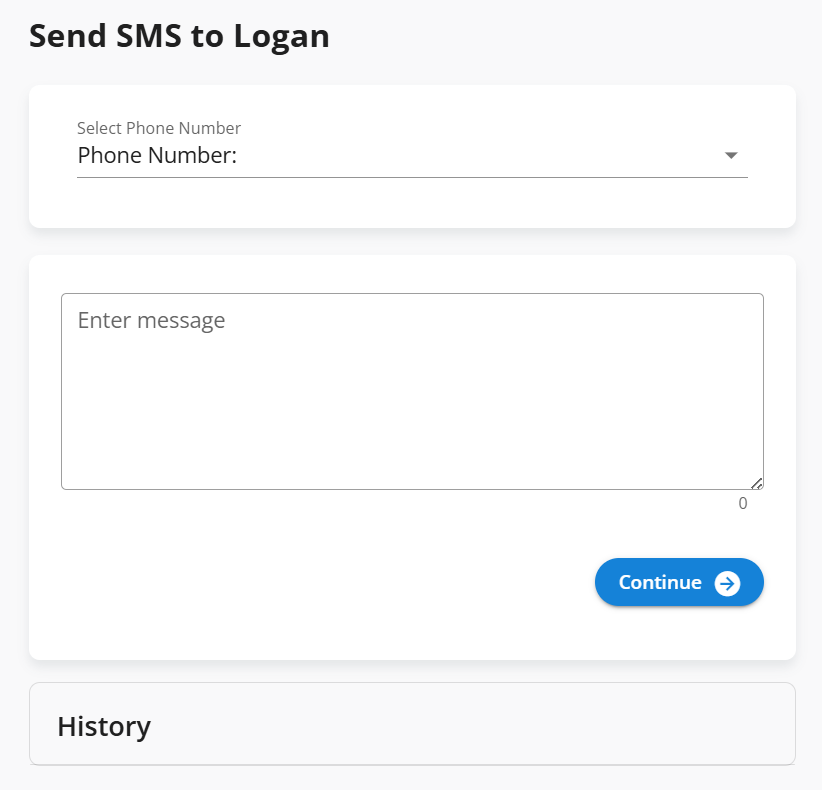
History
Previously sent messages will appear at the bottom under the History section. They will also be added to the contact's Recent Activities in Hubspot.
Receiving Messages
Enable Timeline Forwarding
Ensure Forward Inbound SMS To Contact Timeline was enabled earlier in the integration setup.
How Matching Works
Messages sent to the Connected Number will be added to the HubSpot activity timeline of the first contact that matches the inbound number.
Matching Logic
- A matching contact is determined by whether the number the message was sent from can be found linked to one of your HubSpot contacts.
- If there are no matching contacts, the message will not be added to any activity records.
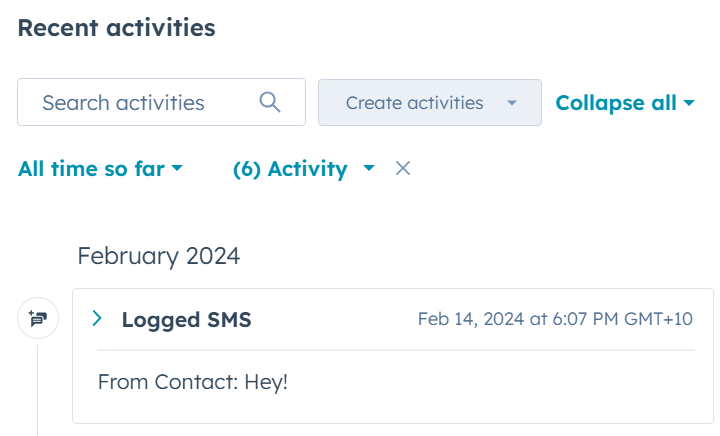
View Messages
To ensure the inbound messages are visible on your contacts' activity timeline, go to their Recent Activities, click the Activity dropdown menu, and enable "SMS".
User Field Syncing
Define Message2Give Fields
Configure contact fields in Message2Give Contacts. These fields should match the name of fields on your contacts in HubSpot.
Map Integration Fields
- Navigate to the integration configuration.
- Enable the fields you just created. They will only appear if they match valid fields in HubSpot.
Sync Data
Upon opening contact fields in the Chat Console, these fields will pull in the data from HubSpot. Any changes made in Chat will be pushed through to the HubSpot Contact record.
How is this guide?