Express Messages
Express message lets you quickly send a templated message to any contact. This message can be SMS, MMS, Email, or Validation.
Send
The first tab on the Express Message page is the Send tab. This is where you can use all your message templates from. Some message templates may be inside a folder (called a "category"). Click on the category to open it and see its contents.
When you click on a message template, a small menu will appear.
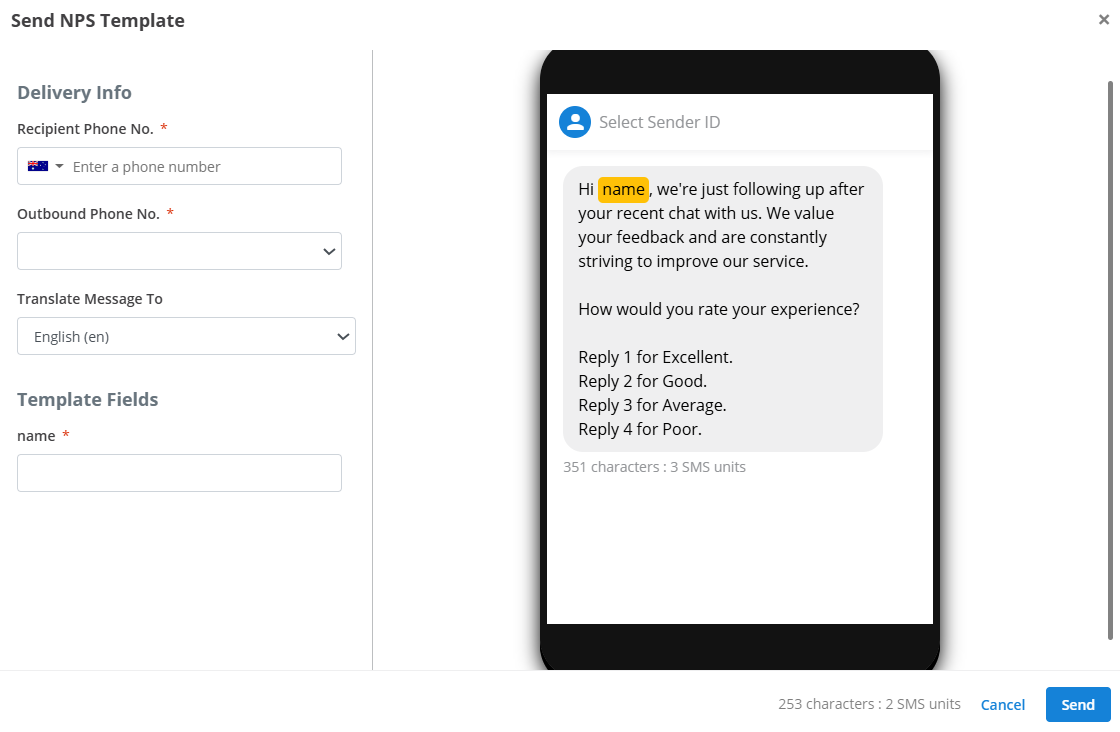
- Recipient Phone No.: destination to send the message to.
- Outbound Phone No.: the sender ID to use to send the message.
- Translate message to: select a language to automatically translate the message before sending.
- Template Fields: if your message template contains placeholders like
{{name}}, they need to be filled in here.
The menu will also show a preview of the message on the right. Also note that the fields may vary slightly depending on your medium, but they are all quite similar (eg attachments for MMS and Email). When you're happy with the message, click Send.
All the messages you send using Express can also be viewed in the History tab.
Templates
This is where you manage your message templates.
Creation
To create a new template, click the + Template button. This will open a menu where you can configure your new template.
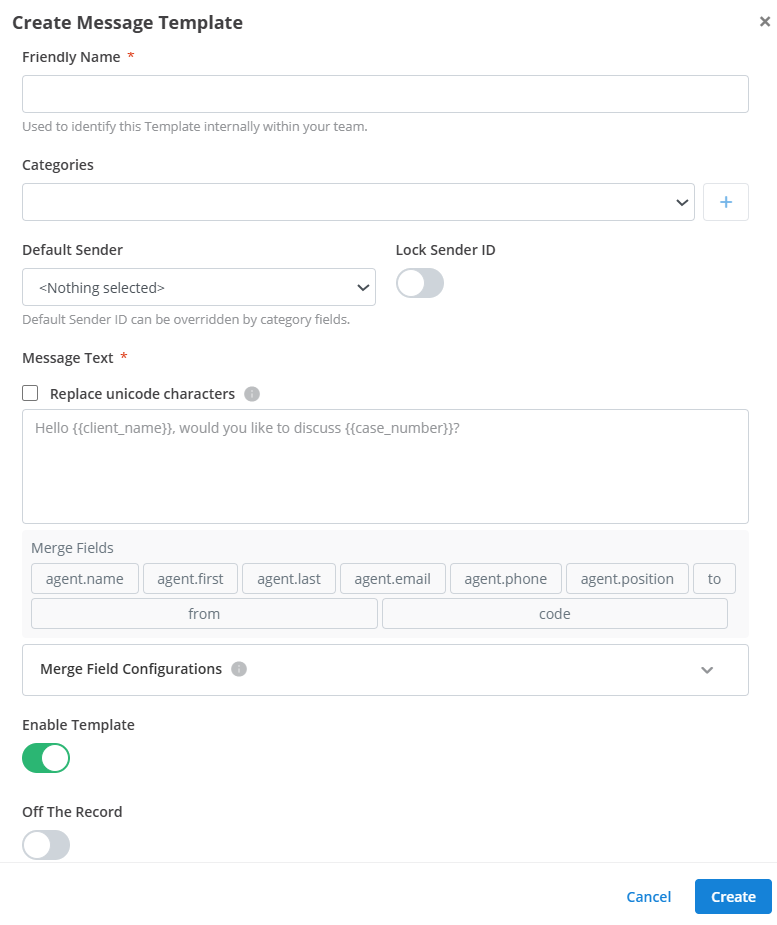
- Friendly Name: name to identify the message template in your workspace.
- Categories: the categories that the template belongs to. This is useful for organisation. It is similar to storing it in a folder. You can create and organise your categories in the Categories tab.
- Enable Template: toggles the visibility of the template in the Send tab.
- Off the Record: if this is enabled, messages sent using this template will not be logged in a transcript.
Then there are various fields for creating the message depending on the medium you selected. See documentation for the different mediums and how to use them here. When you're happy with your template, click Create.
Categories
Create categories to organise your templates into. Categories can also contain "rules" that are enforced on all the templates that belong to it.
Structure
The left side of the page shows you all your Categories and their structure. You can move a root category around in the hierarchy using the six dots to the left of it. Categories that are higher up will be shown first in the Send tab.
Create Root Category
To create a new root category, enter the category name into the New Category field at the top of the structure, and click + to add it.
Nest Category
To nest a category inside another, click the + button next to the category name, enter the nested category's name, and click ✓ to confirm.
Tip
You can also delete a category with the trash icon.
Editing
You can edit the enforced "rules" of a category by clicking the pencil icon on the category.
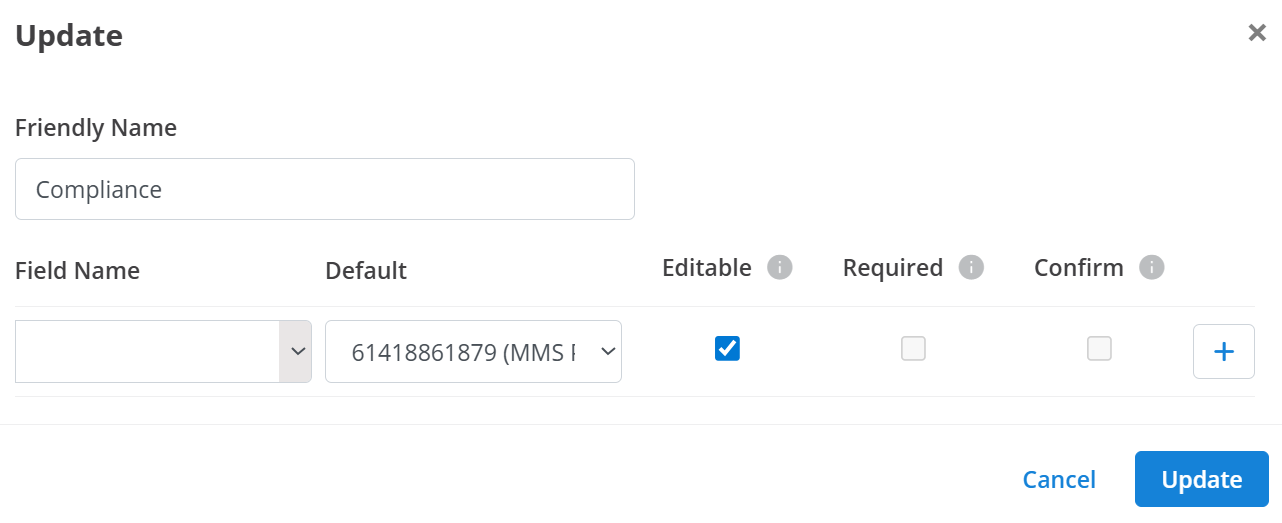
- Friendly Name: the display name of the category
- Field Name: name of the placeholder or property to enforce. For example
defaultSenderwill enforce all templates in this category to be sent from the same destination.business_namewill enforce all templates to use the same value for the{{business_name}}placeholder. - Default: a default value that will pre-populate the field when a template is selected.
- Editable: this value can be changed manually when using the template in the Send tab.
- Required: a value must be assigned before the message can be sent.
- Confirm: in the Send menu, a checkbox will appear underneath the field prompting the user to confirm the value of the field before sending the message.
Click + to add this rule to the category. You can add multiple rules to a category.
Selection
When you click on a category, two lists will appear on the right - Assigned Templates and Templates.
Assigned Templates are the templates that are stored inside the selected category. Click on a templates to unassign it from the category.
Templates are all of your enabled message templates that have not been assigned to the selected category. Click on a template to assign it to the category.
How is this guide?