Member Management
Members represent all users with access to your workspace. You can organize and configure these members and their profiles by clicking the building icon in the top right of the page (outlined below) and selecting Members.
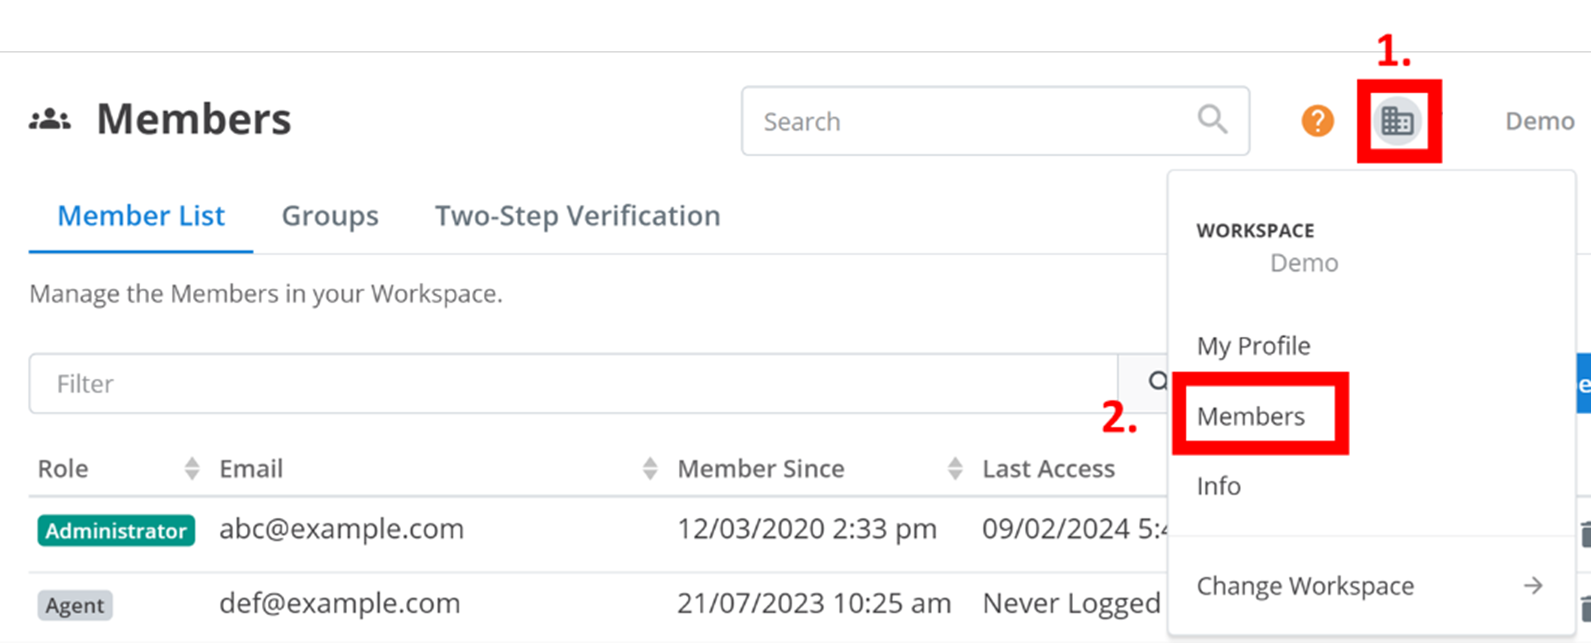
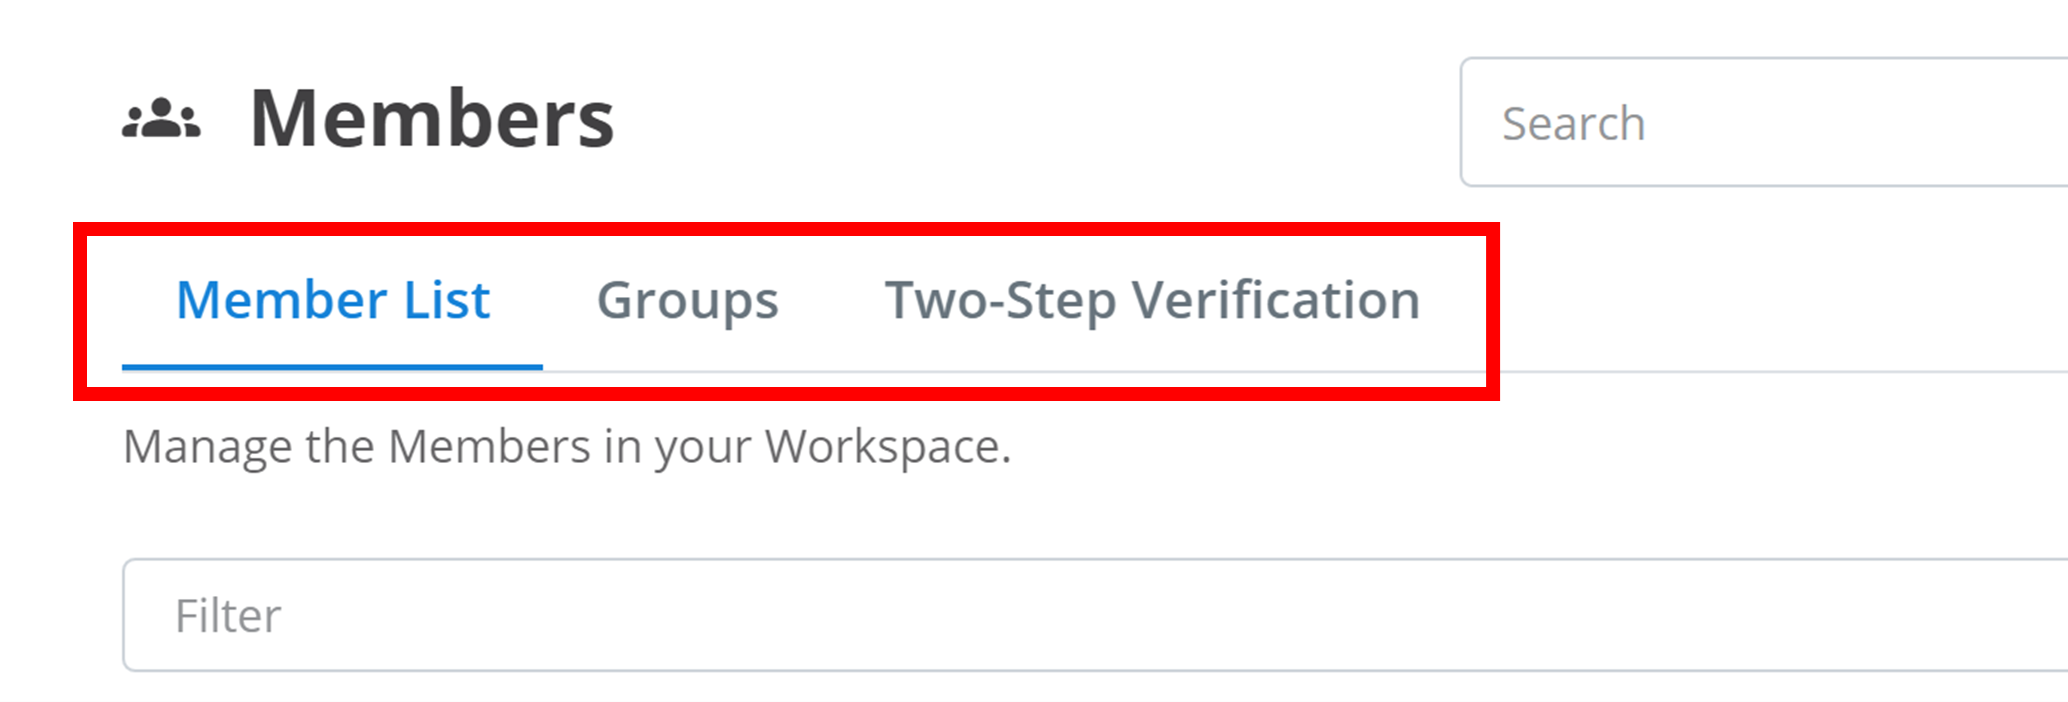
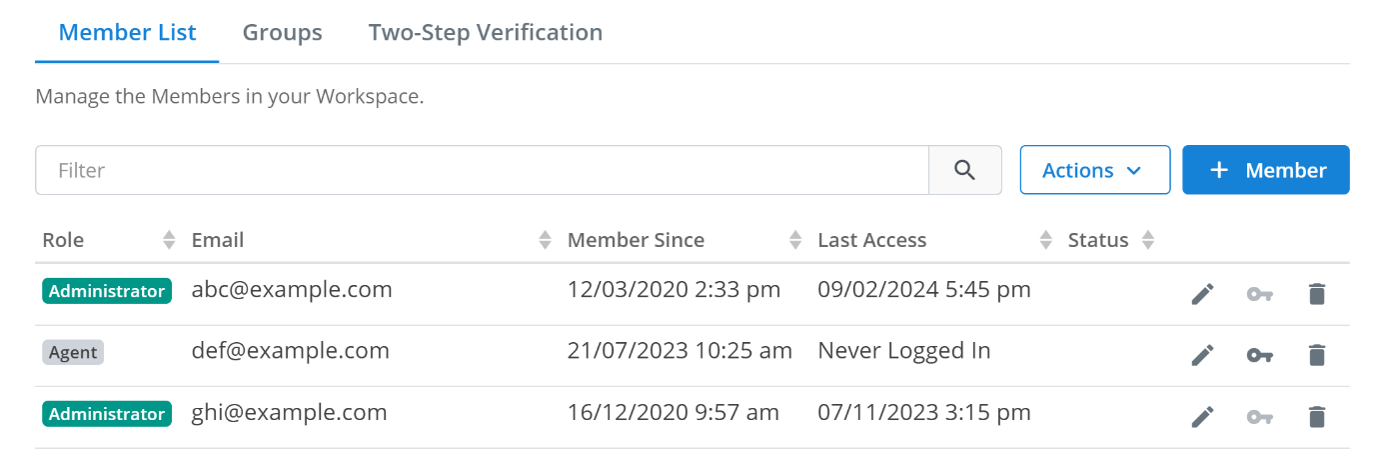
To navigate between different Members configuration options, click the tabs outlined below. In the example below, Member List is currently selected:
Member Creation
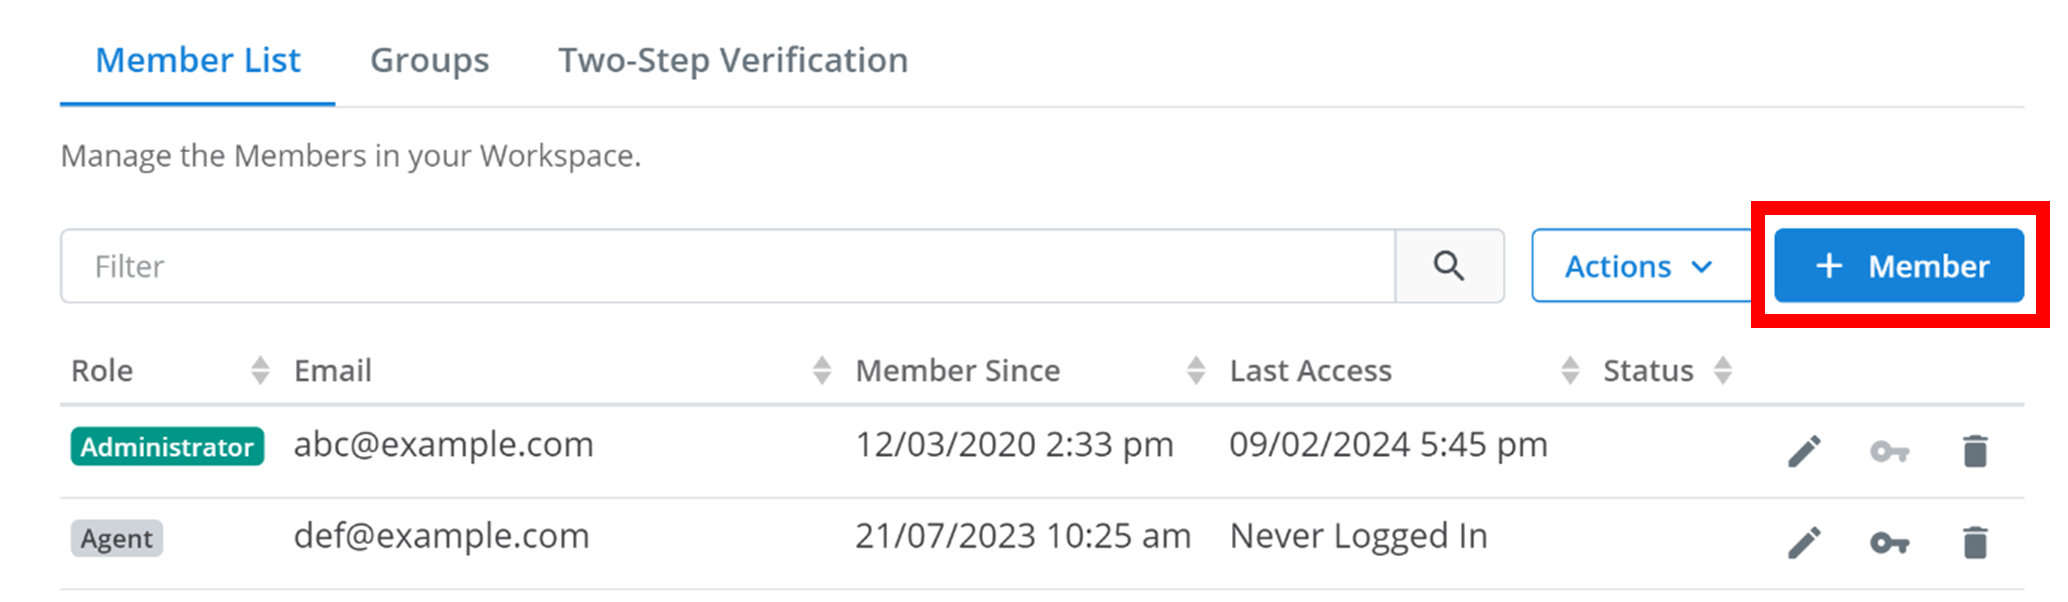
To add a new member to the workspace, click the blue + Member button outlined below.
A configuration menu will appear as shown below.
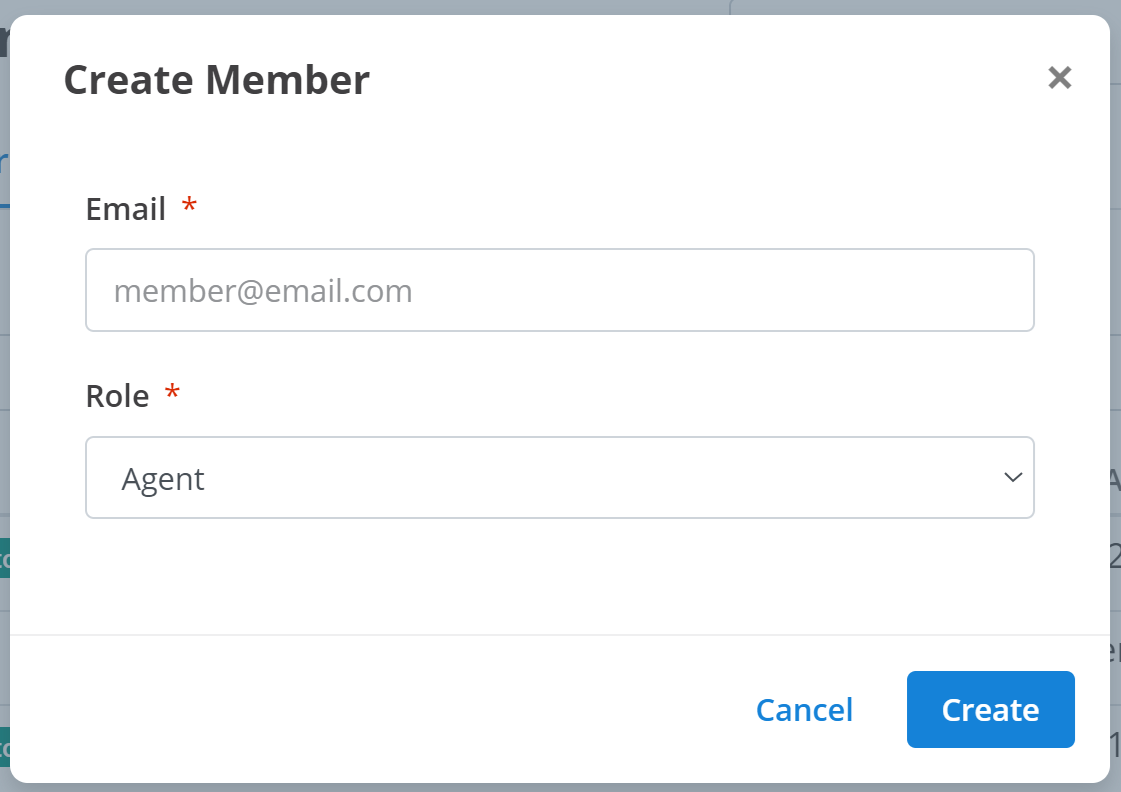
- Email: the email address of the new member.
- Role: the role of the new member inside the workspace. New members can either be an Agent, Administrator, or Owner. Agents can have their permissions modified. Administrators have all permissions. Owners are the same as Administrators except their role cannot be changed and they cannot be removed.
Finally, to confirm and create the new member into the workspace, click Create.
Updating Details
When you update a member, you can change their role, status, and virtual number assignment for Email2SMS. You cannot change their registered email. After clicking on the button to update a member, a small menu will appear like the one below:
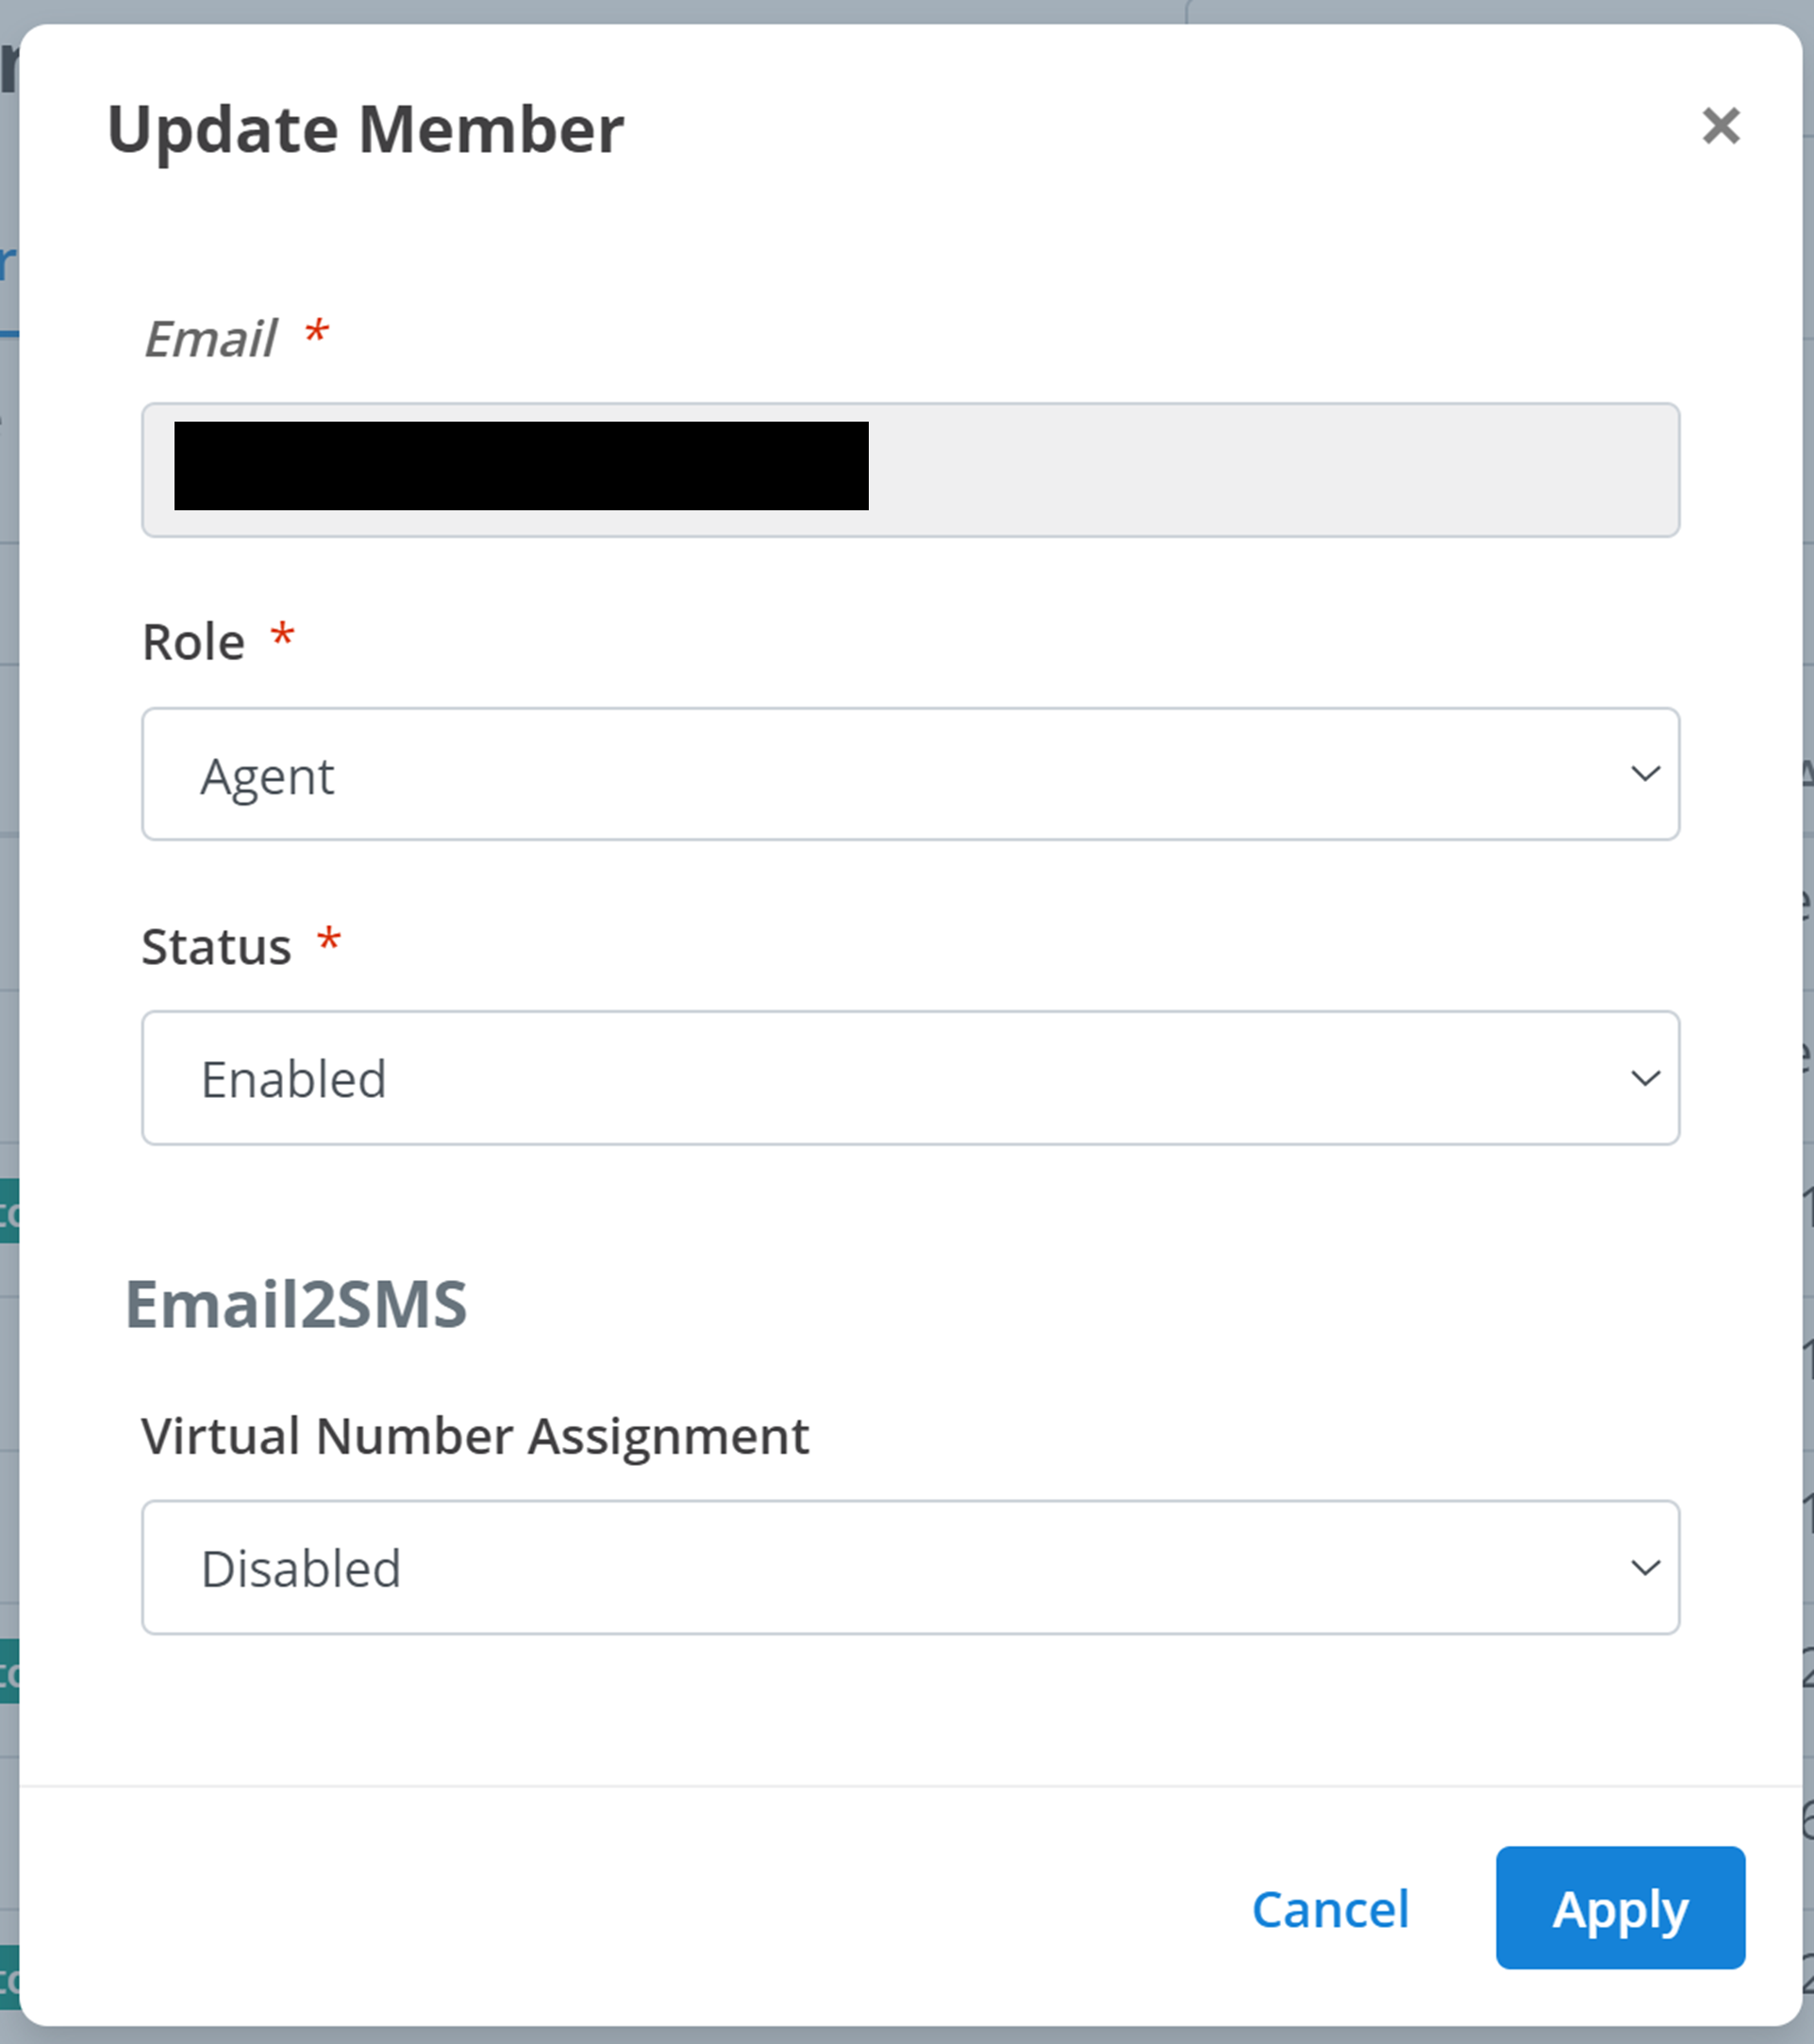
You can change each option below by selecting a new option in the drop-down menus above.
- Role: the role of the member in the workspace.
- Status: whether the member's profile is enabled within the workspace. A disabled member's profile is not functional. This status can either be Enabled or Disable.
- Virtual Number Assignment: this is the Virtual Number that this member will use for Email2SMS communications. To disable Email2SMS functionality for the member, just select Disabled for this option.
Finally, to confirm and register the changes, click Apply.
Permissions
Your workspace has hundreds of available functions. Administrators and Owners will always be able to access all functions. However, you can modify which functions Agents are allowed to use. These are the Agent's Permissions. After clicking on the button to update permissions, a small menu will appear like the one below:
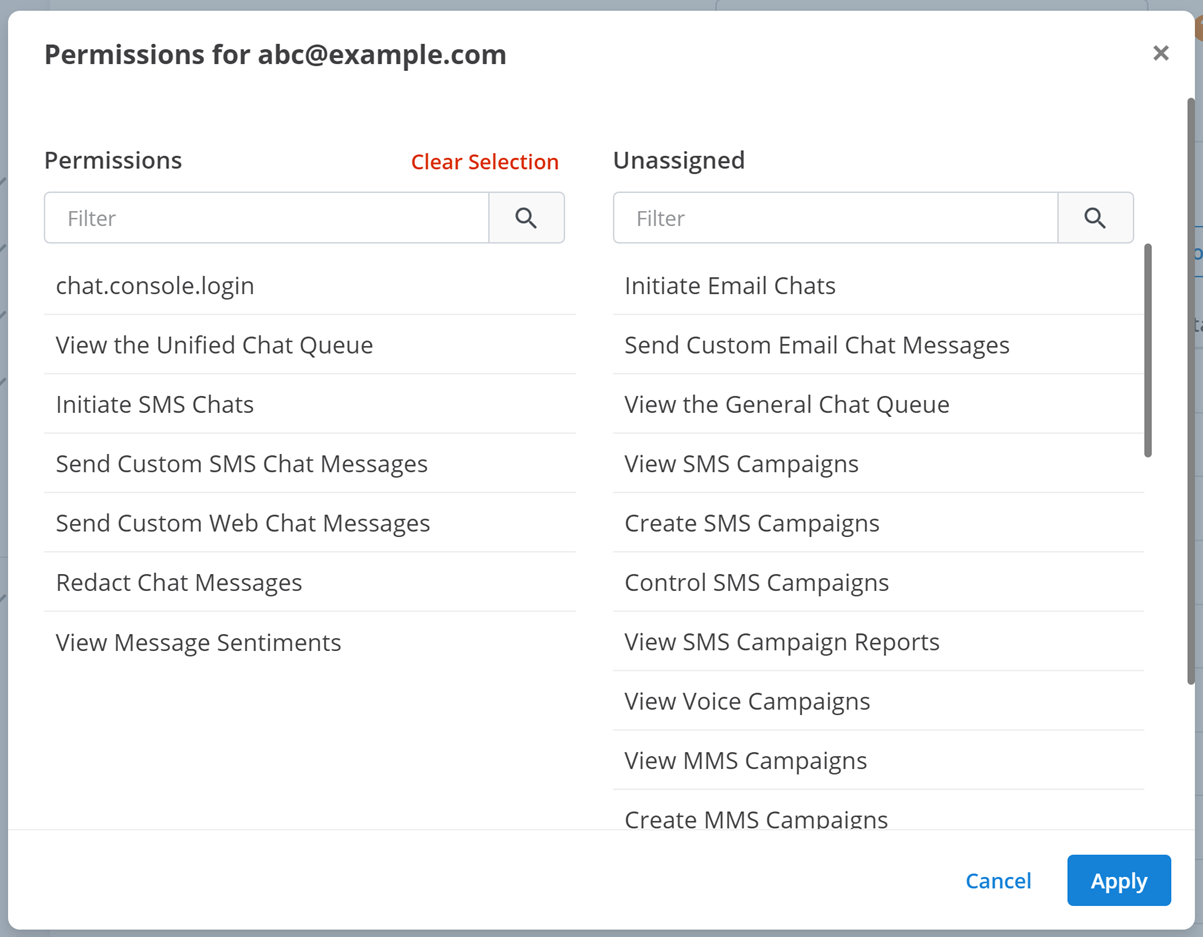
Each permission is described by its title. For example, the Initiate SMS Chats permission allows a member to start a new chat with a customer via SMS. Permissions under Permissions are active for the member. Permissions under Unassigned are inactive for the member. To switch permissions between categories, click on them. For example, to add a permission to Permissions, click on it in Unassigned. To remove a permission from Permissions, click on it in Permissions. You can also search permissions by their name by using the Filter text box.
Actions
There are three actions you can perform on the Member List. To access these, click on the Actions ˅ button outlined below.
This will give you three options:
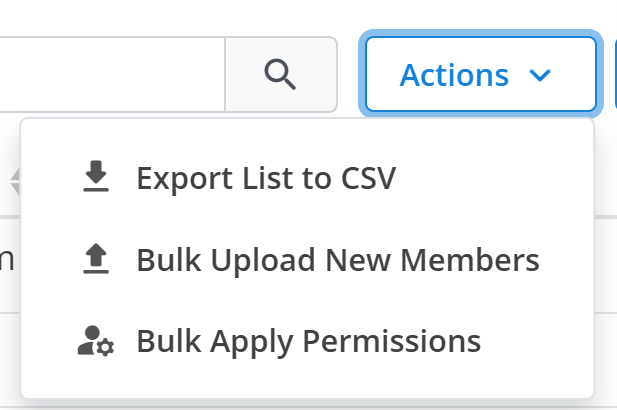
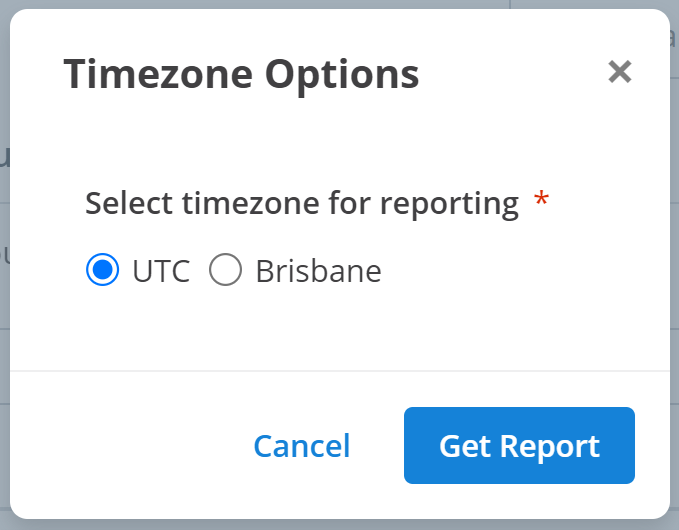
Export List to CSV
This will transfer all of the information listed here about each member into a CSV document. This CSV document will then be downloaded onto your device. When you click this option, a small menu will appear like the one below. Select the timezone you want the CSV file to use for dates and times, and then click Get Report to download the file.
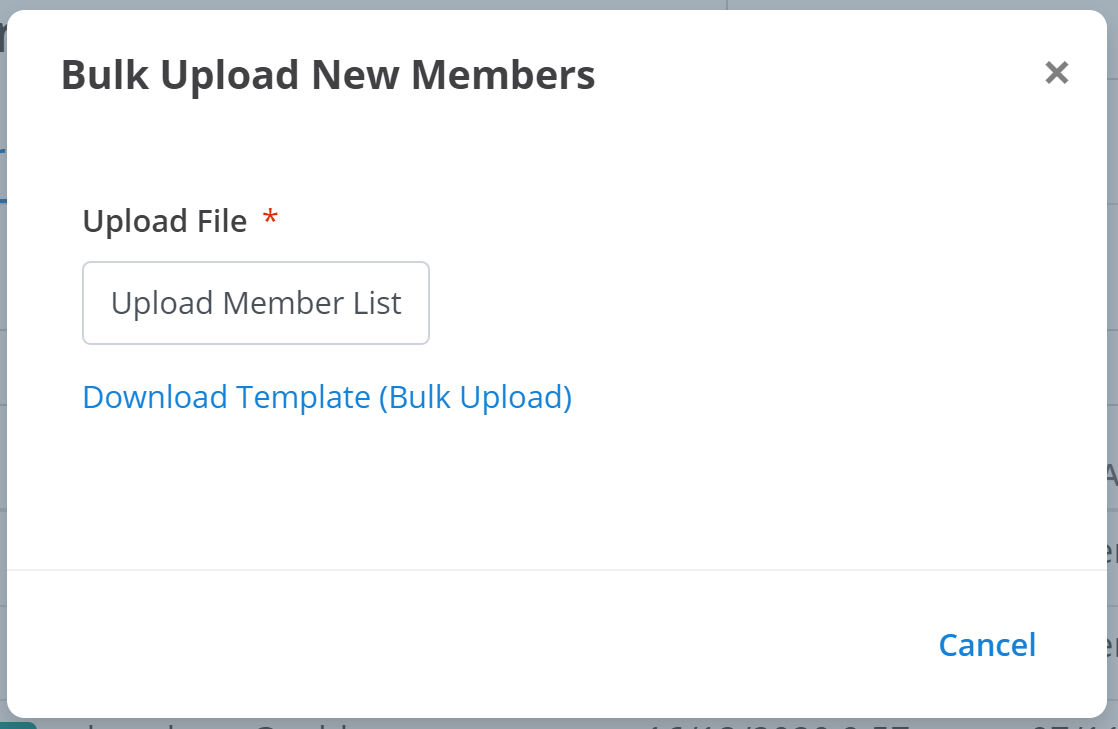
Bulk Upload New Members
You can add several members to the workspace at once. When you click this option, a small menu will appear like the one below. Click on Upload Member List and select your CSV file with all the members you would like to add to the workspace. This document must be formatted correctly and will be explained shortly. Alternatively, click Download Template (Bulk Upload) for an example of correct formatting.
Formatting Member List File
To be accurately read by the program, your member list must be formatted exactly as below. Replace the information in each column with the information of the new members you wish to add. You can also add more members to the file by adding a new row of information.

Each column specifies a different property of each new member:
- email: the email address of the new member.
- role: the role of the new member.
- name: the display name of the new member within the workspace.
- phone: the phone number of the new member.
- title: the display title of the new member within the workspace.
Bulk Upload Configurations
Once you have uploaded your member list file and it is appropriately formatted, there are some final options you have to specify before completing the bulk upload. After uploading the file, the following options will appear:
Enabling each option executes the bulk upload differently:
- Create New Accounts: if an email is not registered with a member (the member does not currently exist), a new member account will be created.
- Set Member Profiles: if an email is not registered with a member, it will be skipped in the bulk upload.
- Both Enabled: if an email is registered with a member (the member already exists), their current member account will be overwritten/updated with the new information.
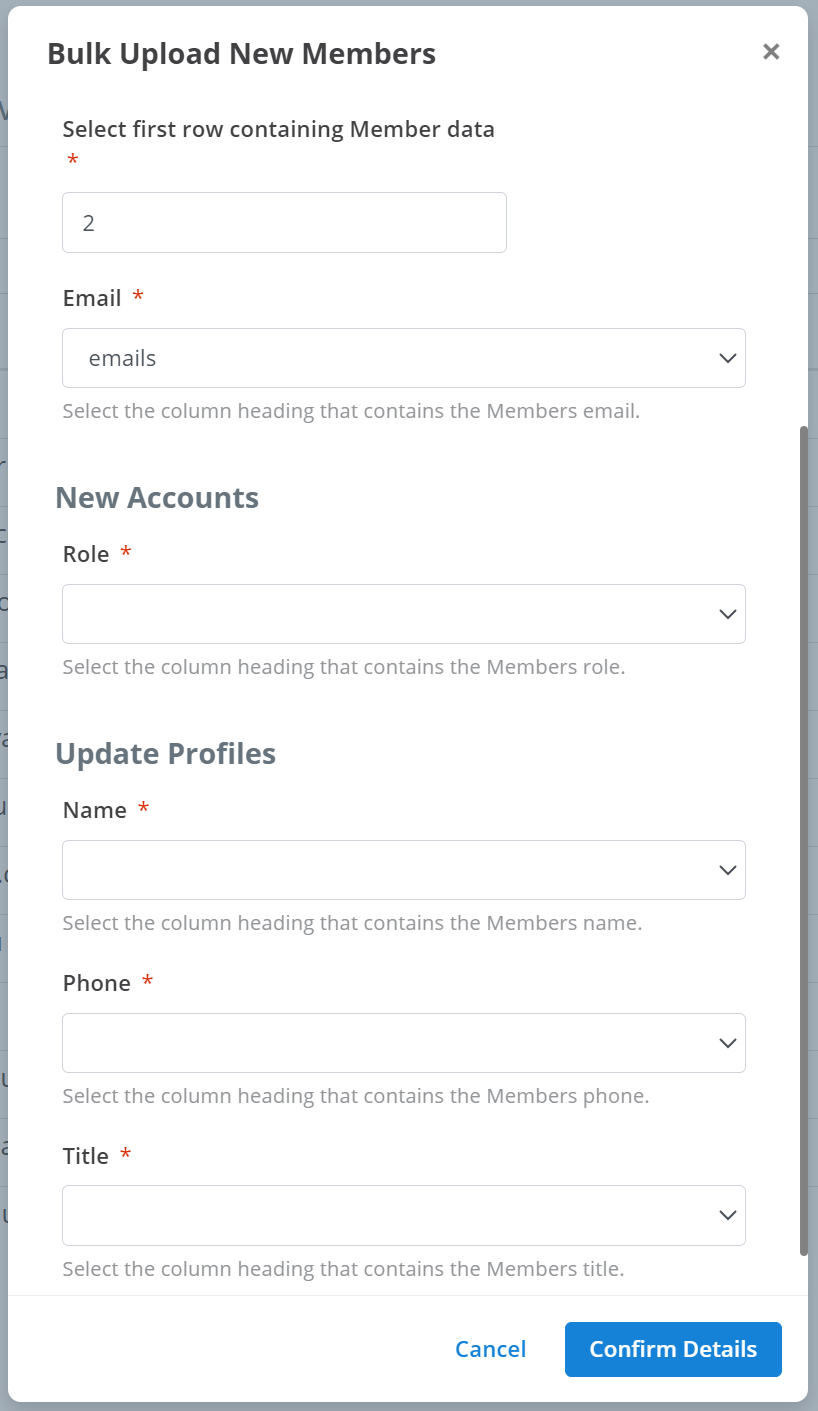
Next, you need to tell the program how to read your file. You need to outline where certain data is located. Depending on what settings you enabled in the previous step, different settings and configurations will appear here. Below is a screenshot of all possible settings and configurations for the bulk upload. The previously screenshotted CSV file will be referenced as an example for this explanation.
Each setting needs different information about your file:
- Select first row containing Member data: the first row in your file where you find information about a member. The example CSV file has column titles in row 1. Row 2 is the first row to contain information about a member. Thus, '2' would be appropriate here.
- Email: the title of the column in your file that contains the members' email addresses. The example CSV file stored member emails under the column titled 'email'. Thus, 'email' would be an appropriate option in this drop-down.
- Role: the title of the column in your file that contains the members' roles. The example CSV file stored member roles under the column titled 'role'. Thus, 'role' would be an appropriate option in this drop-down.
- Name: the title of the column in your file that contains the members' names. The example CSV file stored member names under the column titled 'name'. Thus, 'name' would be an appropriate option in this drop-down.
- Phone: the title of the column in your file that contains the members' phone numbers. The example CSV file stored member phone numbers under the column titled 'phone'. Thus, 'phone' would be an appropriate option in this drop-down.
- Title: the title of the column in your file that contains the members' titles. The example CSV file stored member titles under the column titled 'title'. Thus, 'title' would be an appropriate option in this drop-down.
Finally, to upload all the new members to your workspace, click Confirm Details.
Bulk Apply Permissions
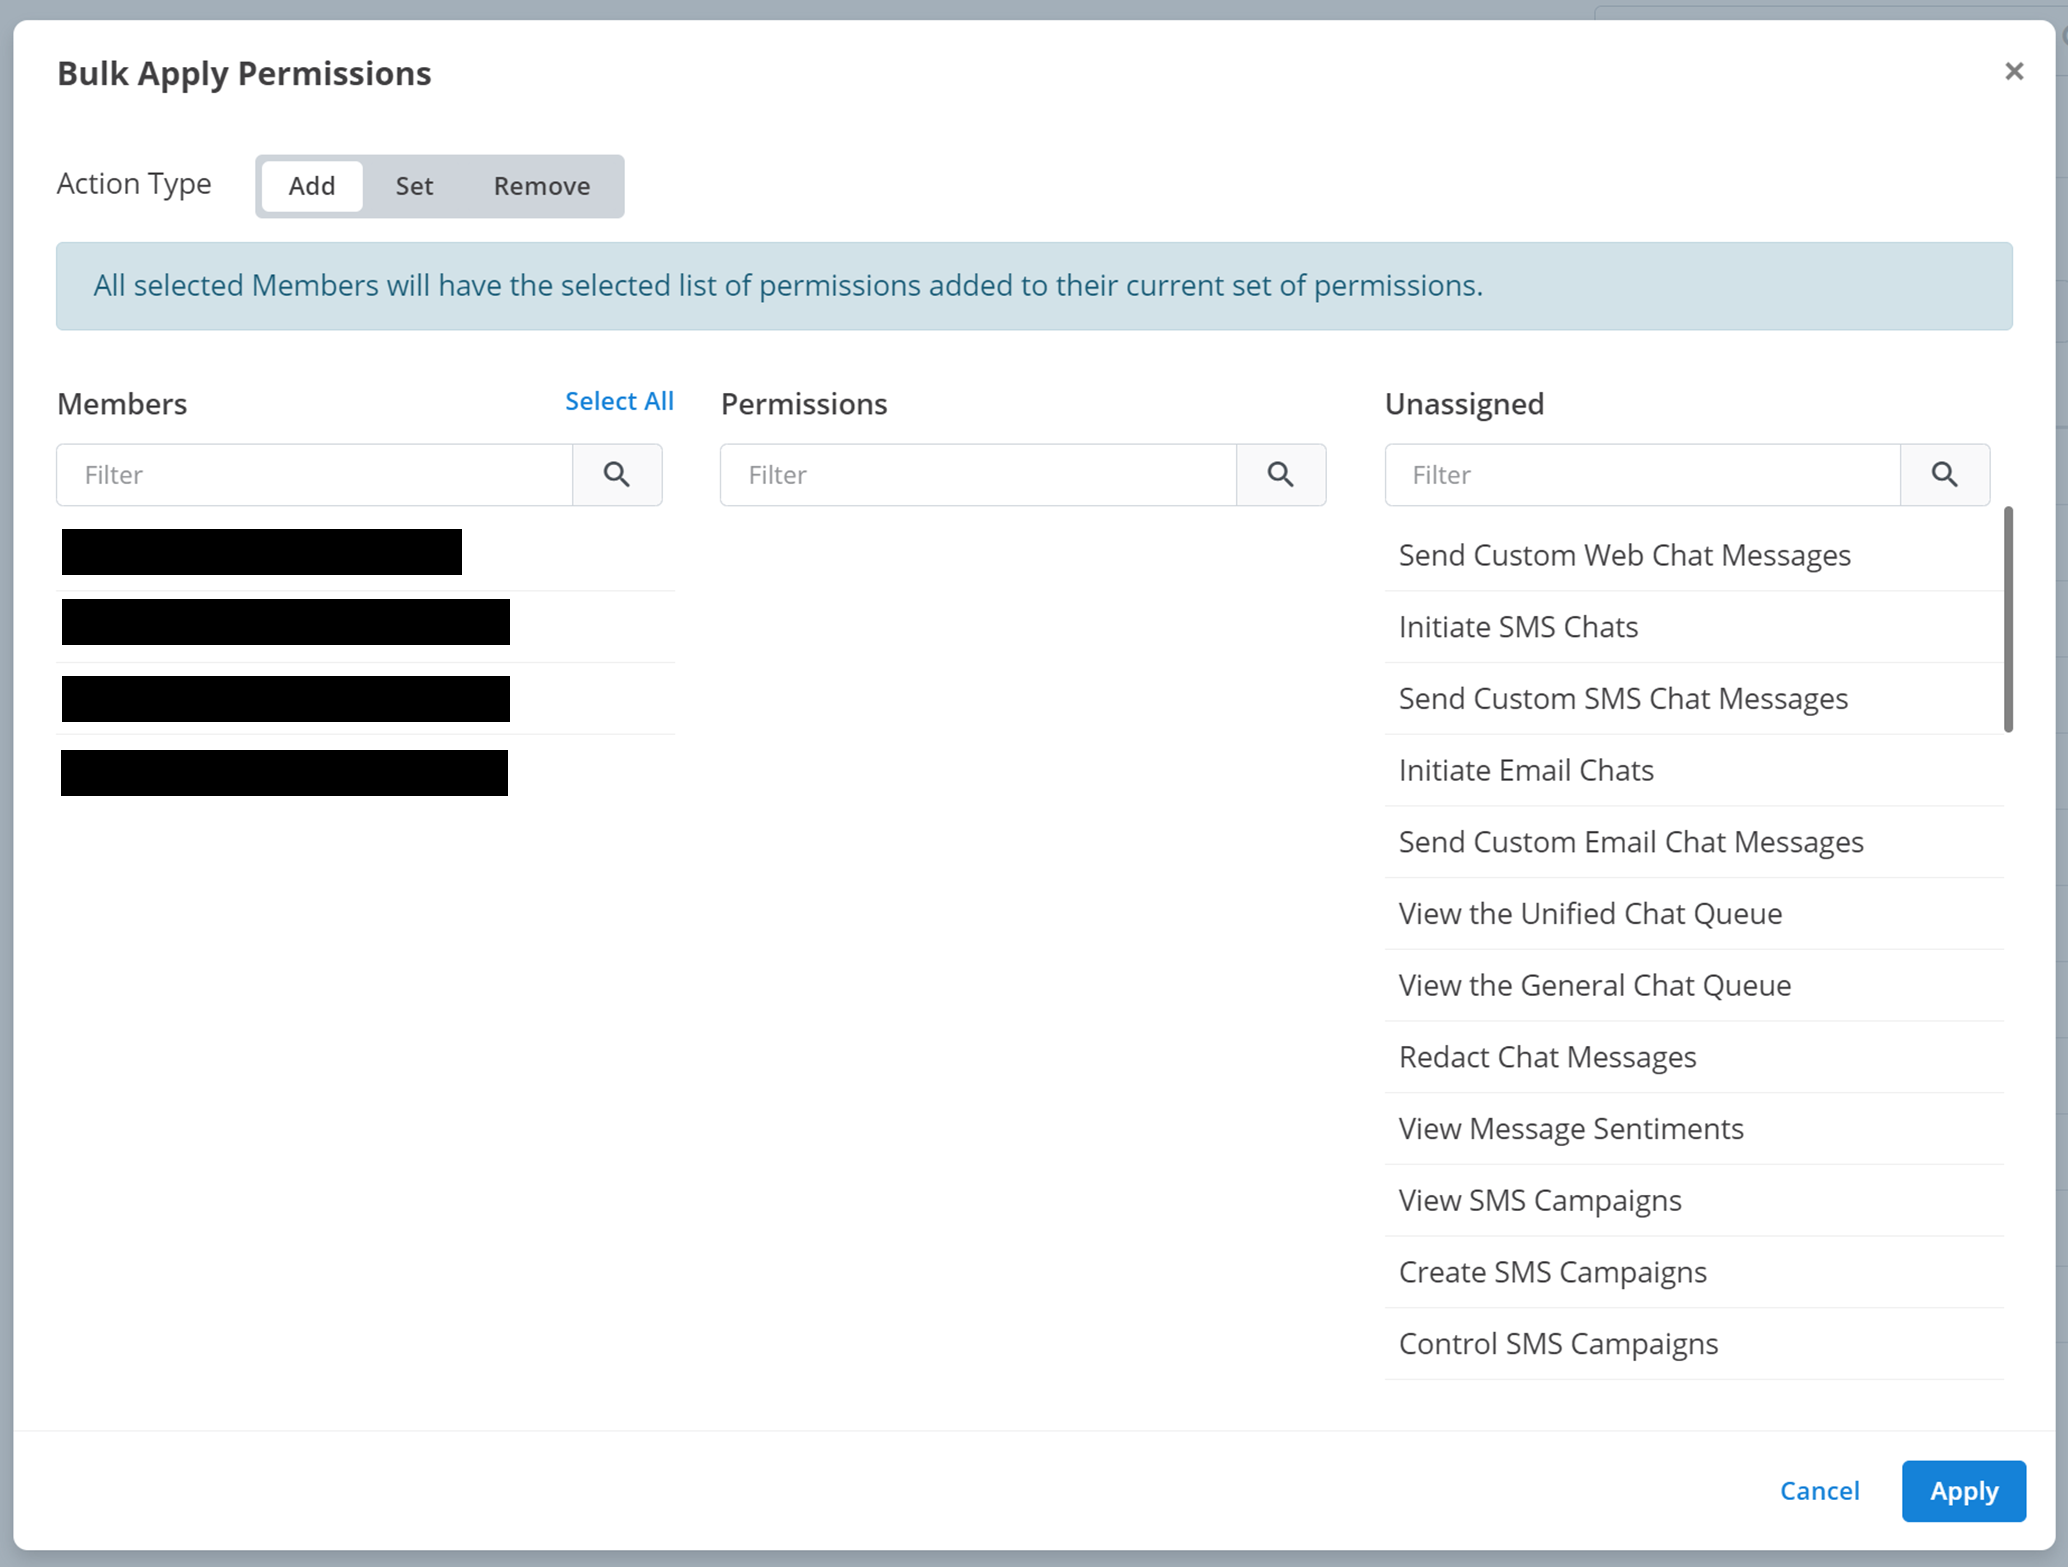
You can modify the permissions of multiple members in the workspace at once. When you click on this option, a small menu will appear like the one below.
To modify the permissions of several members at once:
Select Action Type
Select how you want to modify the permissions with the Action Type:
- Add: will add the selected permissions.
- Set: will remove any permissions that are not selected, and add any permissions that are selected.
- Remove: will remove the selected permissions.
Select Members
Select the members you want to modify the permission of. Click on a member underneath Members to select them. This will make the name appear blue. Click on the member again to unselect them.
Select Permissions
Select the permissions you want to add/set/remove. Permissions are the permissions selected for modification (add/set/remove). The rest of the permissions appear under Unassigned. Click on a permission in Unassigned to add it to the Permissions. Click on a permission in Permissions to unselect it and remove it from Permissions.
Apply Changes
Click Apply.

Tip
If you are struggling to find a member or permission here, you can search them by name using the Filter text box above each section.
Email2SMS
Email2SMS allows members to send an SMS via an email.
Setup
An extended menu will appear for configuring Email2SMS:
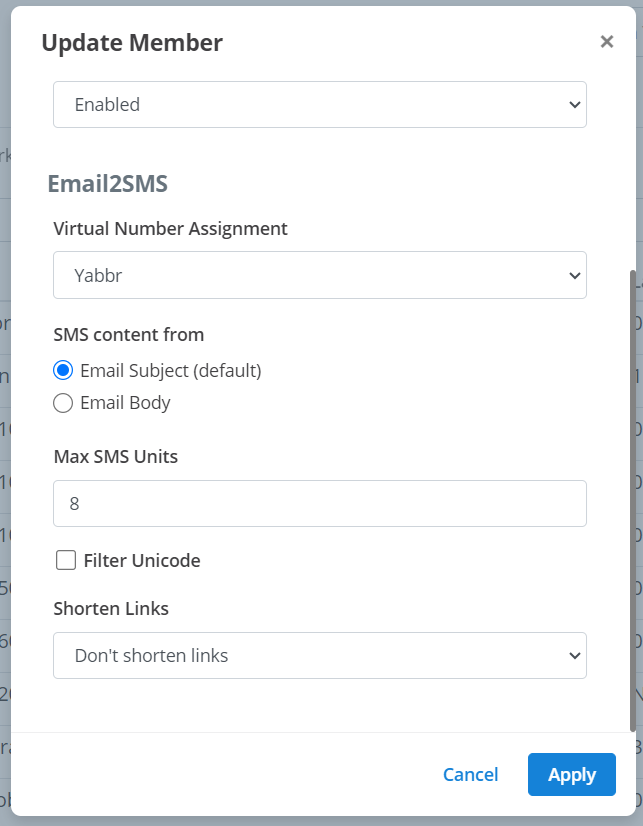
To configure Email2SMS for a member:
Assign Virtual Number
Select the virtual number within Message2Give that will be used to send your SMS. This is the Virtual Number Assignment.
Select Content Source
Select whether the content of your SMS will be generated from the email’s Subject or Body. This is the SMS Content from. By default, it is the subject.
Set Max SMS Units
Select the maximum SMS unit count that will be translated into SMS from the email. This allows you to cap the length of your messages. This is the Max SMS Units. By default, this is 10. For an explanation of SMS Units, navigate here.
Apply Changes
Click Apply. This Member is now configured for Email2SMS.
Using Email2SMS
Each member has a registered email. If a member is registered for Email2SMS, they can send an SMS using this email address by following these steps:
Compose Email
Address an email to the Australia mobile number they want to send the SMS to using this format: {{number}}@sms.app.message2give.com.
For example 0412345678@sms.app.message2give.com
Enter Message
Enter the desired message to be sent into the email's subject or body depending on how you configured it.
Send
Send the email. The SMS will be sent via Message2Give through the Virtual Number you have set-up with the Member.
How is this guide?