SMS/MMS Campaigns
The General Campaign Guide provides comprehensive information about creating and managing campaigns. This page focuses specifically on SMS/MMS campaigns and their unique features.
For detailed information about SMS and MMS message formatting, character limits, and content creation, refer to the SMS Message Types and MMS Message Types documentation.
Setup
Create
When creating an SMS campaign, you must select from one of three campaign types: Branded Broadcast, Interactive Broadcast, and Poll. Click the relevant option below and create the campaign as normal.
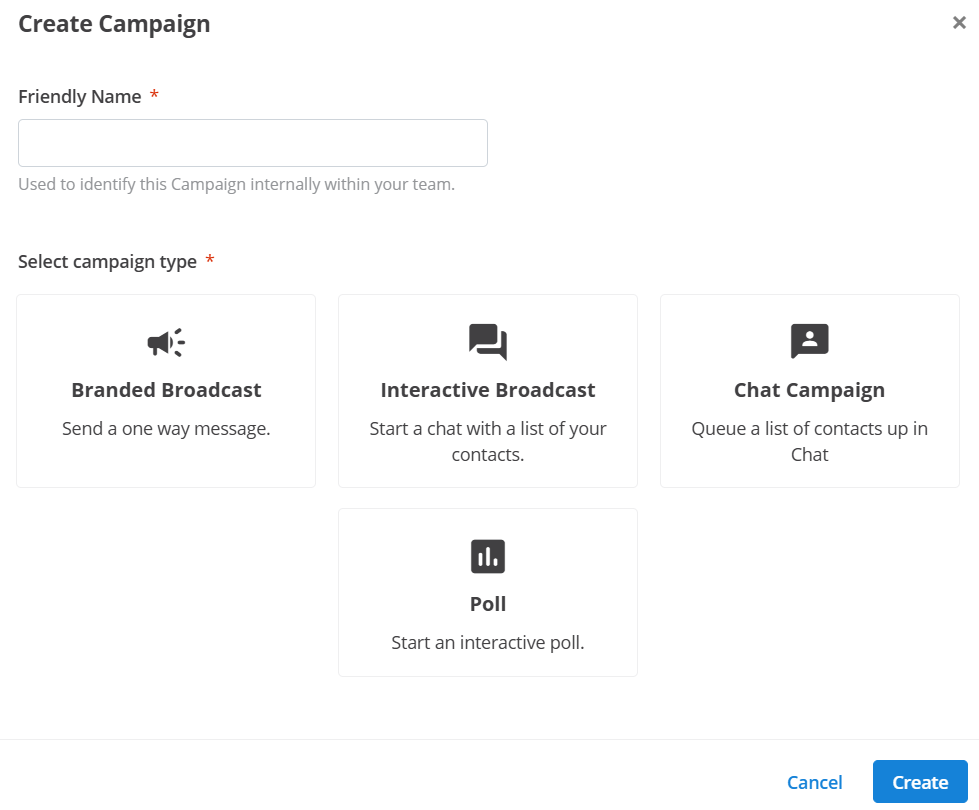
- Broadcast: One-way outbound message sent using a registered alpha code or sender ID. Automatically disables inbound capabilities.
- Interactive Broadcast: Message sent using a virtual number. Enables two-way communication so other systems like Message2Give Chat can interact with responses.
- Poll: Connects the Campaign to a Survey, allowing you to draft your outbound campaign message, and connect it directly to a survey to manage automated follow-on questions.
Message
For comprehensive SMS message creation guidelines, including character limits, unit calculations, and Unicode character handling, refer to the SMS Message Types documentation.
For MMS campaigns requiring rich media content, subject lines, and file attachments, see the MMS Message Types documentation.
Management
Actions
Preview Campaign
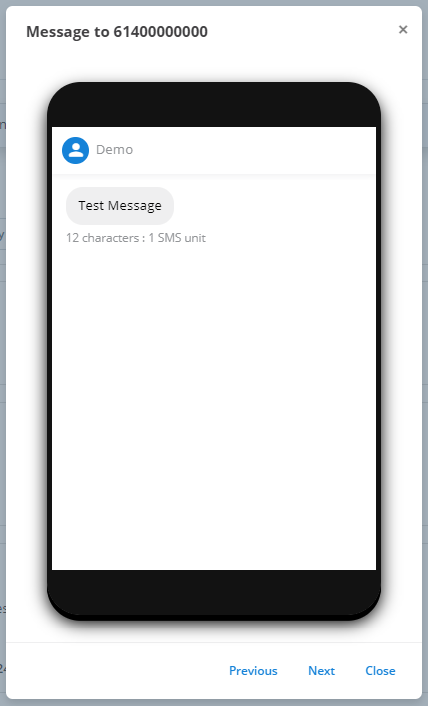
The following example demonstrates the SMS campaign preview interface. The contact number 61400000000 is displayed at the top. The sender ID (Demo) appears at the top of the phone display, followed by the message content. Any placeholders in the message are replaced with relevant information from the contacts file. You can preview every contact using the Previous and Next buttons.
Test Campaign
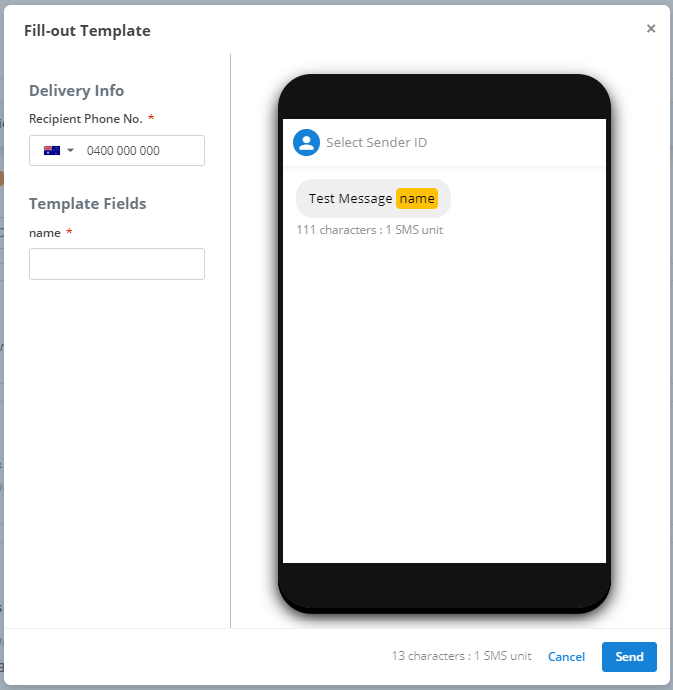
Below is an example of the Test Campaign menu for SMS Campaigns. As explained in the general Test Campaign documentation, enter the mobile number that you would like to receive the test in the Recipient Phone No. text box as well as the region of the phone number in the drop-down menu on the left. Then, you must fill in any placeholders you have included. They will be listed on the left under Template Fields, and highlighted in yellow on the preview on the right. Finally, click Send to send the test campaign.
Contact Import
If a campaign-recipient responds to your SMS Campaign, the chat and its details will be imported into Message2Give Chat. There, you can start and continue an interaction with a campaign-recipient. The contact import helps this process.
Contact Import is all the information about the campaign-recipient that will be imported into Message2Give Chat if they respond. As mentioned in General, your contacts file may contain information about each contact such as their name. This information is also stored under column headings in the contacts file.
Under each drop-down in the Contact Import, you can optionally select one of these column headings. Then, if a campaign-recipient responds, the information stored about them in the contacts file under the selected column header will be imported into Message2Give Chat under the title you selected.
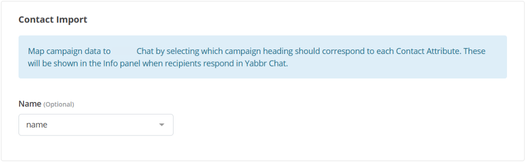
In the example below, the contacts file has two columns: name and phone. phone stores the phone number of the contact, and name stores their corresponding full name. The Name attribute has been connected to the name column heading, and Phone has connected to phone.
If a campaign-recipient responds, their information will be imported into Message2Give Chat. It will list their Phone as the information stored under phone in the contacts file, and will list their Name as the information stored under name in the contacts file.
Keyword Replies
If a user responds to the campaign with an SMS, you can use this section to detect certain words in their reply and then trigger different responses automatically and accordingly. These words are called keywords. To add a new one of these, click on the + Add Keyword button outlined below.

Clicking on this will bring up a menu like the one below:
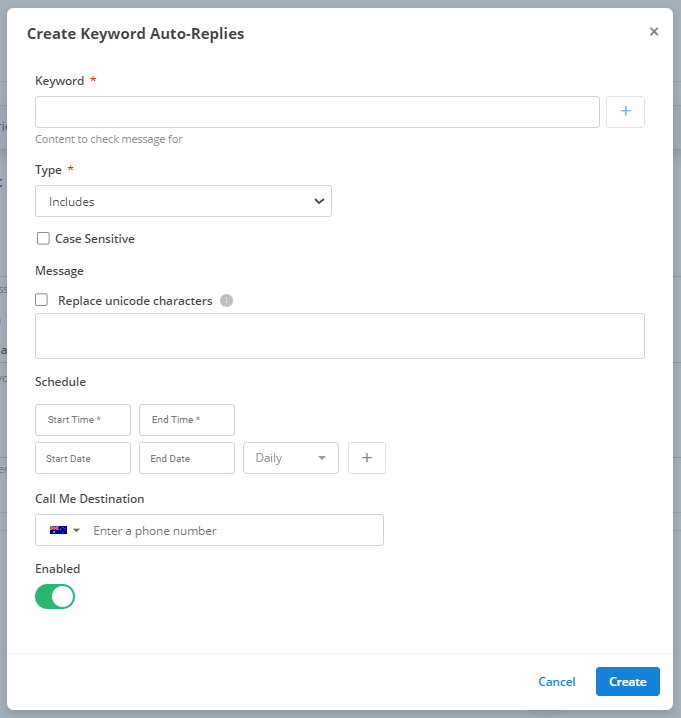
Keyword
In this text box, type a word or a phrase to detect in the campaign-recipient's reply. Then, to add and register this keyword(s) in the program, click the + button outlined below.

Tip
You can add multiple keywords to the same keyword reply. You can keep adding more keywords with the + button, or delete some with the X button on the right of the keyword.
Type
Campaign-recipients may not use the exact keyword in their reply. In the above example, someone might reply with "Ok! Sounds good - keyword phrase" or "Keyword Phrase". Depending on the settings chosen here, the program can still detect them.
By default, a keyword is case insensitive. This means that it will still detect the keyword regardless of letter capitalisation. This means "keyword phrase", "Keyword Phrase", and "kEyWoRd PhRaSE" would all be detected by default in the above example. You can disable this option and make the keyword case sensitive by selecting the checkbox outlined below.

The drop-down menu is used to customise how the keyword needs to appear in the reply to be detected. For example, the keyword may have to be the only thing in the reply, or maybe it must appear at the end of the reply. Below is all the options you can select, and what each of them specify.
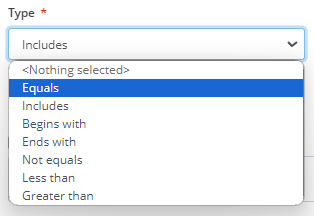
- Equals: the reply only includes the keyword.
- Includes: the keyword appears somewhere in the reply
- Begins with: the keyword appears at the start of the reply.
- Ends with: the keyword appears at the end of the reply.
- Not equal: the keyword does not appear somewhere in the reply.
- Less than: the value of the reply is less than the value of the keyword.
- Greater than: the value of the reply is greater than the value of the keyword.
Message
If the program detects the keyword reply, this is the SMS that will be sent to them. Enter the desired message in the text box under Message. For guidance on SMS message formatting and character limits, refer to the SMS Message Types documentation.
Schedule
The keyword reply will only be detected within this schedule. See Schedule for how the schedule works. The schedule is also optional. No schedule specified means the keyword reply will always work.
Call Me
When a keyword reply is detected, you can choose to link the campaign-recipient to a call with one of your employees or agents using the Call Me functionality. When one of the keyword replies is detected, the program will call the Call Me Destination that you enter into the text box below that title. If the recipient of this call - usually an employee or agent - presses 1, they will be redirected to a call with the campaign-recipient.
This field is completely optional, but if you choose to fill it, a menu will appear to customise the Call Me similar to the one pictured below.
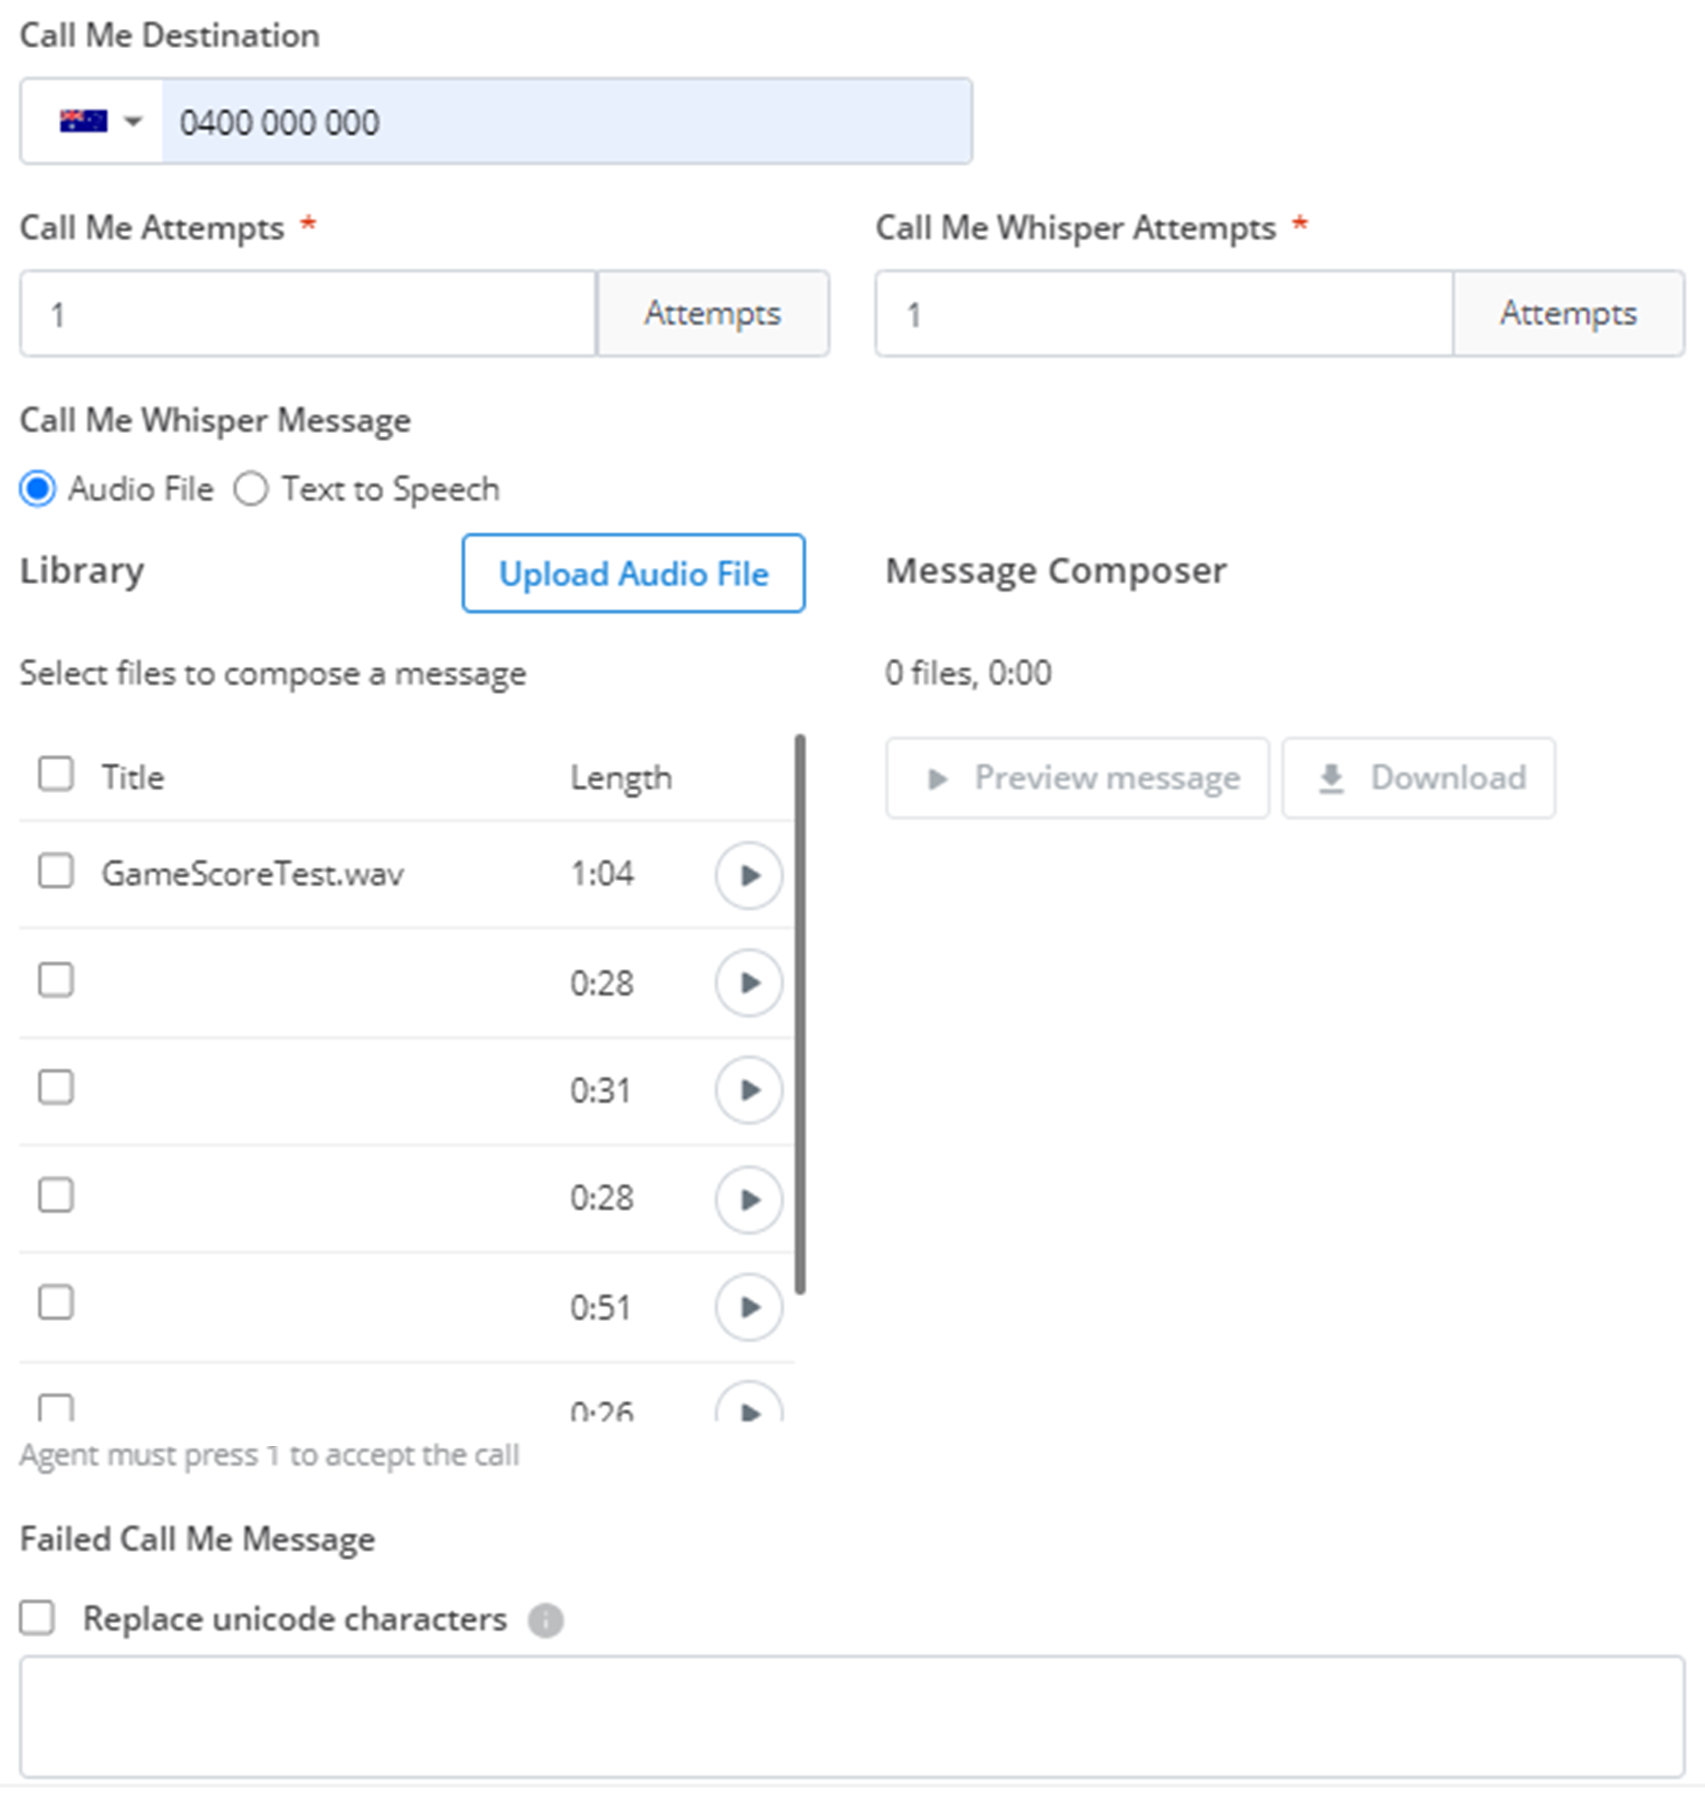
Call Me Attempts
The first step in connecting with an agent is getting them to accept the incoming call triggered by the campaign-recipient. The number you enter in this text box determines how many times the program will try and call the Call Me Destination for a response before giving up.
Call Me Whisper Attempts
The next step in connecting an agent with the campaign-recipient is getting them to accept the redirection. If the Call Me Destination accepts the incoming call from the program, the program will play a short message (customised below) providing some context to the agent. This is known as a Call Me Whisper. If the agent presses 1 on their call, it will successfully redirect the agent and connect them to a call with the campaign-recipient. The number you enter in the Call Me Whisper Attempts text box determines how many times the program will try to get the agent to accept the redirection.
Call Me Audio Message
This is the message that is played to the Call Me Destination when they accept the incoming call. Usually it provides context about some information surrounding the campaign-recipient. The creation of this audio message is identical to the process outlined in Message.
Failed Call Me Message
This is the SMS that is sent to the campaign-recipient if the program is unsuccessful in connecting them with the Call Me Destination. Enter the desired message in the text box under Failed Call Me Message. For SMS formatting guidelines, see the SMS Message Types documentation.
Enabled
Toggling this switch will enable/disable the functionality of the keyword reply you have set up. Green = enabled, Grey = disabled.
Finally, to add this keyword reply to your campaign, click Create.
Overview
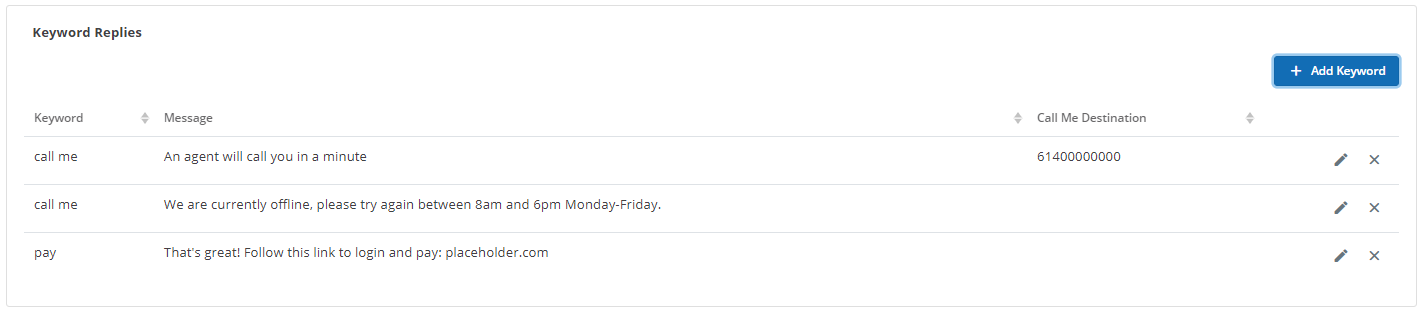
After a keyword is added, it will display an overview of all your keyword replies. This overview will briefly summarise the information about each keyword reply: the keyword(s), the Message, and a Call Me Destination if one was given. To edit a keyword reply, click the 🖉 button. To delete a keyword reply, click the ✕ button.
Keyword Replies Example
Here is an example SMS sent by the campaign:
You have a debt that needs paying. Reply 'PAY' if you'd like to pay it now, or 'CALL ME' if you would like an agent from our team to give you a call
This example requires two keyword replies to be setup - PAY and CALL ME.
'PAY' Keyword:
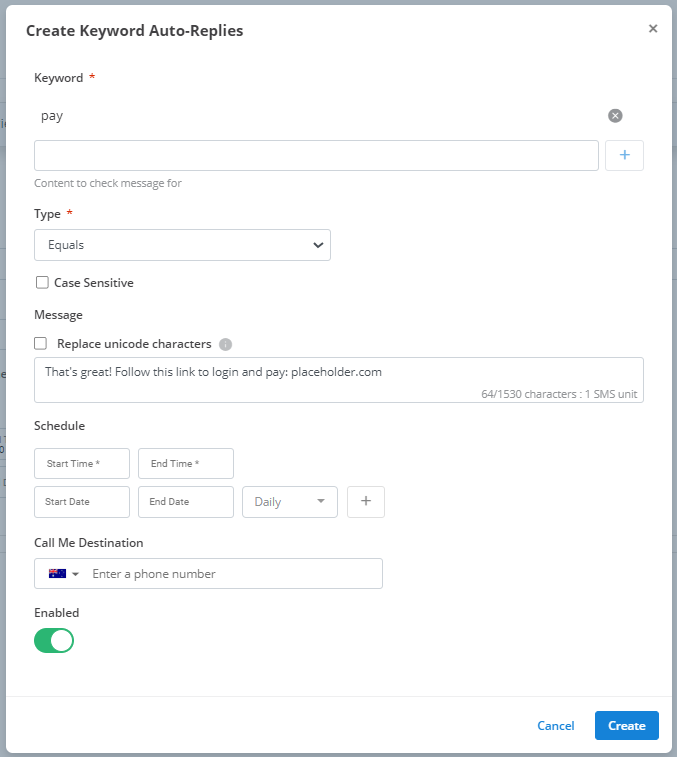
In the above example, the keyword that the program is trying to detect in the campaign-recipient's SMS is pay. The word will only be detected if is the only content in the SMS. If it is detected, the campaign recipient will be sent the message: "That's great! Follow this link to login and pay: placeholder.com". In this example, placeholder.com would direct the campaign-recipient to a login address where they can pay.
'CALL ME' Keyword:
The CALL ME example requires two keyword replies to be setup - one during employee hours, and one outside. Below is for the reply during employee hours.
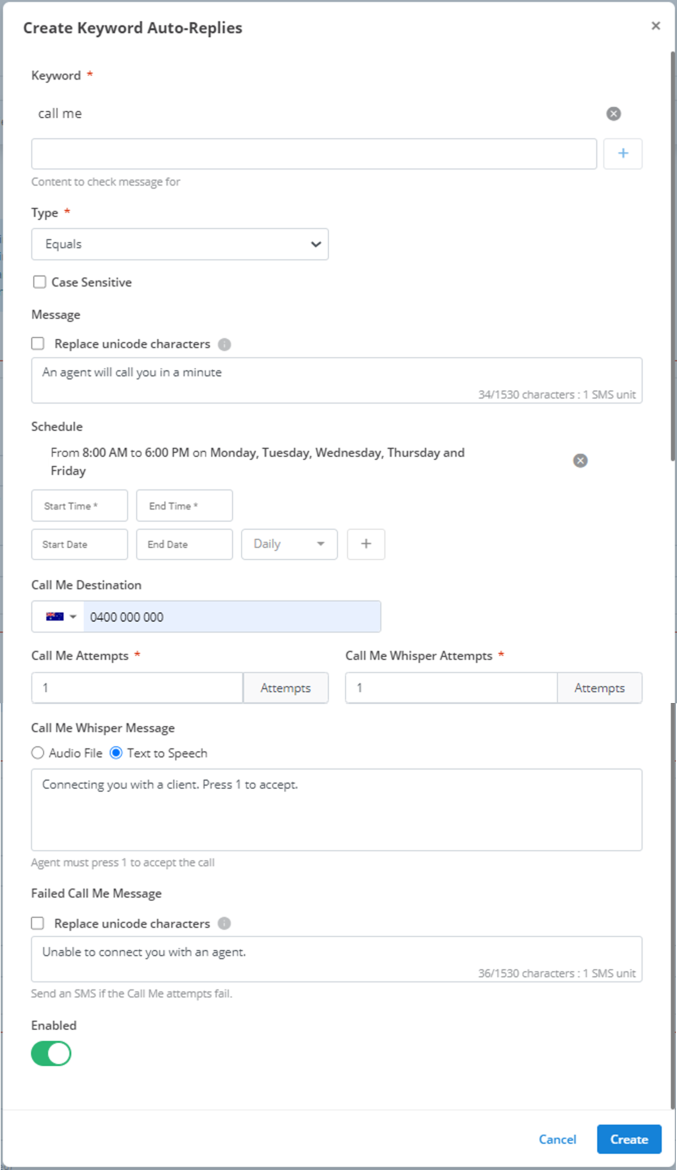
If the program detects an SMS with JUST the words call me - or any other capitalisations of the phrase - it will go to the next step. If the time of the reply falls within the designated schedule - 8am to 6pm on weekdays - then the campaign will send the campaign recipient an SMS saying "An agent will call you in a minute". Then, the program will try and call 0400 000 000 and give up if that one attempt fails. If the number picks up, it will send the text-to-speech audio message "Connecting you with a client. Press 1 to accept.". If the Call Me Destination clicks 1, the program will connect them to a call with the campaign-recipient, otherwise the program will give up. If the program ever gives up after exhausting any of its attempts, it will send an SMS to the campaign recipient notifying them: "Unable to connect you with an agent."
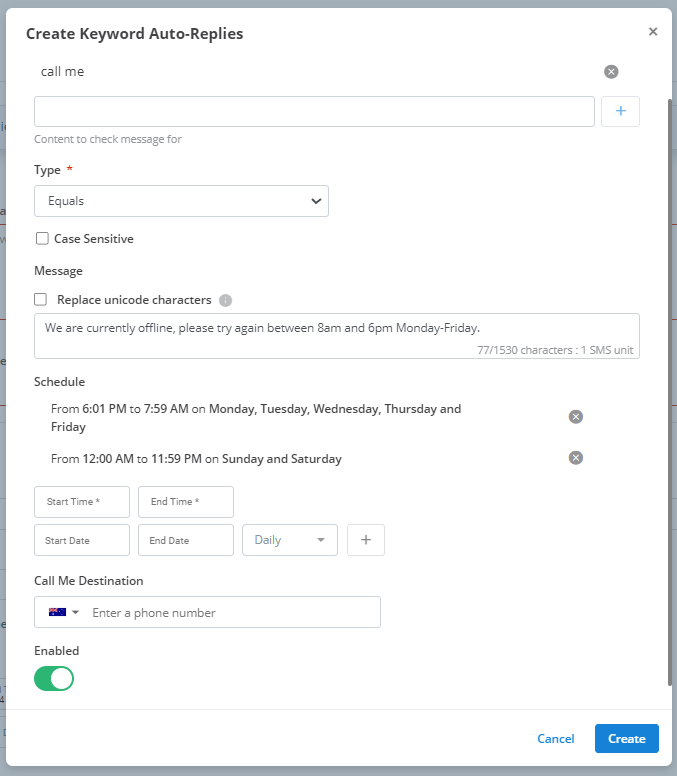
This keyword reply is identical in detection to the previous example. However, this keyword reply is for the case where the campaign-recipient requests a call outside of employee hours. Thus, the schedule here is set for 6:01pm - 7:59am Mon-Fri, and for the whole day on Sat-Sun. If the call me keyword is detected in this time frame, the campaign-recipient will be sent an SMS notifying them that "We are currently offline, please try again between 8am and 6pm Monday-Friday.".
Below is what this entire keyword reply setup would look like:
Duplicate Campaign
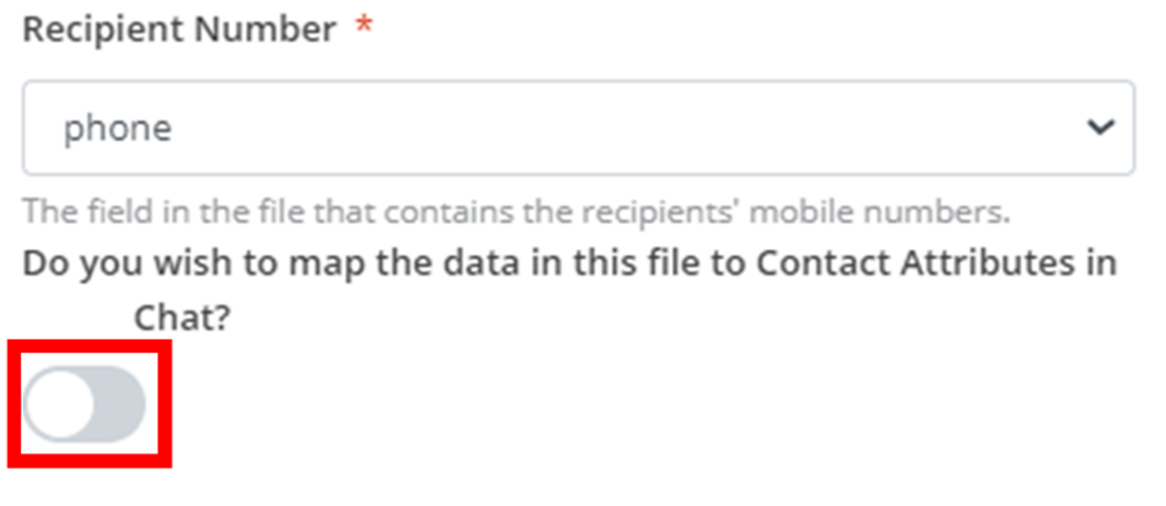
When you duplicate an interactive campaign and select a new contacts file, it will ask if you would like to map the data in the file to Contact Attributes. If you toggle this option (outlined in red) on (green), a new menu will appear. This is identical to the Contact Import menu. See Contact Import documentation for an explanation.
How is this guide?