General
A campaign is a personalized message distributed simultaneously to a specified audience. After reviewing the general documentation, refer to the specific campaign type documentation for additional details.
Setup
Create
Navigate to Campaign Type
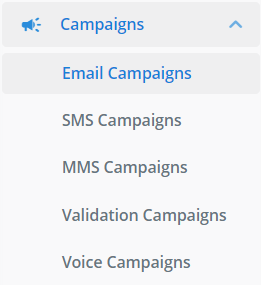
Navigate to the desired campaign type in the sidebar:
Start New Campaign
Once selected, click the blue New Campaign button.

Name Your Campaign
Assign your campaign a Friendly Name which will be the display name visible to all workspace members. Then, click Create to create your campaign.

Some campaign types like SMS and Voice will ask you to select a more specific campaign type. These will be covered in their respective sections.
Audience
Your campaign requires a target audience to deliver the message. This takes the form of a contact list in CSV or XLS format. The file must contain a column with contact information for all intended recipients. The contact information type depends on your campaign type (e.g., email addresses for Email Campaigns and phone numbers for SMS, MMS or Voice Campaigns).
Contact information can be:
- An email address (e.g.,
abc123@example.com) - A mobile number in any format (e.g.,
0400000000,+61400000000)
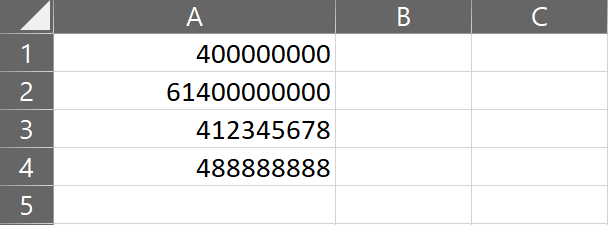
The following example shows a contact file for mobile numbers:
Placeholders
You can include additional contact information such as names or demographic data. The first row must contain column headers, with corresponding data listed for each contact.
Important
All column headers must be in the same row and positioned above the data.
The following example shows a contact file for emails:

Tip
Information placement within the file is flexible; it doesn't need to start in the first row and column. Ensure that related information is aligned vertically and horizontally.
These placeholders can be used to personalize your message for each contact. Include the column header in curly braces within your message (e.g., Hello {{names}}...).
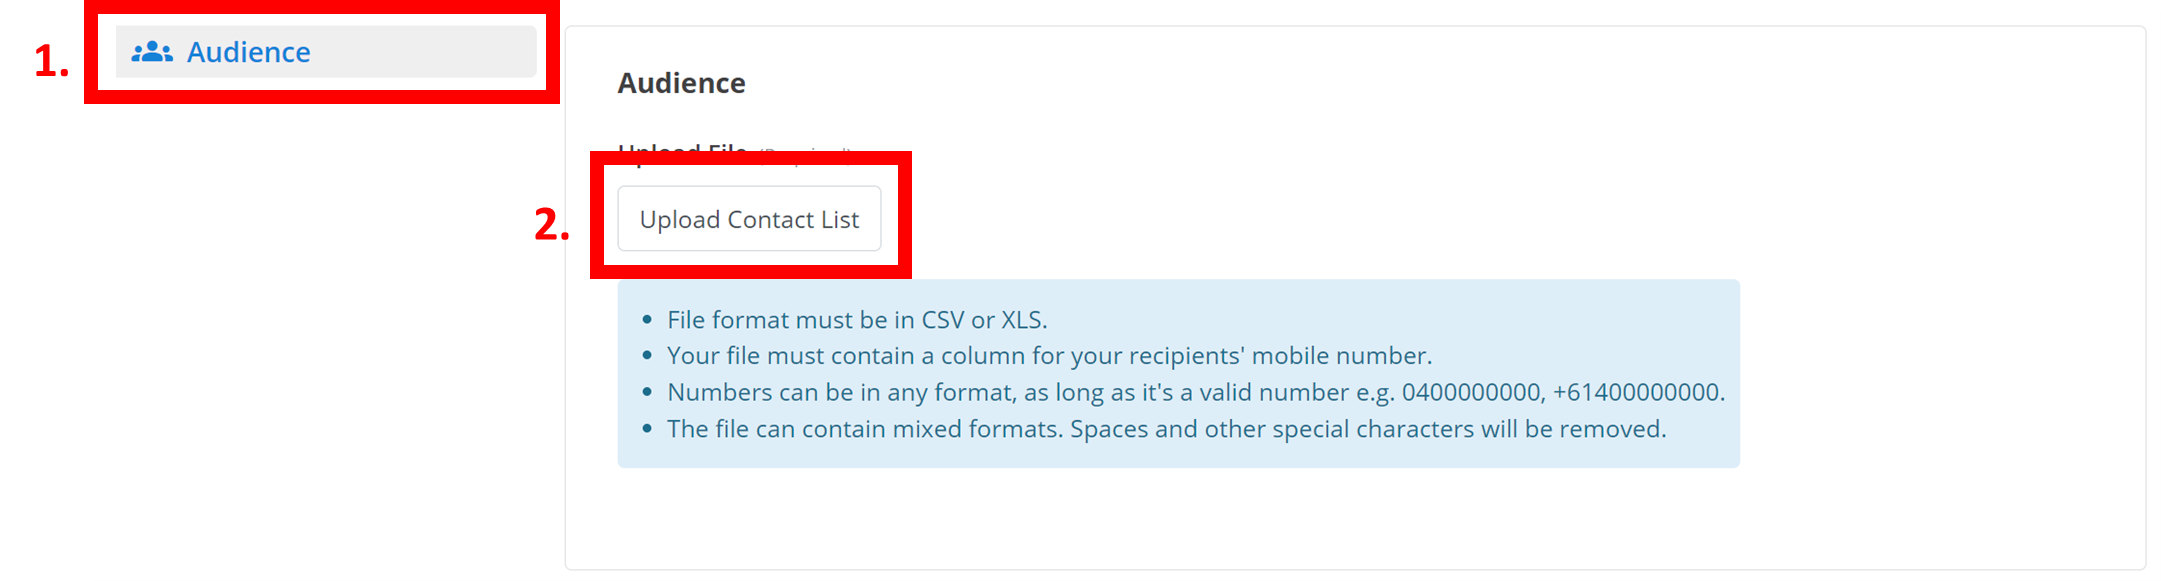
Upload
To upload your contact list, navigate to the Audience section, click Upload List, and select your contact list file.
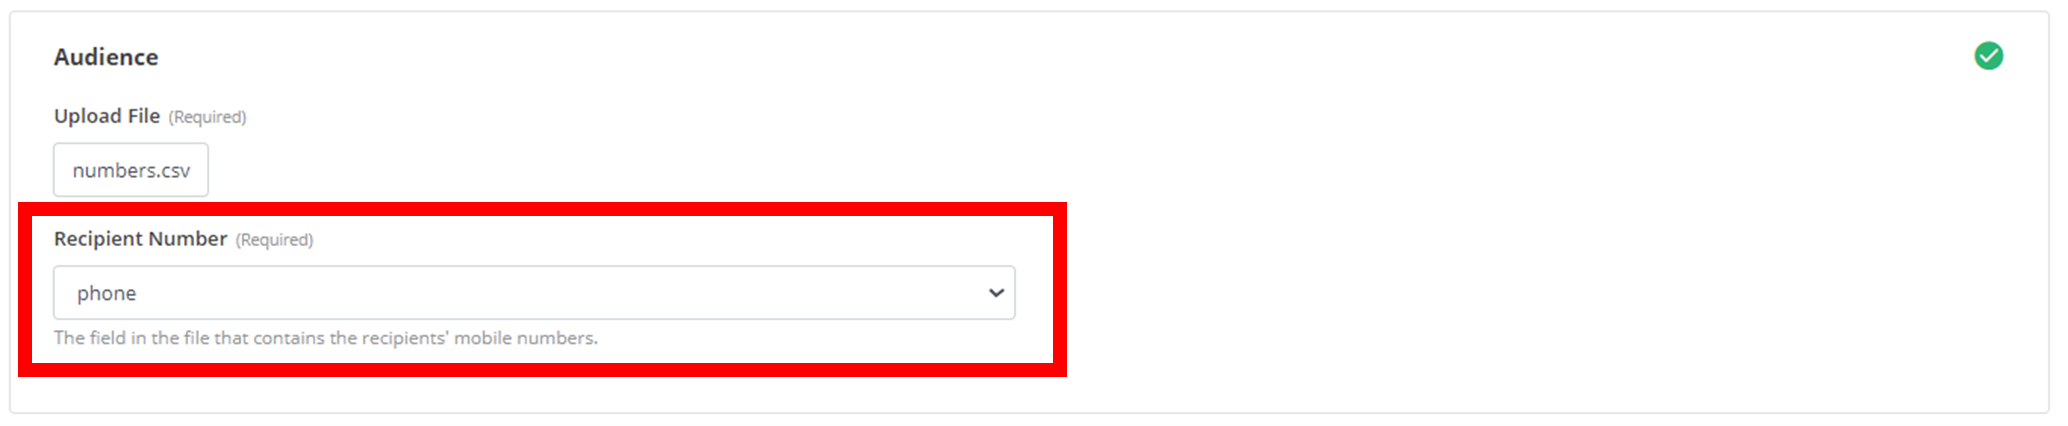
After uploading your contacts file, if it contains multiple columns of information, click on the drop-down menu outlined below. Then, you must select the title of the column in your contacts file that contains the actual contact. In the example below, the phone column contains all the phone numbers.
Opt-Out
Exclusion Lists
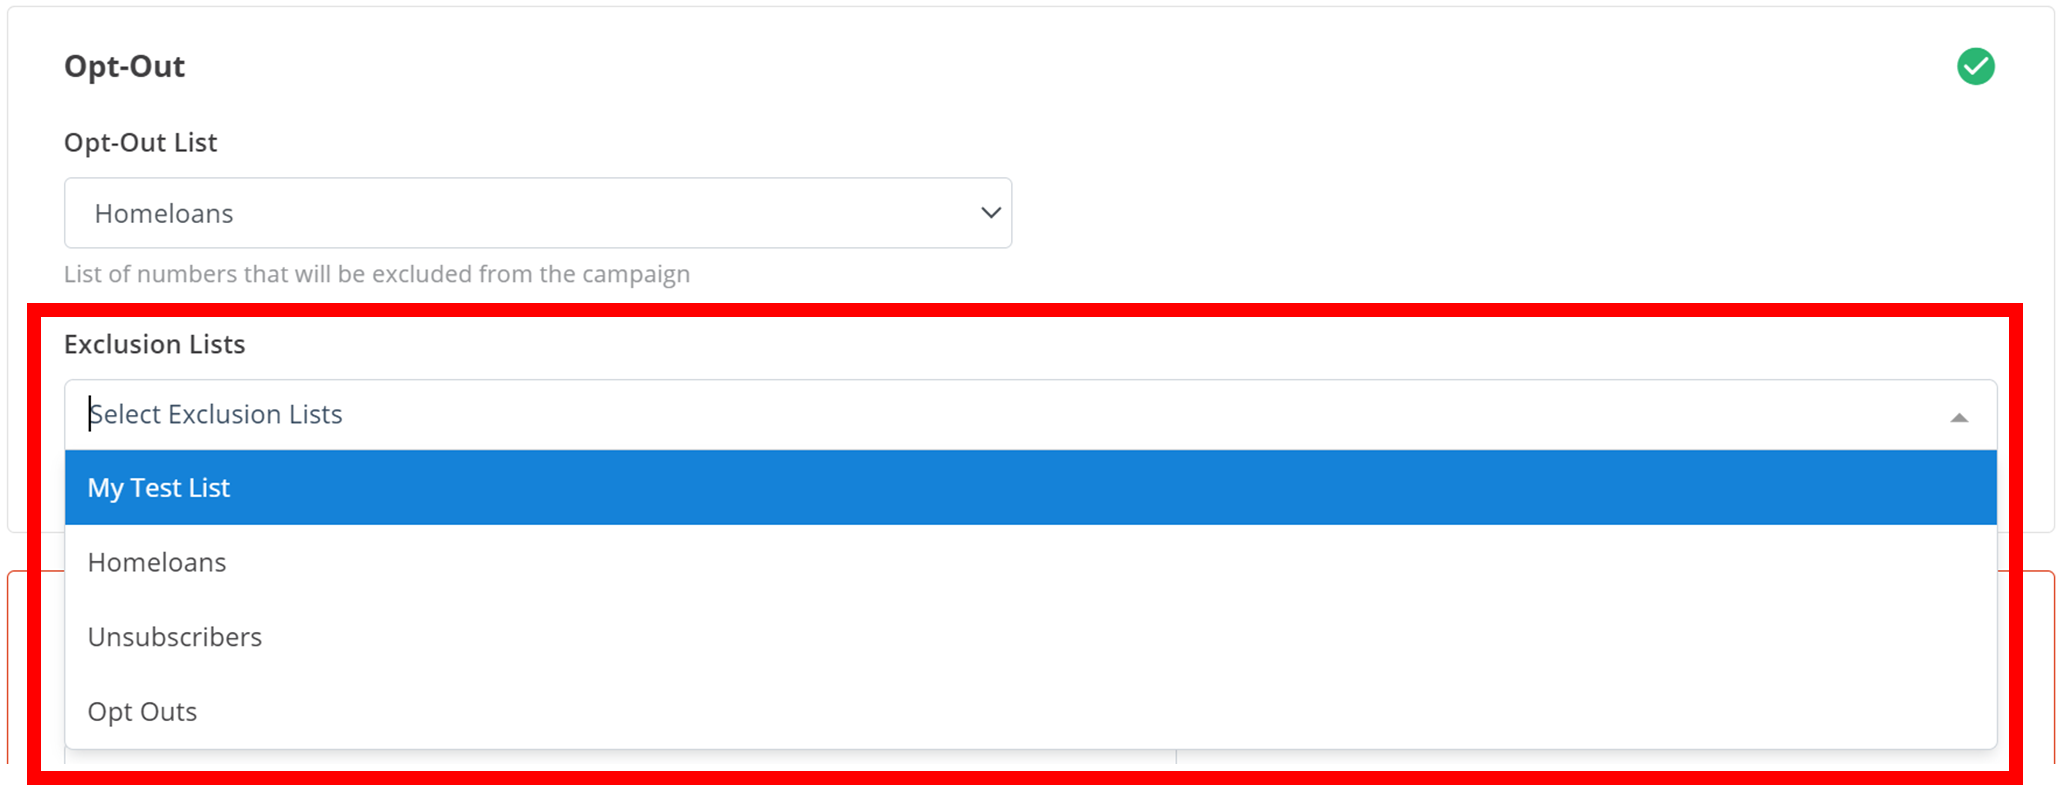
There are two list selections here - your Opt-Out List and your Exclusion Lists. Your Exclusion Lists include all the lists of contacts you do not want to receive the campaign. The documentation for lists and how to create them can be found here.
To add one of your lists to the Exclusion Lists for this campaign, simply click on the drop-down box under Exclusion Lists, and click the desired list as below:
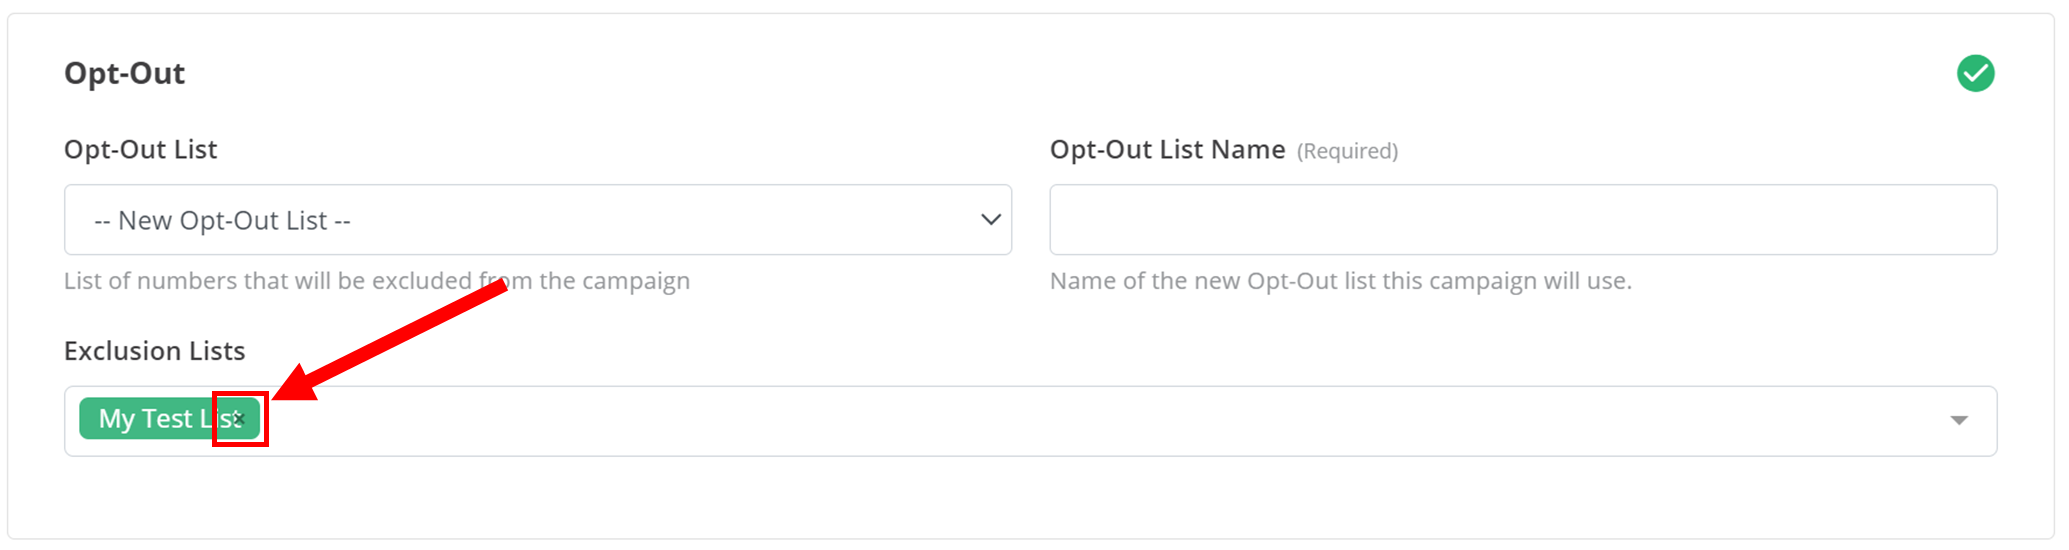
To remove a list from your Exclusion Lists, either click on the X next to its name, or navigate back to the drop-down menu and reselect the list you wish to remove.
Tip
You can add multiple lists to your Exclusion Lists.
Opt-Out List
You may give the recipient of your campaign the option to opt-out. For this functionality, you first have to select a list from the drop-down underneath Opt-Out List.
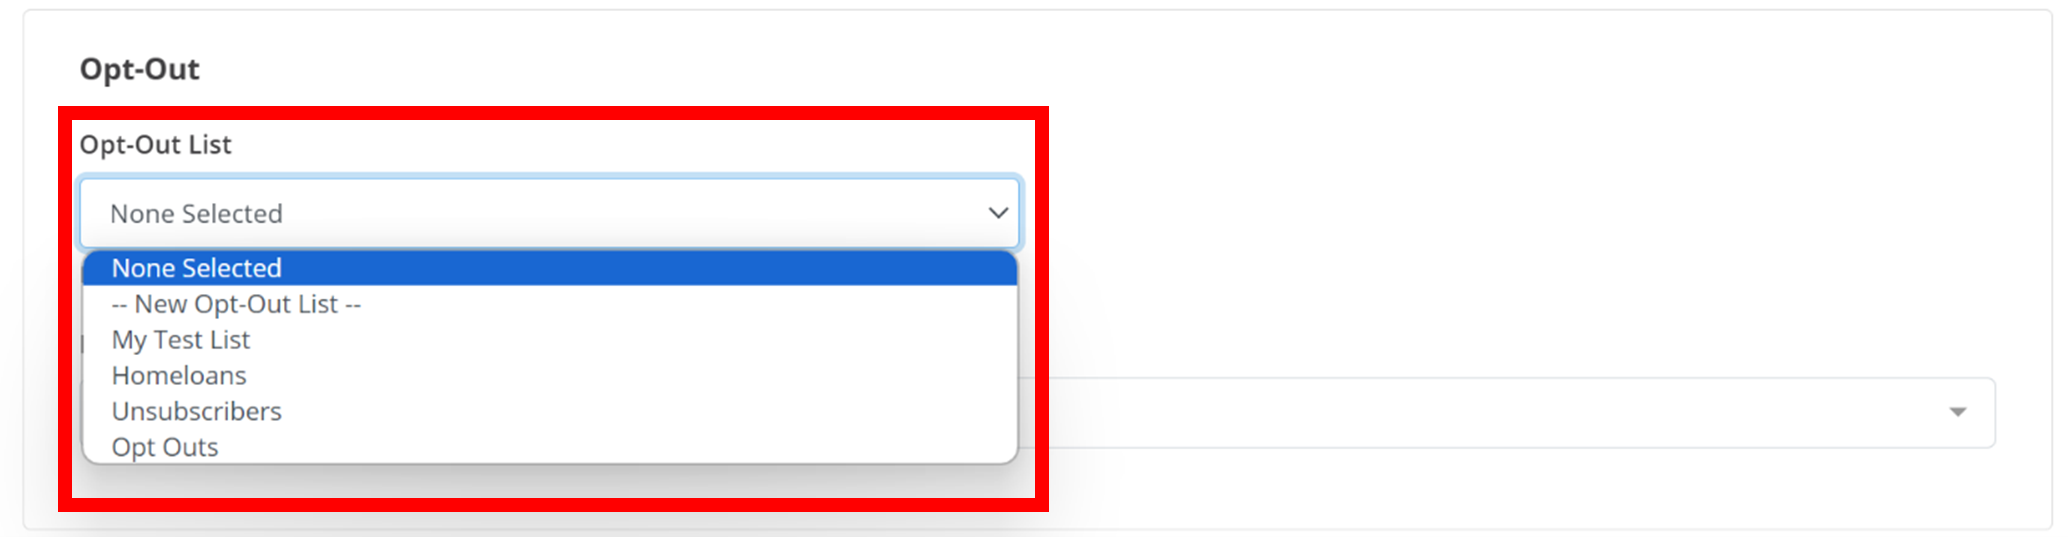
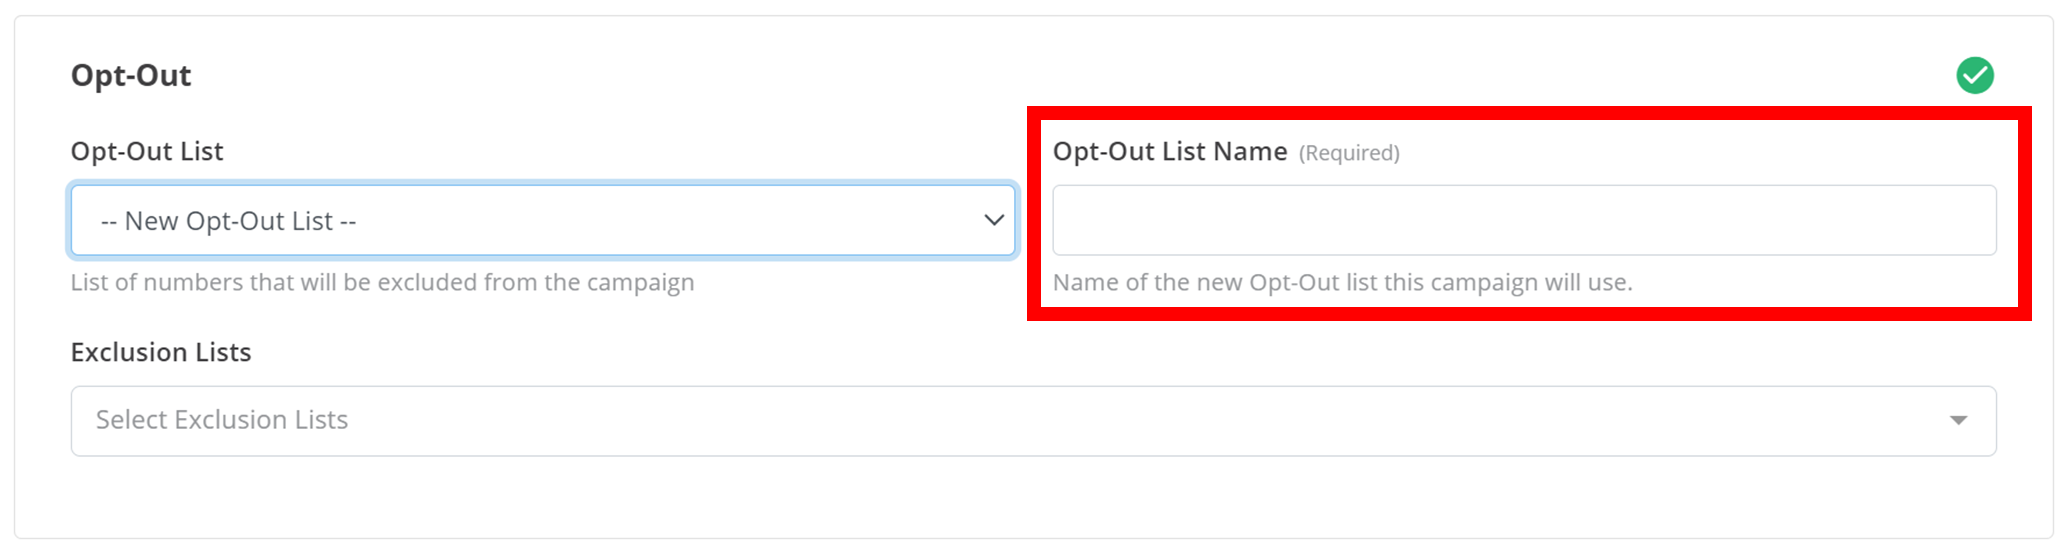
This will be your Opt-Out List, and all recipients of the campaign that opt-out will be added to this list. You can also choose to create a new list for this by selecting -- New Opt-Out List --, and entering the new list's name in the text box as shown below.
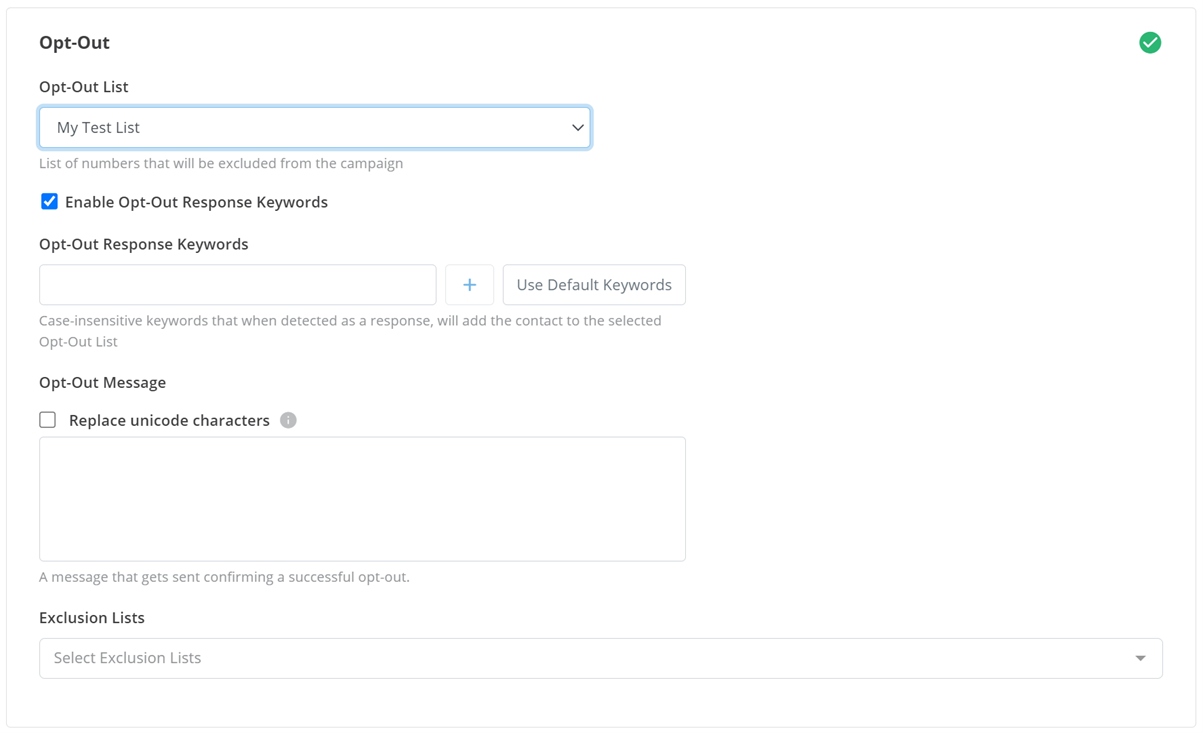
Once you have selected a list for opt-out contacts to be added to, an extended menu will appear (as below) to customise this opt-out process for campaign-recipients. Some features may not be available depending on campaign type.
Opt-Out Keywords
Opt-Out Keywords are the words or phrases that campaign-recipients must respond with to opt-out of your campaign.
Information
The phrases are case insensitive (e.g. stop keyword will include Stop and STOP)
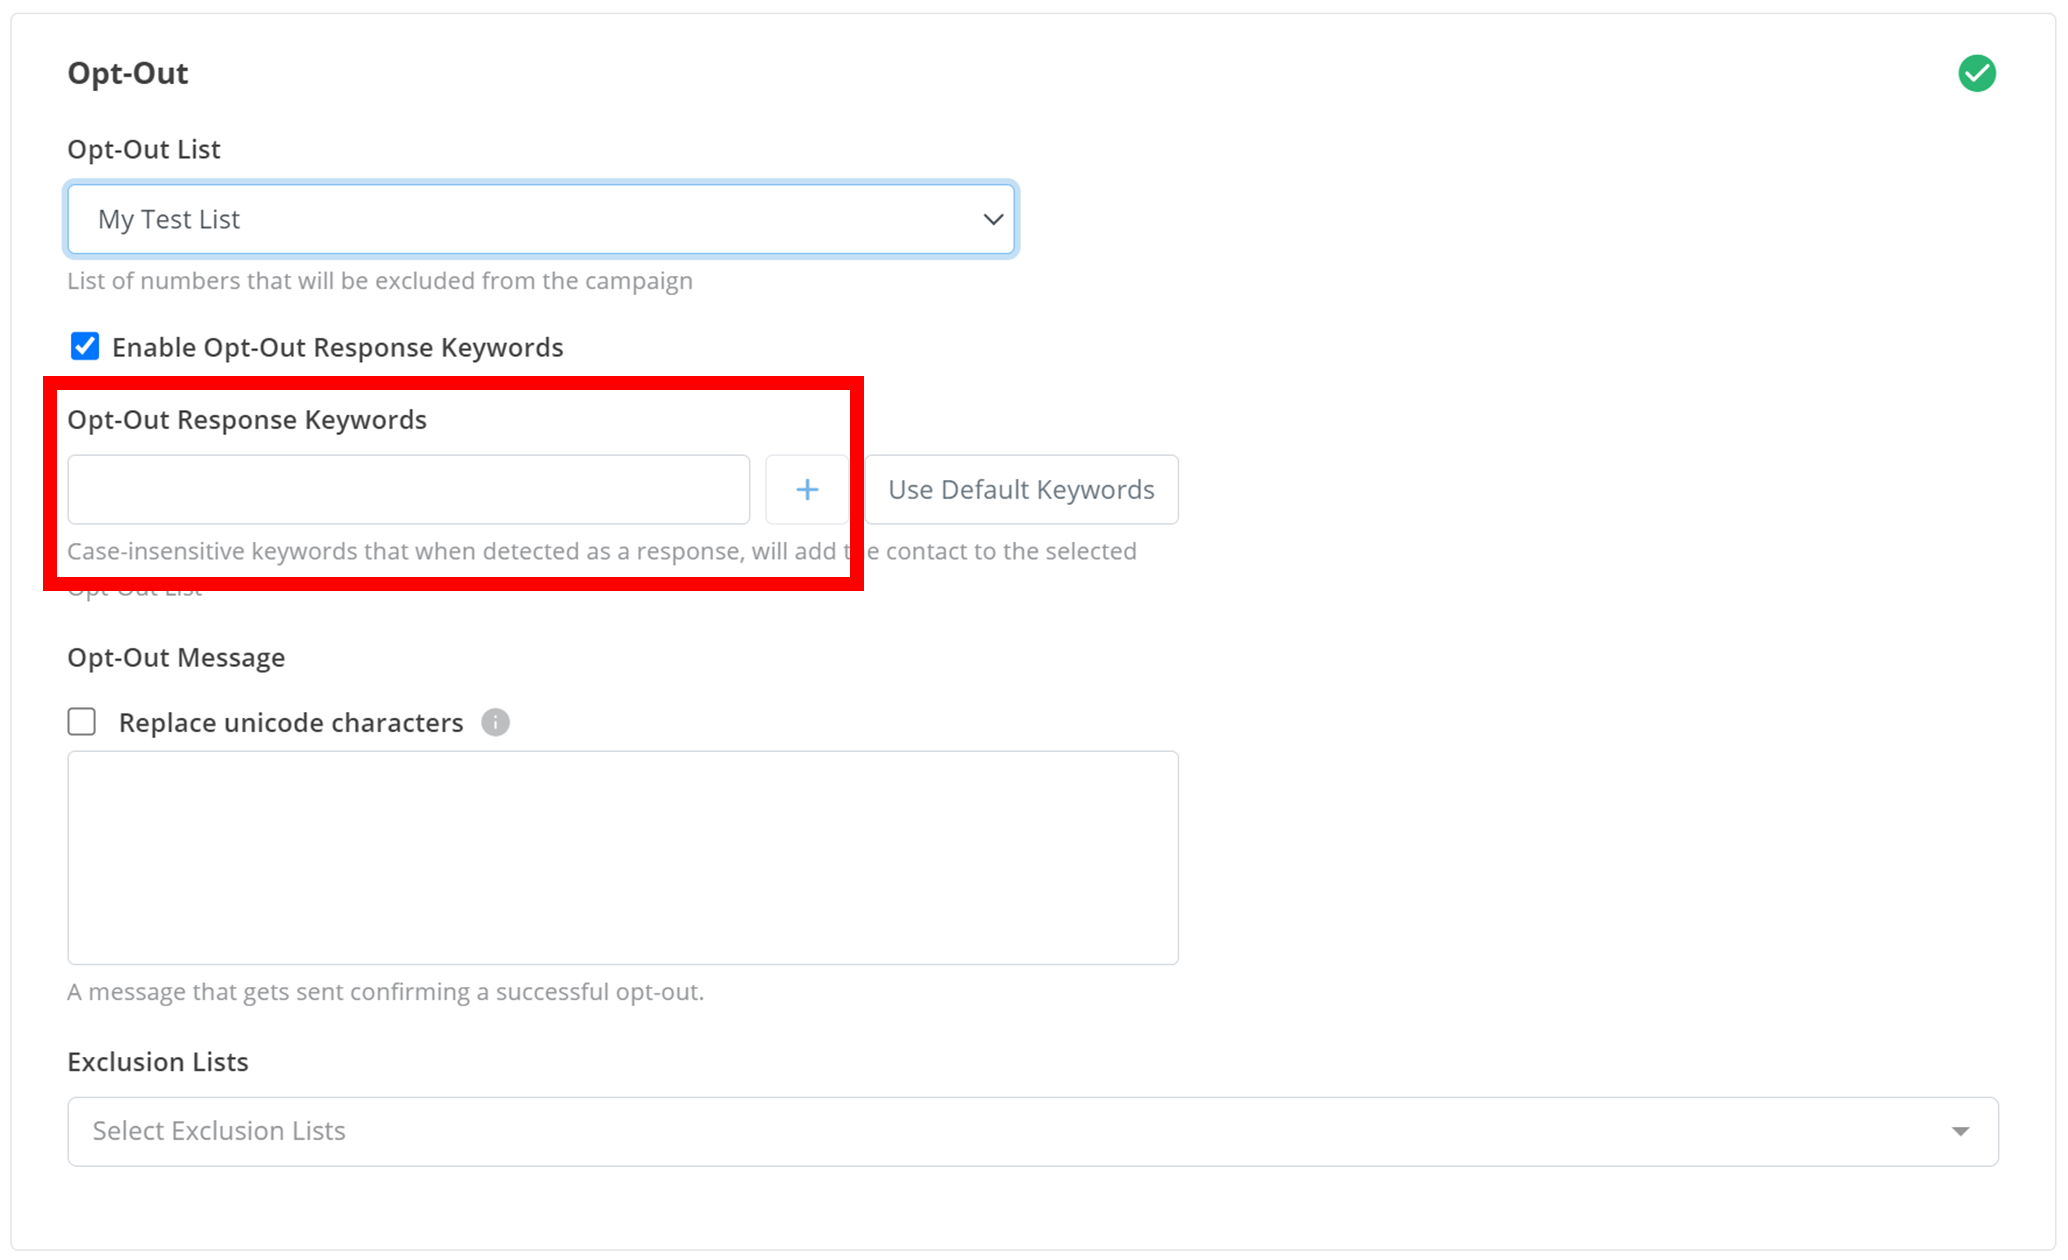
To add one of these to your campaigns, type your desired opt-out phrase into the text box under Opt-Out Response Keywords, and then click the + button to the right of the text box or click Enter on your keyboard. Alternatively, you can disable/enable Opt-Out Keywords by selecting the checkbox above the red box in the image below.
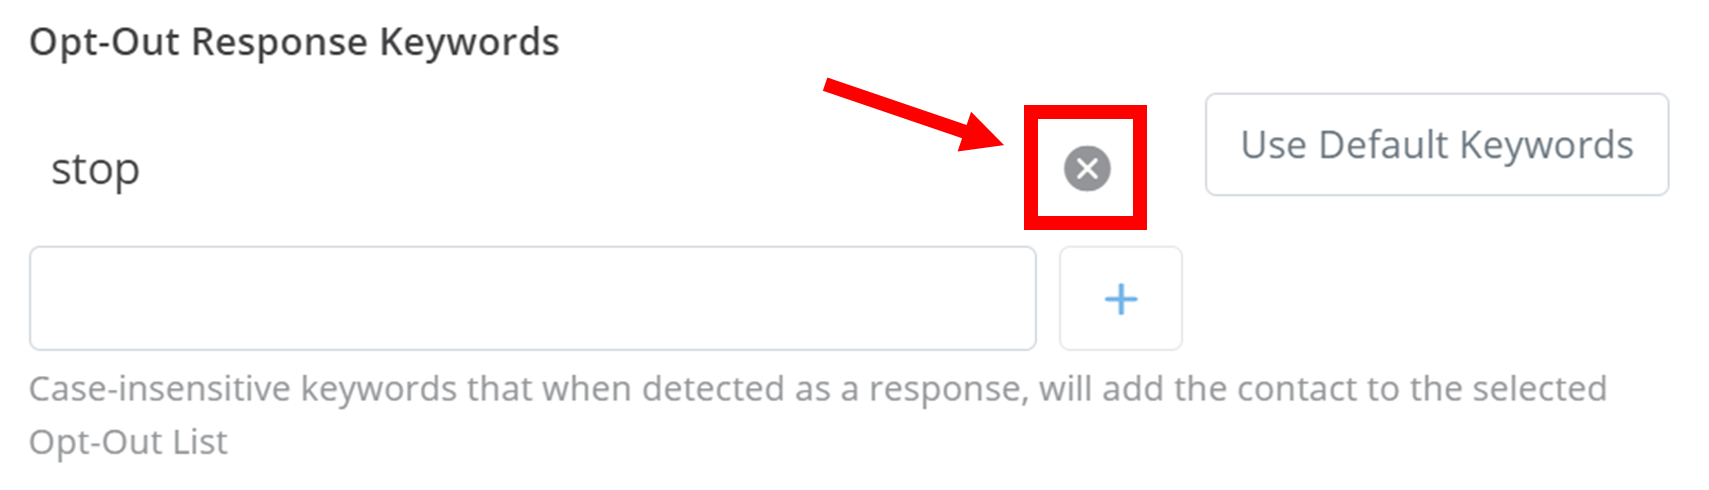
Alternatively, you can click the Use Default Keywords button, and several standard opt-out phrases will be added to this list of keywords. You can add as many opt-out phrases as you desire, and you can remove an opt-out phrase by clicking the X next to the phrase.
If Opt-Out Keywords are not available for the selected campaign type or you have disabled them, you can instead use the {{opt-out}} placeholder in your Message. This will be replaced with an opt-out URL, that will opt-out the campaign-recipient if they click it.
Opt-Out Message
The Opt-Out Message is the message campaign-recipients will receive after a successful opt-out. Enter the message you desire them to receive in this text box.

You can optionally replace unicode characters for mobile-number-recipients by selecting the checkbox above the text box as seen in the previous image. This will simply reduce the SMS character count and/or the SMS units if unicode characters are present.
Tip
Exclusion Lists and your Opt-Out List are both non-compulsory for your campaign and can be left empty.
Opt Out Link
If you include an {{opt-out}} placeholder in your message, the placeholder will instead be replaced with an opt-out link for campaign-recipients that will opt them out of the campaign if they click it.
An example of this may be:
... To opt-out of this campaign, follow this link:
{{opt-out}}
Send Config
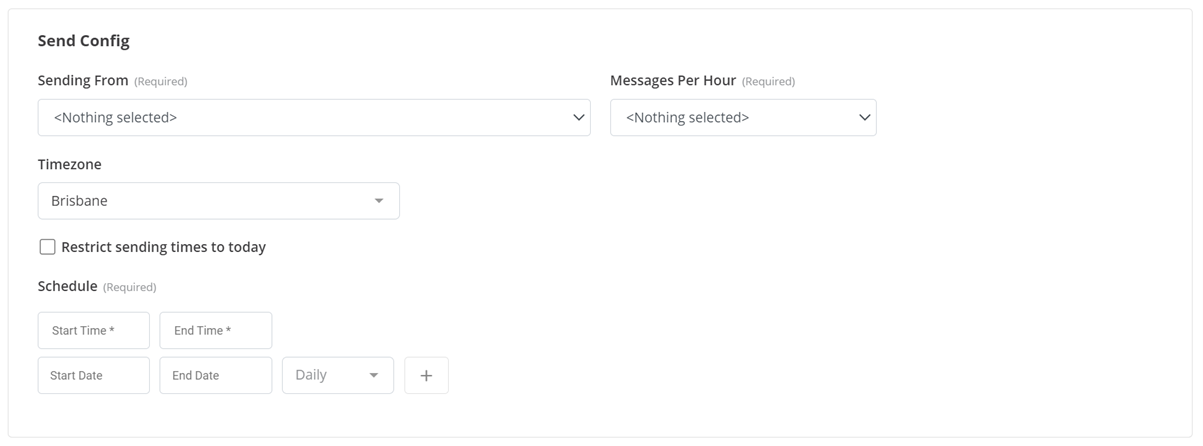
The final step in most campaigns is to configure the send conditions of the campaign. Below is what this menu should look like.
Sending From
This drop-down menu is where you select the sender of your campaign. This is the contact that your campaign-recipients will receive the campaign from.
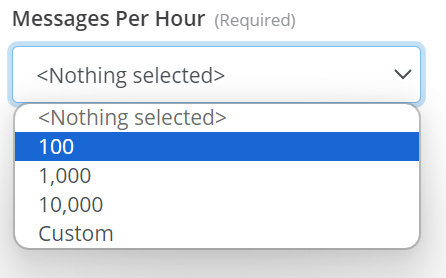
Messages Per Hour
This section determines how quickly the campaign will be sent out. Messages per hour is the number of contacts in your contact information file the program will send your campaign to in one hour. If you select 100, the program will send the campaign to a new contact in your file every 36 seconds. If you have 200 contacts in your file and you select a rate of 100/messages/hour, the campaign will be finished being sent out to everyone in 2 hours. Simply click on the drop-down menu, and select the rate you desire.
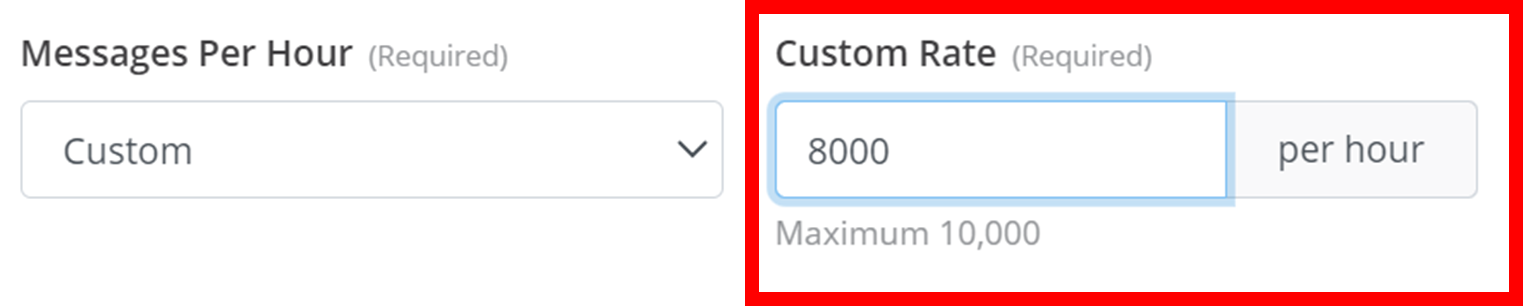
Alternatively, you can select a Custom amount that doesn't appear in the drop-down, and you can specify it in a text box on the right.
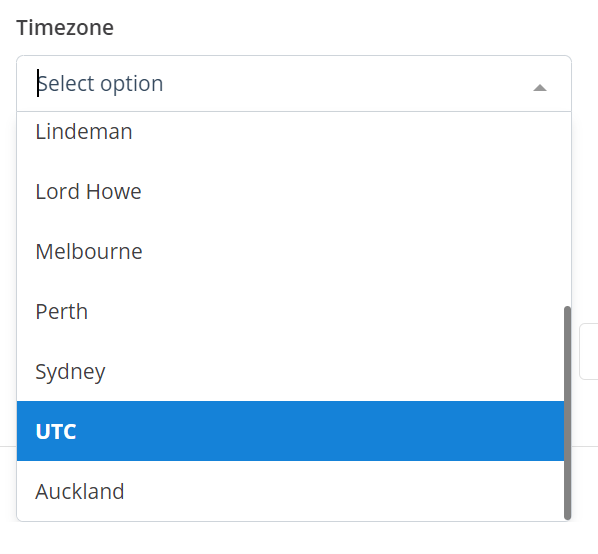
Timezone
This drop-down menu is simply to select the timezone you are using for scheduling in the next section.
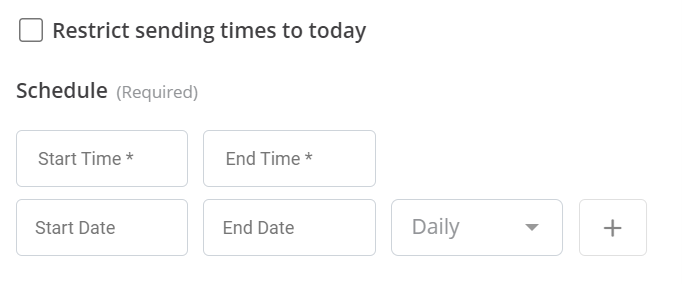
Schedule
This is where you specify when you want your campaign to run and be sent out. To do this, you must add time periods in which the program will run and send out your campaign to your contacts.
Here are step by step instructions on how this works:
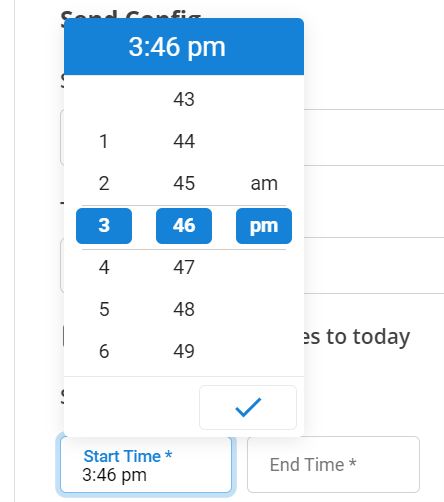
Select Time
Select a desired start time and end time during the day (e.g., 12:00pm to 5:30pm). This will be referred to as your hourly time period in the following steps.
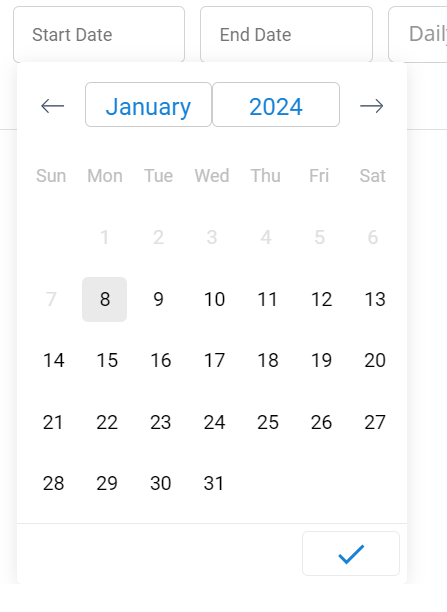
Select Dates
Select the dates you want your hourly time period to be active for. Select a start and end date (e.g., 14th of January 2024 to the 18th of January 2024).
Select Days
Select the days within the above dates you want your hourly time period to be active for (e.g., Monday, Tuesday, and Wednesday).

- You can delete selected days by reselecting them in the drop-down menu. Selected days will be bolded in the drop-down menu.
- If no days are selected, it will select Daily by default, in which your hourly time period will run everyday within the dates.
- Otherwise, you can select the checkbox Restrict sending times to today so your hourly time period only runs once today.
- If no dates are selected in step 2, the campaign will just run during the days selected in this step until every contact has been contacted.
Add Time Period
Click the + button next to the schedule to add this entire time period into the campaign's run times. Remove a time period with the X on the far right of the time period's label.

Summary
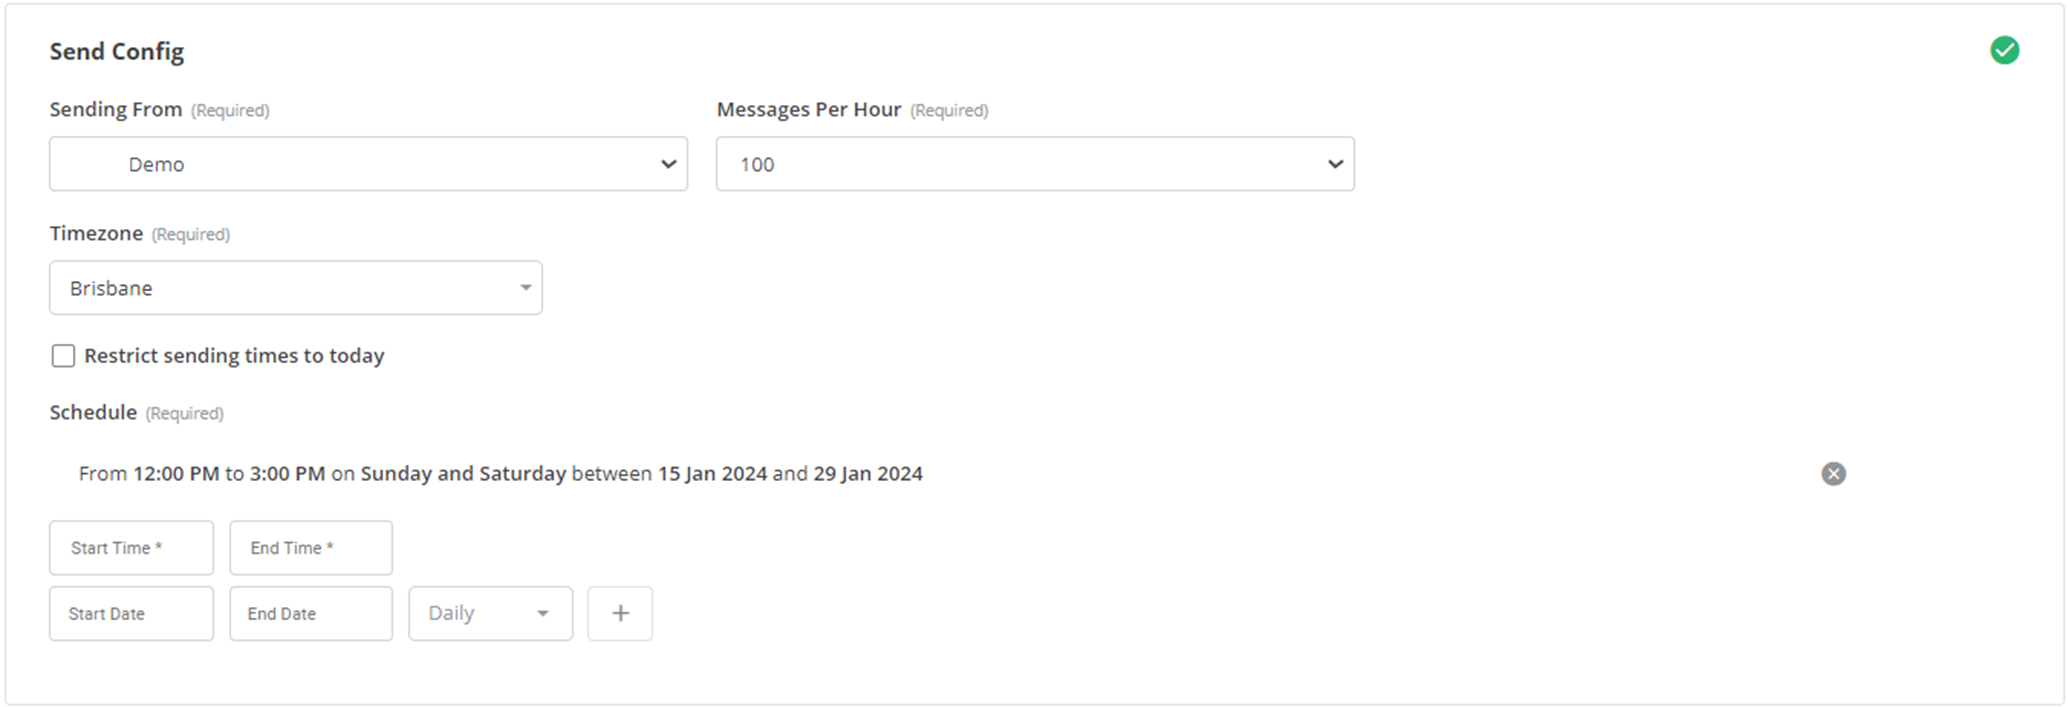
To create a new time period, select dates during the year, days during the dates, and a time during the days. Add this to your campaign's schedule. The program will send out the campaign during this time period and all other time periods you have added.
Below is what an example campaign schedule could look like. Every weekend from the 15th of January 2024 to the 29th of January 2024, from 12pm to 3pm, the campaign will be sent out to new contacts in the file at a rate of 100 contacts every hour, from a mobile number named 'YabbrDemo'. If there were 1200 contacts, this schedule would send out the campaign to the first half of the contacts on the first weekend, and then the second half of the contacts on the second weekend.
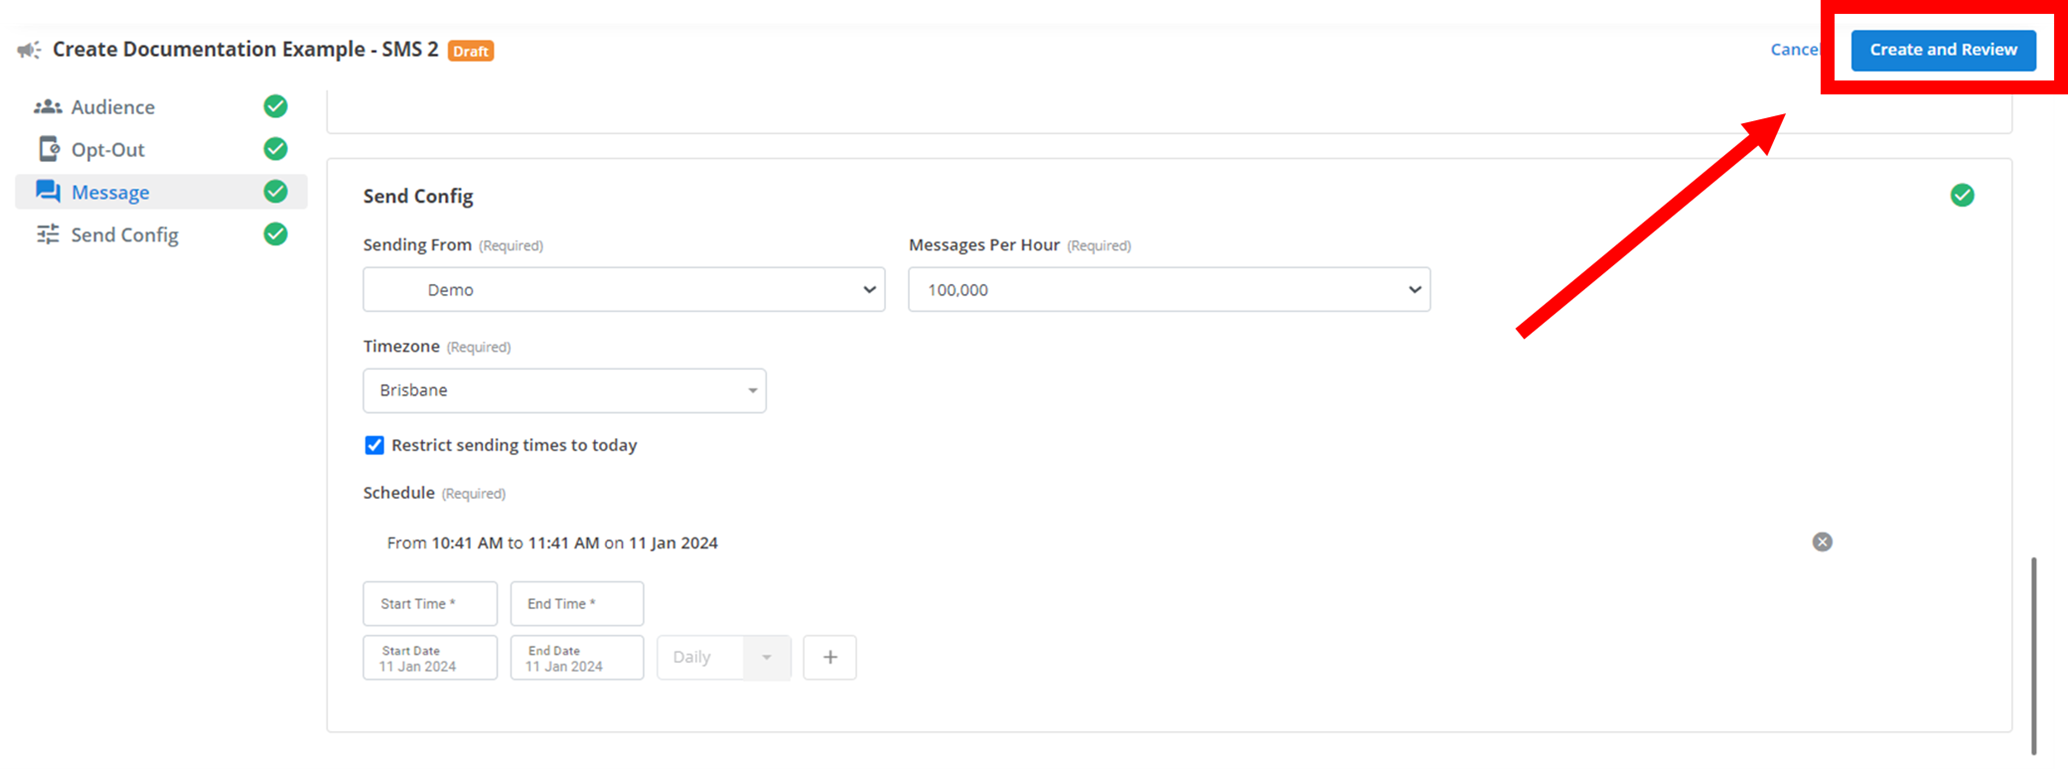
Finally, to create this campaign, click on the Create and Review button in the top right.
Management
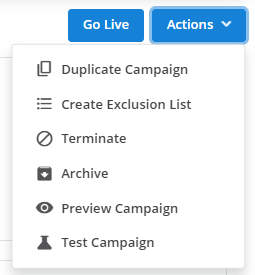
Once a campaign has been created, within the campaign and in the campaign menu, a button will appear in the top right called Actions ˅. This will show you a set of actions you can perform on your campaign like in the menu below (Remember different campaign types may have more or less features. See relevant documentation for more specificity).
Duplicate Campaign
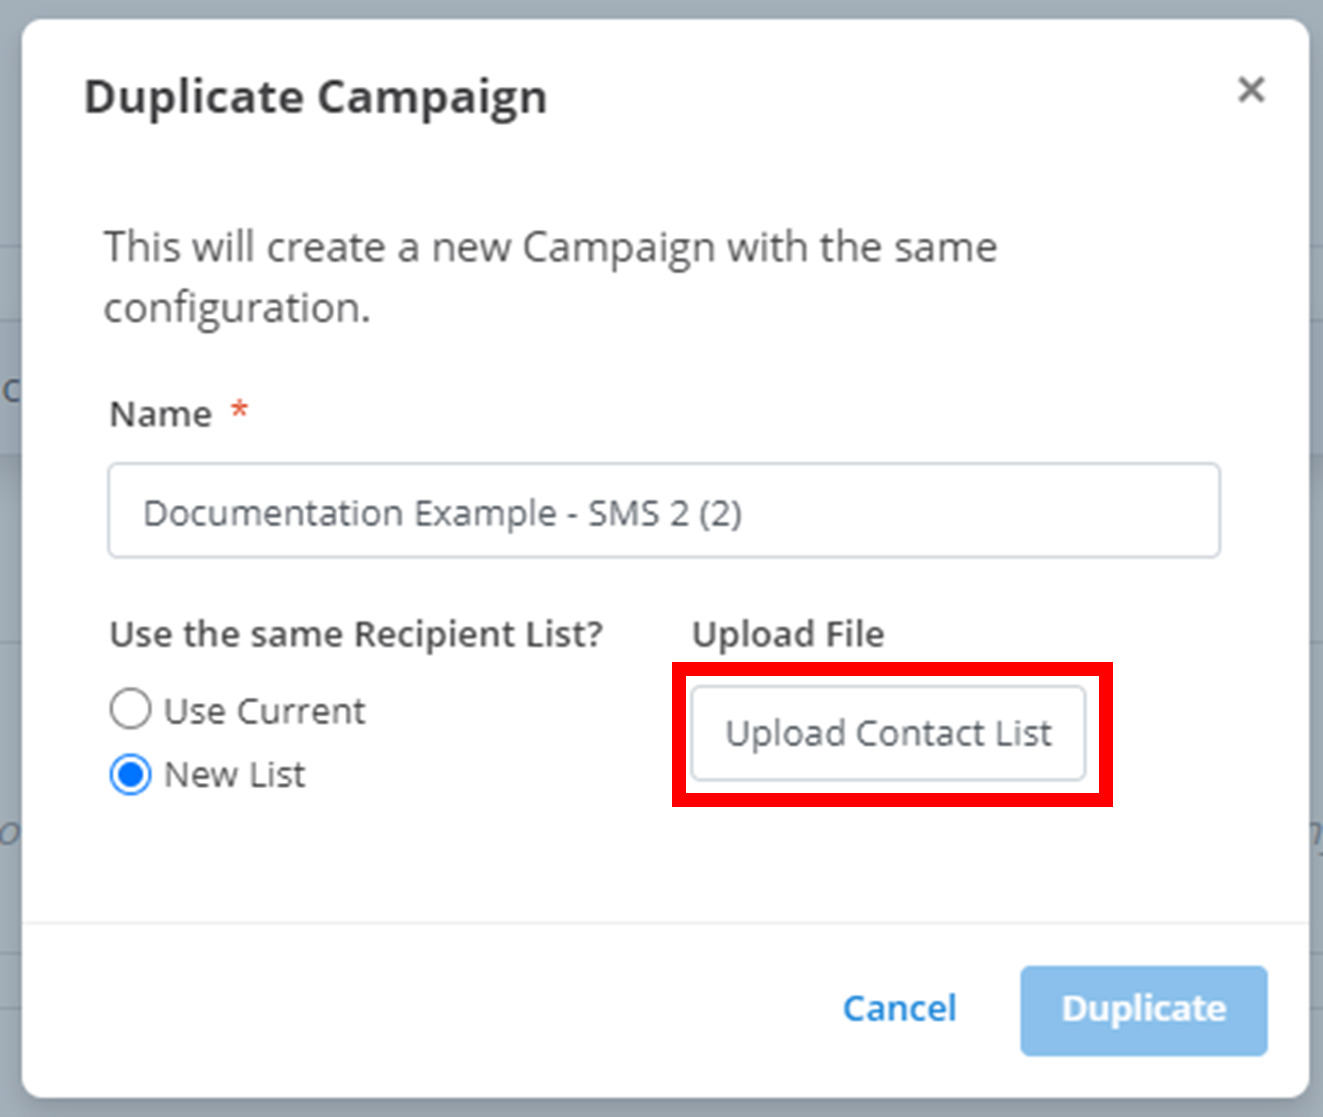
This will create a copy of the current campaign and all the settings you have selected for it. When you select this option, a menu will show up like the one below. Firstly, you must give the duplicate a different name with the text box under Name. Next, you need to decide if you want to keep the same audience or upload a new contact list by selecting your desired option under Use the same Recipient List?. If you opt for a new audience, select the Upload Contact List button outlined below and select your new contact list (and then if necessary select the column name that contains all the contacts). Then, select the Duplicate button to finish the duplication. You will automatically be navigated to the menu of the new duplicate.
Information
Some campaign types may have extra options. See their relevant documentation for more specificity.
Terminate
Terminating the campaign will kill the campaign. You cannot start the campaign again after terminating it.
Archive
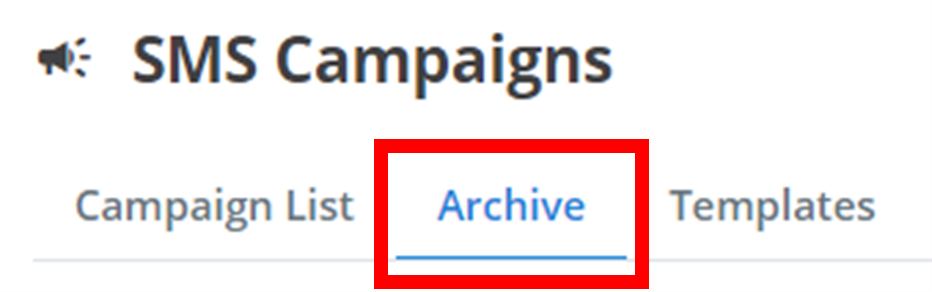
Archiving the campaign will store the campaign in a separate tab near the top of the screen called Archive. Here, your campaigns cannot be run. They can be unarchived by repeating the archival process - selecting the desired campaign, clicking on Actions ˅, and selecting Remove from Archive.
Preview Campaign
This option will allow you to view examples of what your campaign will look like from the end of the user. It allows you to navigate through each contact in your file to see what the campaign looks like for each person, and any placeholders in the message will be replaced with the information relevant to the contact. Navigate through the preview for each contact using the Previous and Next buttons on the bottom. The contact of the preview currently being viewed is displayed above the preview. This preview will be different for each campaign type. See relevant documentation for more specificity.
Test Campaign
This option allows you to send an example 'test' campaign to a selected contact to test the functionality and to make sure everything works how you would like it to. Input the contact you want to send the test campaign to, and then you have to fill in any placeholders in your message. This test menu will be different for each campaign type. See relevant documentation for more specificity.
Starting a Campaign
Validation
Before you can run your campaign, the program may ask you about something called deduplication.

Within your contact file, there maybe be duplicates of either your contacts or your placeholders.
- Don't Deduplicate: This will run through the contact file in its current state and will send the campaign to the same contact multiple times if that contact appears multiple times.
- Deduplicate records by Mobile Number: The wording here will be different for each campaign type, but this second option will only send the campaign to each contact in the file once. If a single contact appears multiple times, only the first instance of the contact will be used.
- Deduplicate by Message: This option will only send different messages to the same contact. If a contact appears multiple times, with the same placeholders (and thus message), only the first instance will be used. However, if a contact appears multiple times with different placeholders, all instances will be used.
Going Live
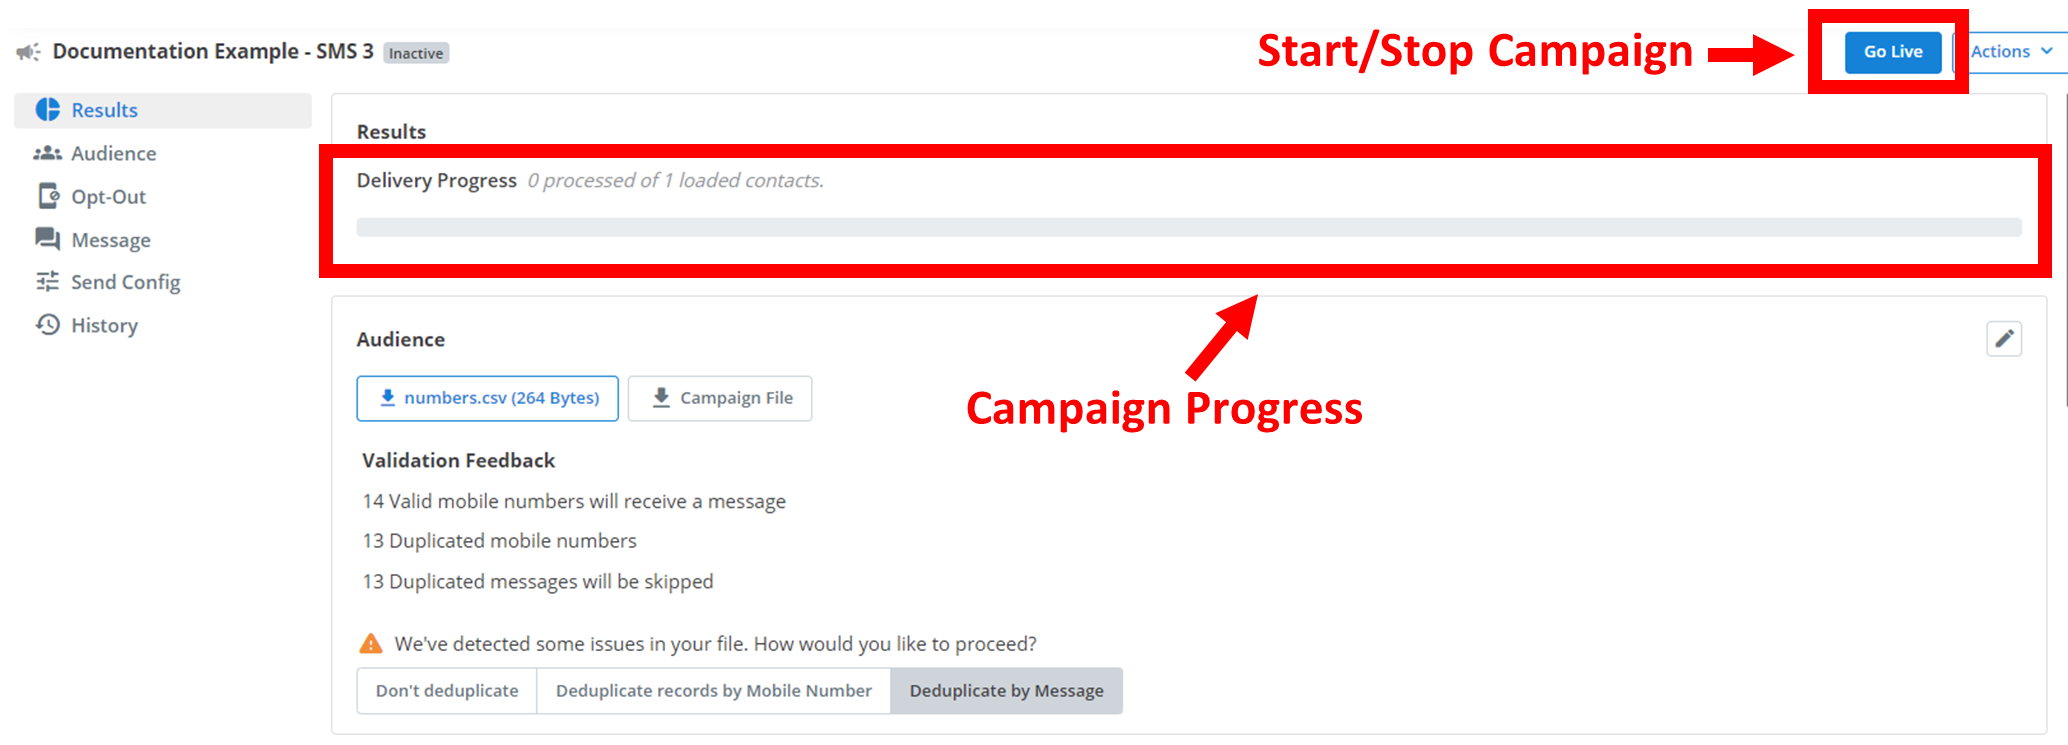
If there are no errors or warnings that appear in your campaign, you can then click the Go Live button.
This will start your campaign, and it will send out your message to your contacts as per your selected schedule at the rate of messages/hour you selected. Clicking the Go Live button will also automatically navigate you to a page where you can view the progress of your campaign as it is running. It will show you how many contacts have already been sent the campaign and how many are left to contact. To pause and temporarily stop the campaign from running, at any time you can simply click the Pause button in the top right where the Go Live button used to be.
Results
There are two files you can download for information about your campaign:
- Campaign File
- Campaign Results
Campaign Results
At any point after the campaign has started and at least one contact has received the campaign, in the top right, on the left of the Actions ˅ button, a Download Reports ˅ button will appear as outlined below. Click on this drop-down and select 'Campaign Results' to download the current outcomes of the campaign. This will include which contacts have received the campaign, at what time were they received, did the recipient opt-out, and more depending on campaign type.

How is this guide?