Chat Settings
Configure and customize your Message2Give Chat experience with comprehensive settings that control how your team interacts with customers. Manage chat routing, tags, quick replies, and other essential features to optimize your customer communication workflow.
General
This is where you configure general chat settings. This includes verifications, notifications, and limitations. To edit and configure any of the settings shown below, just click on the relevant setting.
Guest Verifications
You may want your customers to verify their contact information before they proceed to a conversation with an agent. This is where you configure the verification prompt.
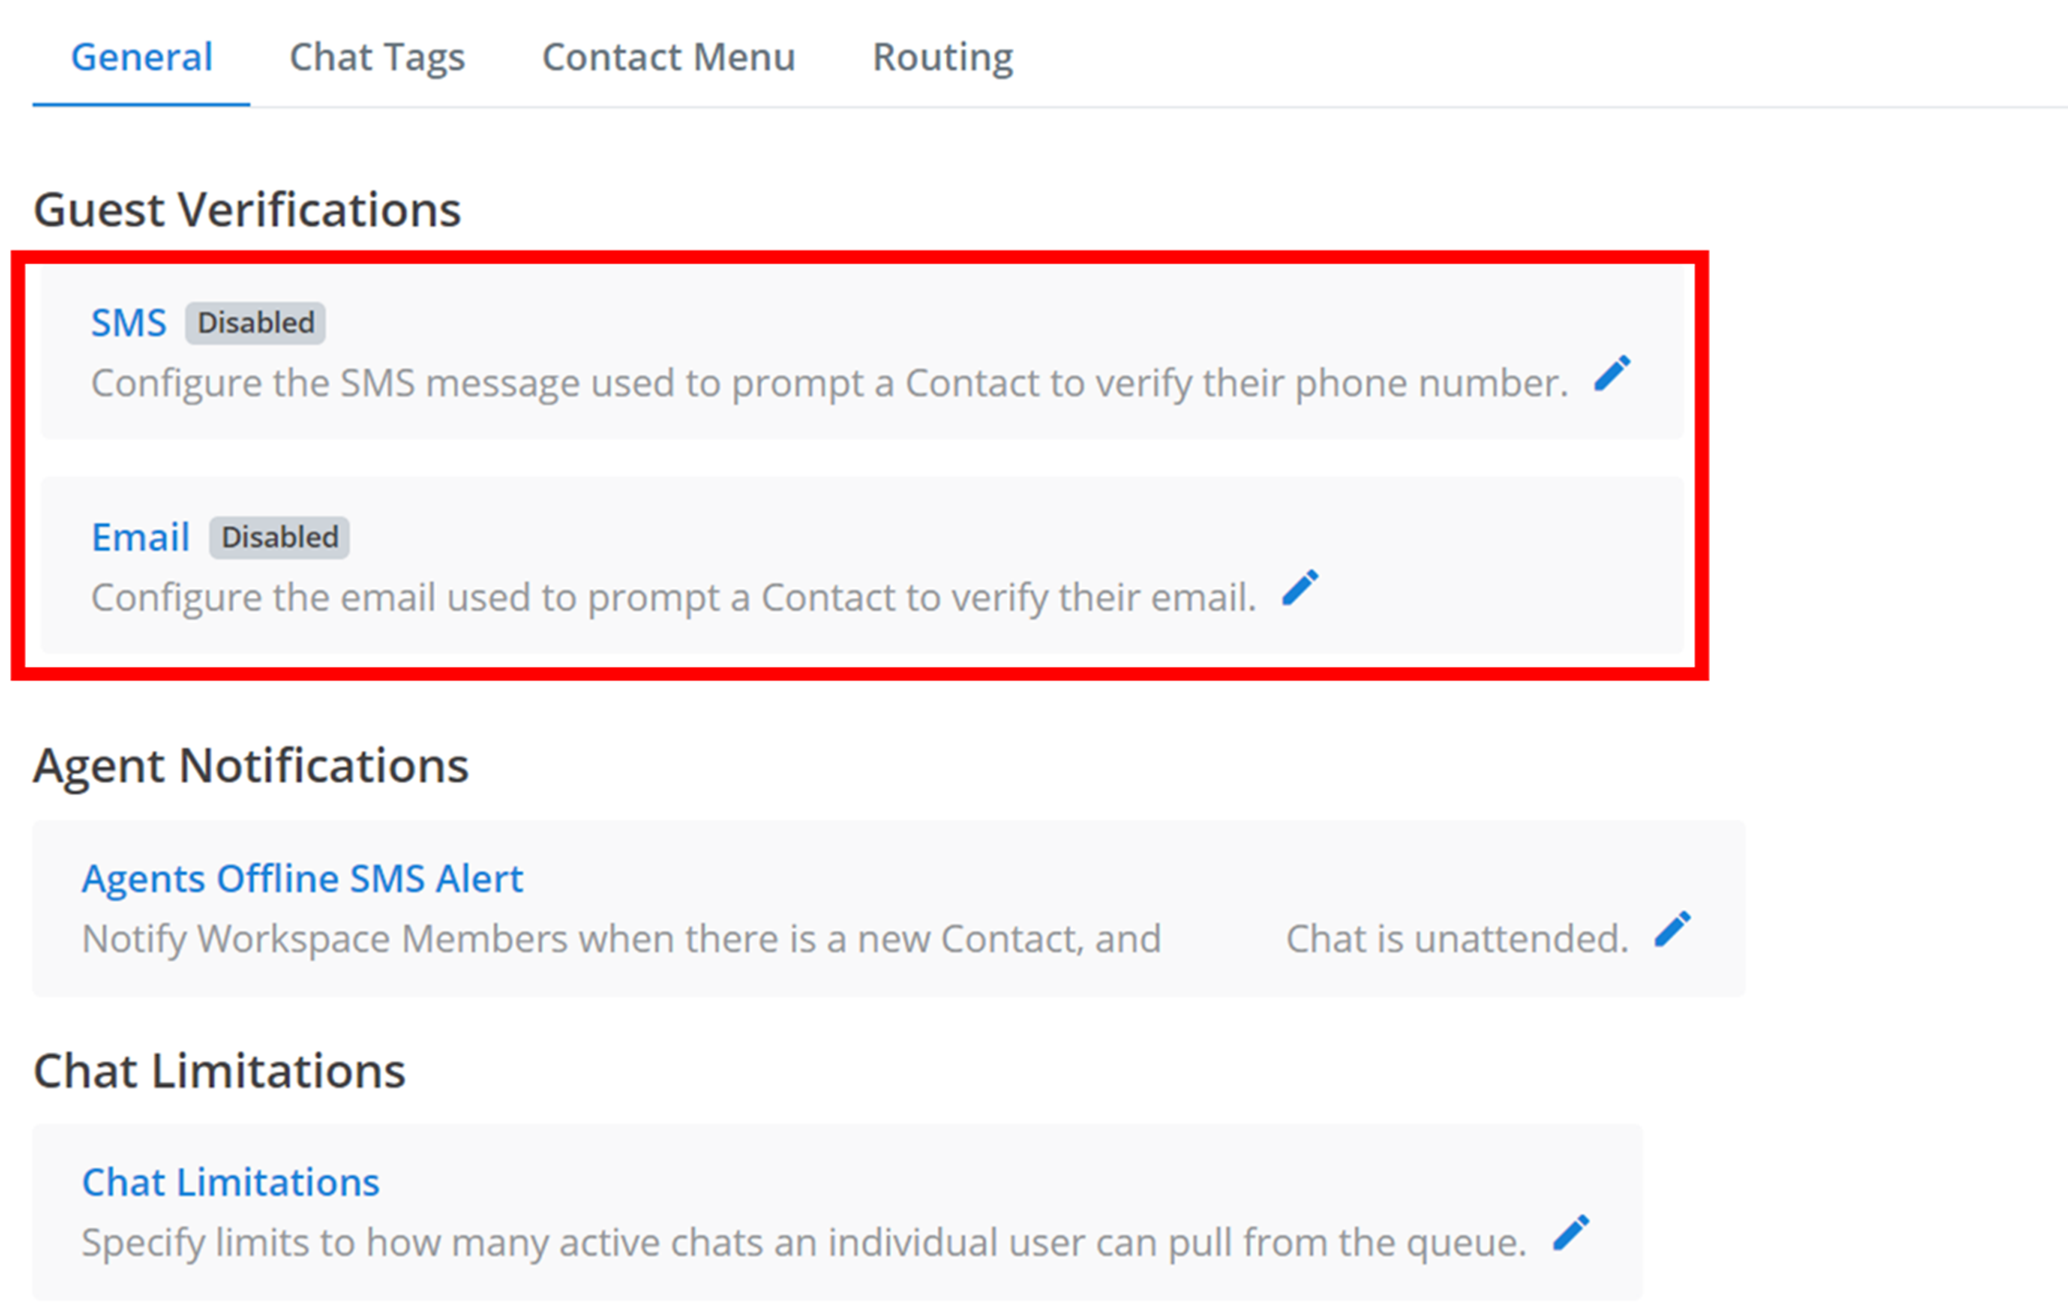
Select Verification Type
Click on the verification that you want to configure - either SMS or Email.
Configure Prompt
Then, a small menu will appear. You need to configure a verification prompt. This is a message that the customer will receive before they have been verified. It should prompt the user to verify their contact information. Create this message under 'Message Content'.
Enable Verification
Enable verification by toggling the button outlined below.
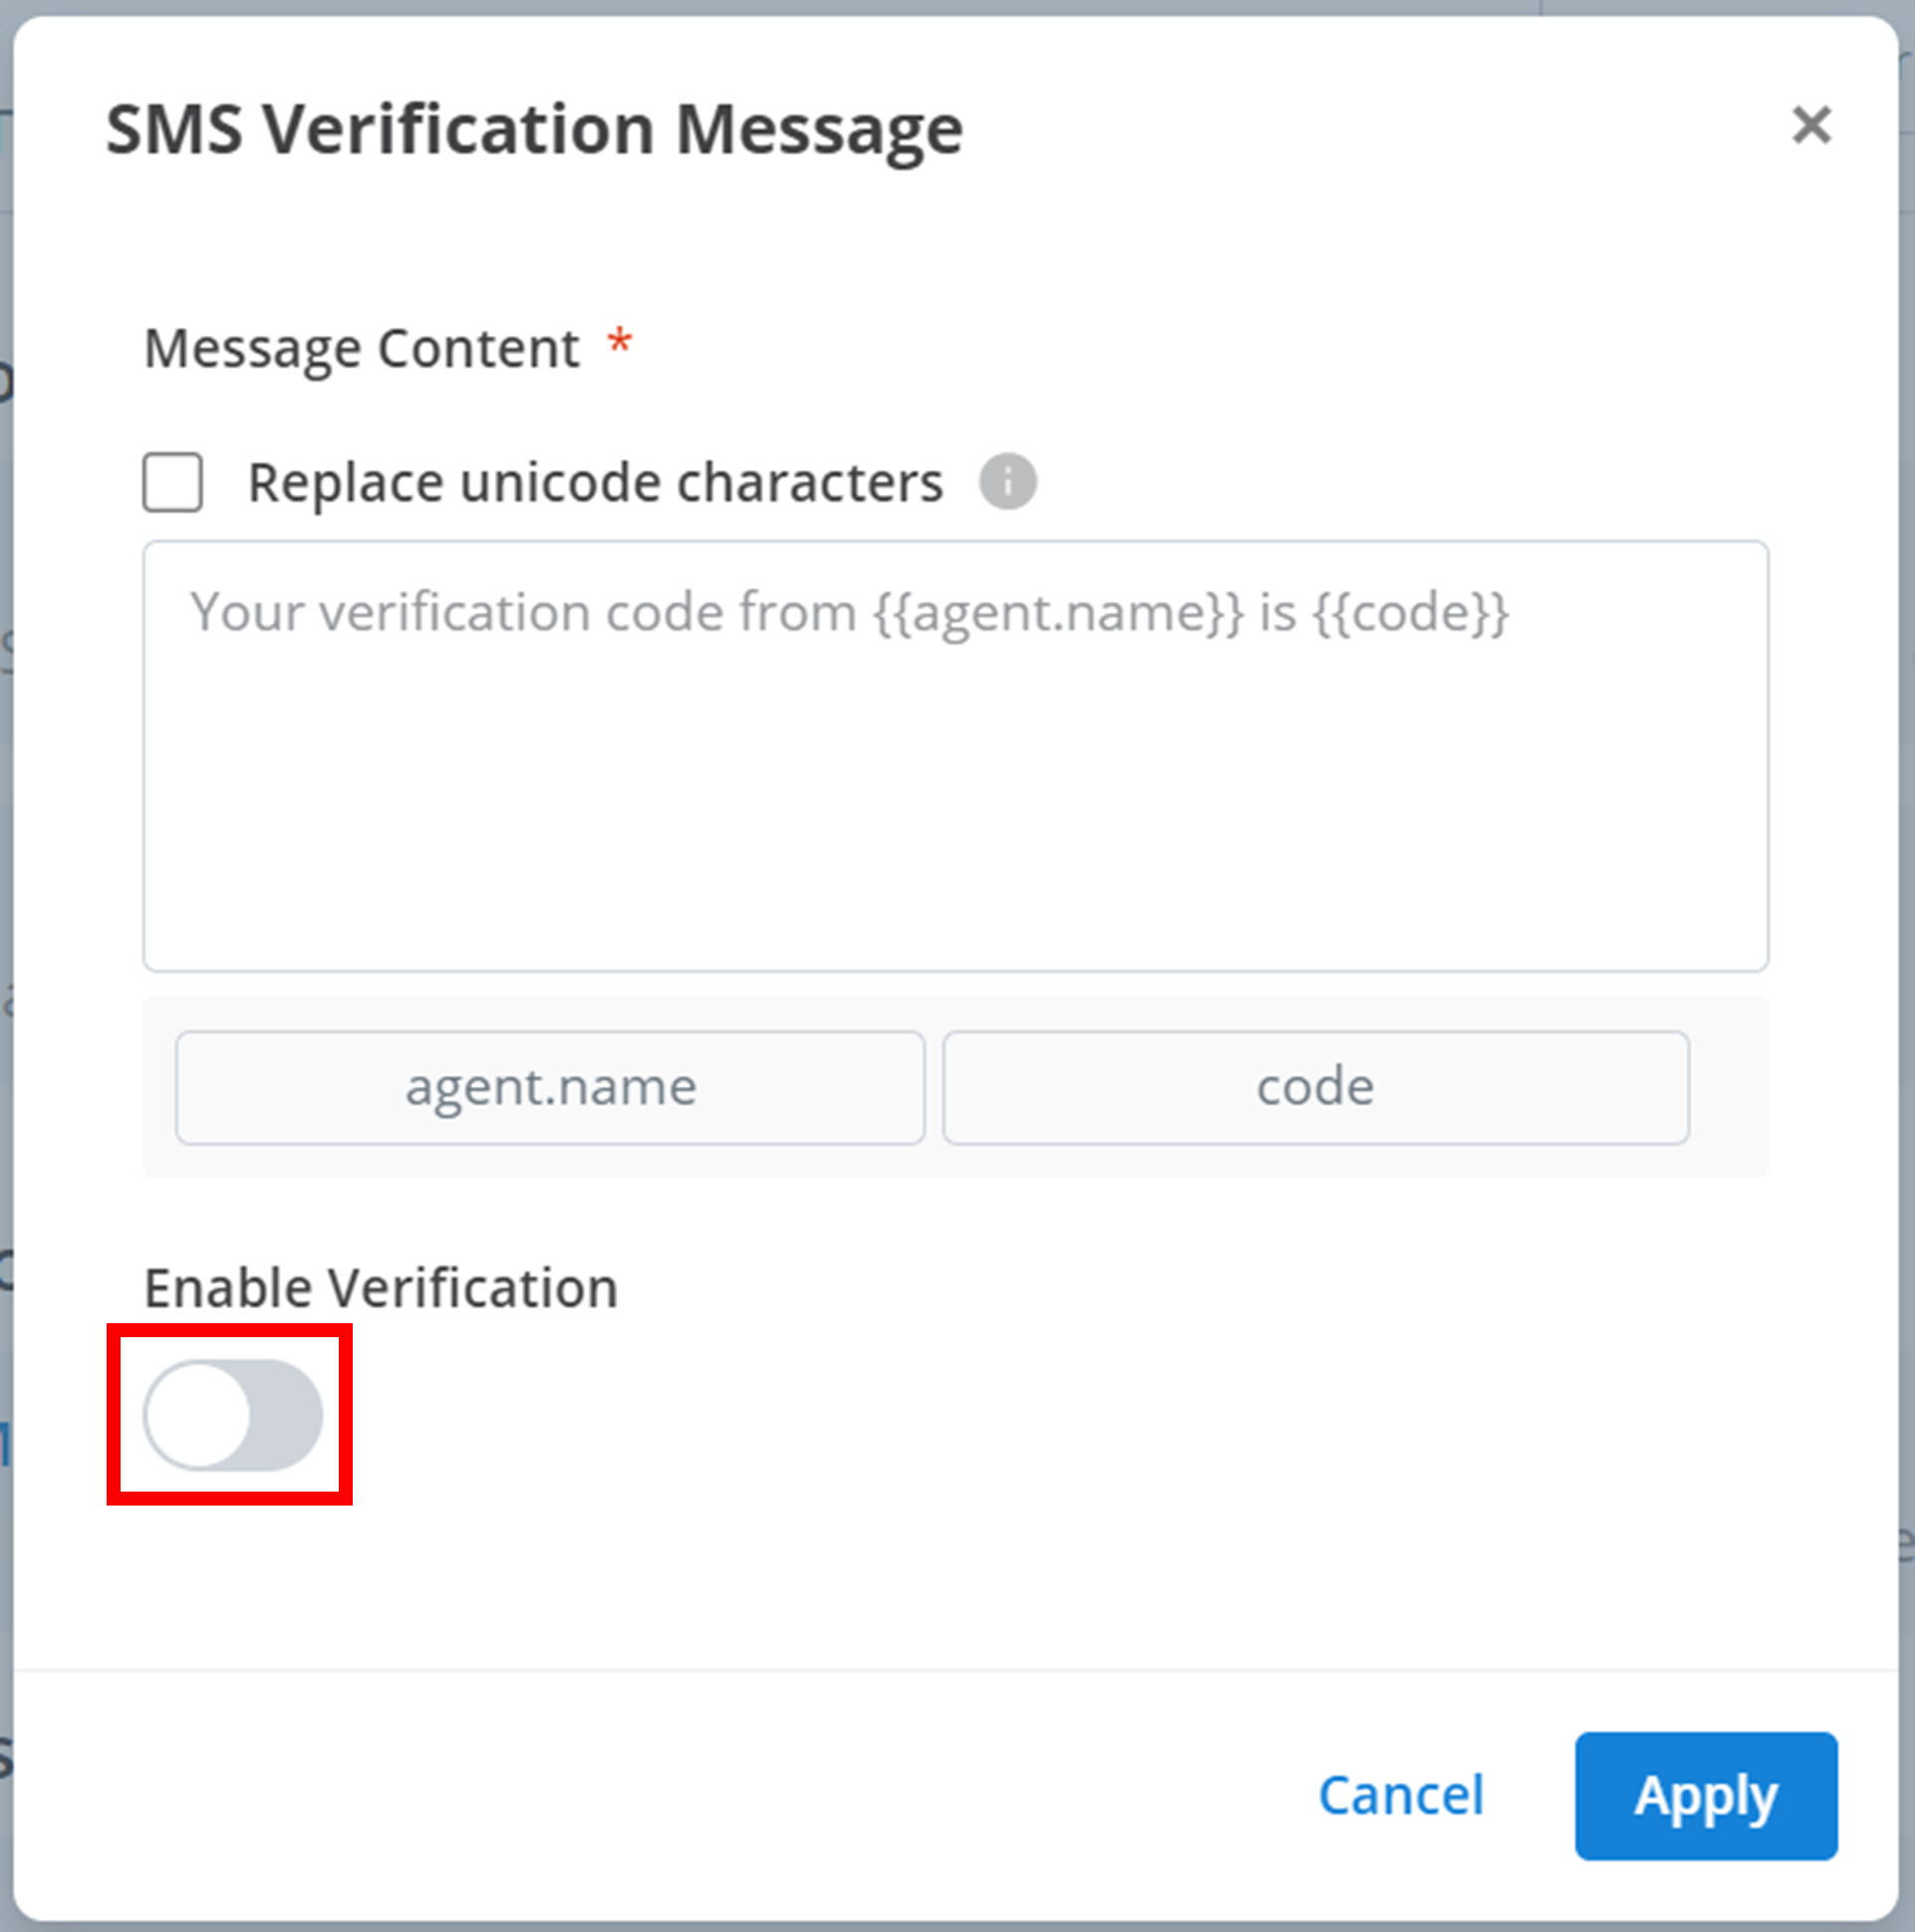
Apply
To save and apply the new setting, click Apply.
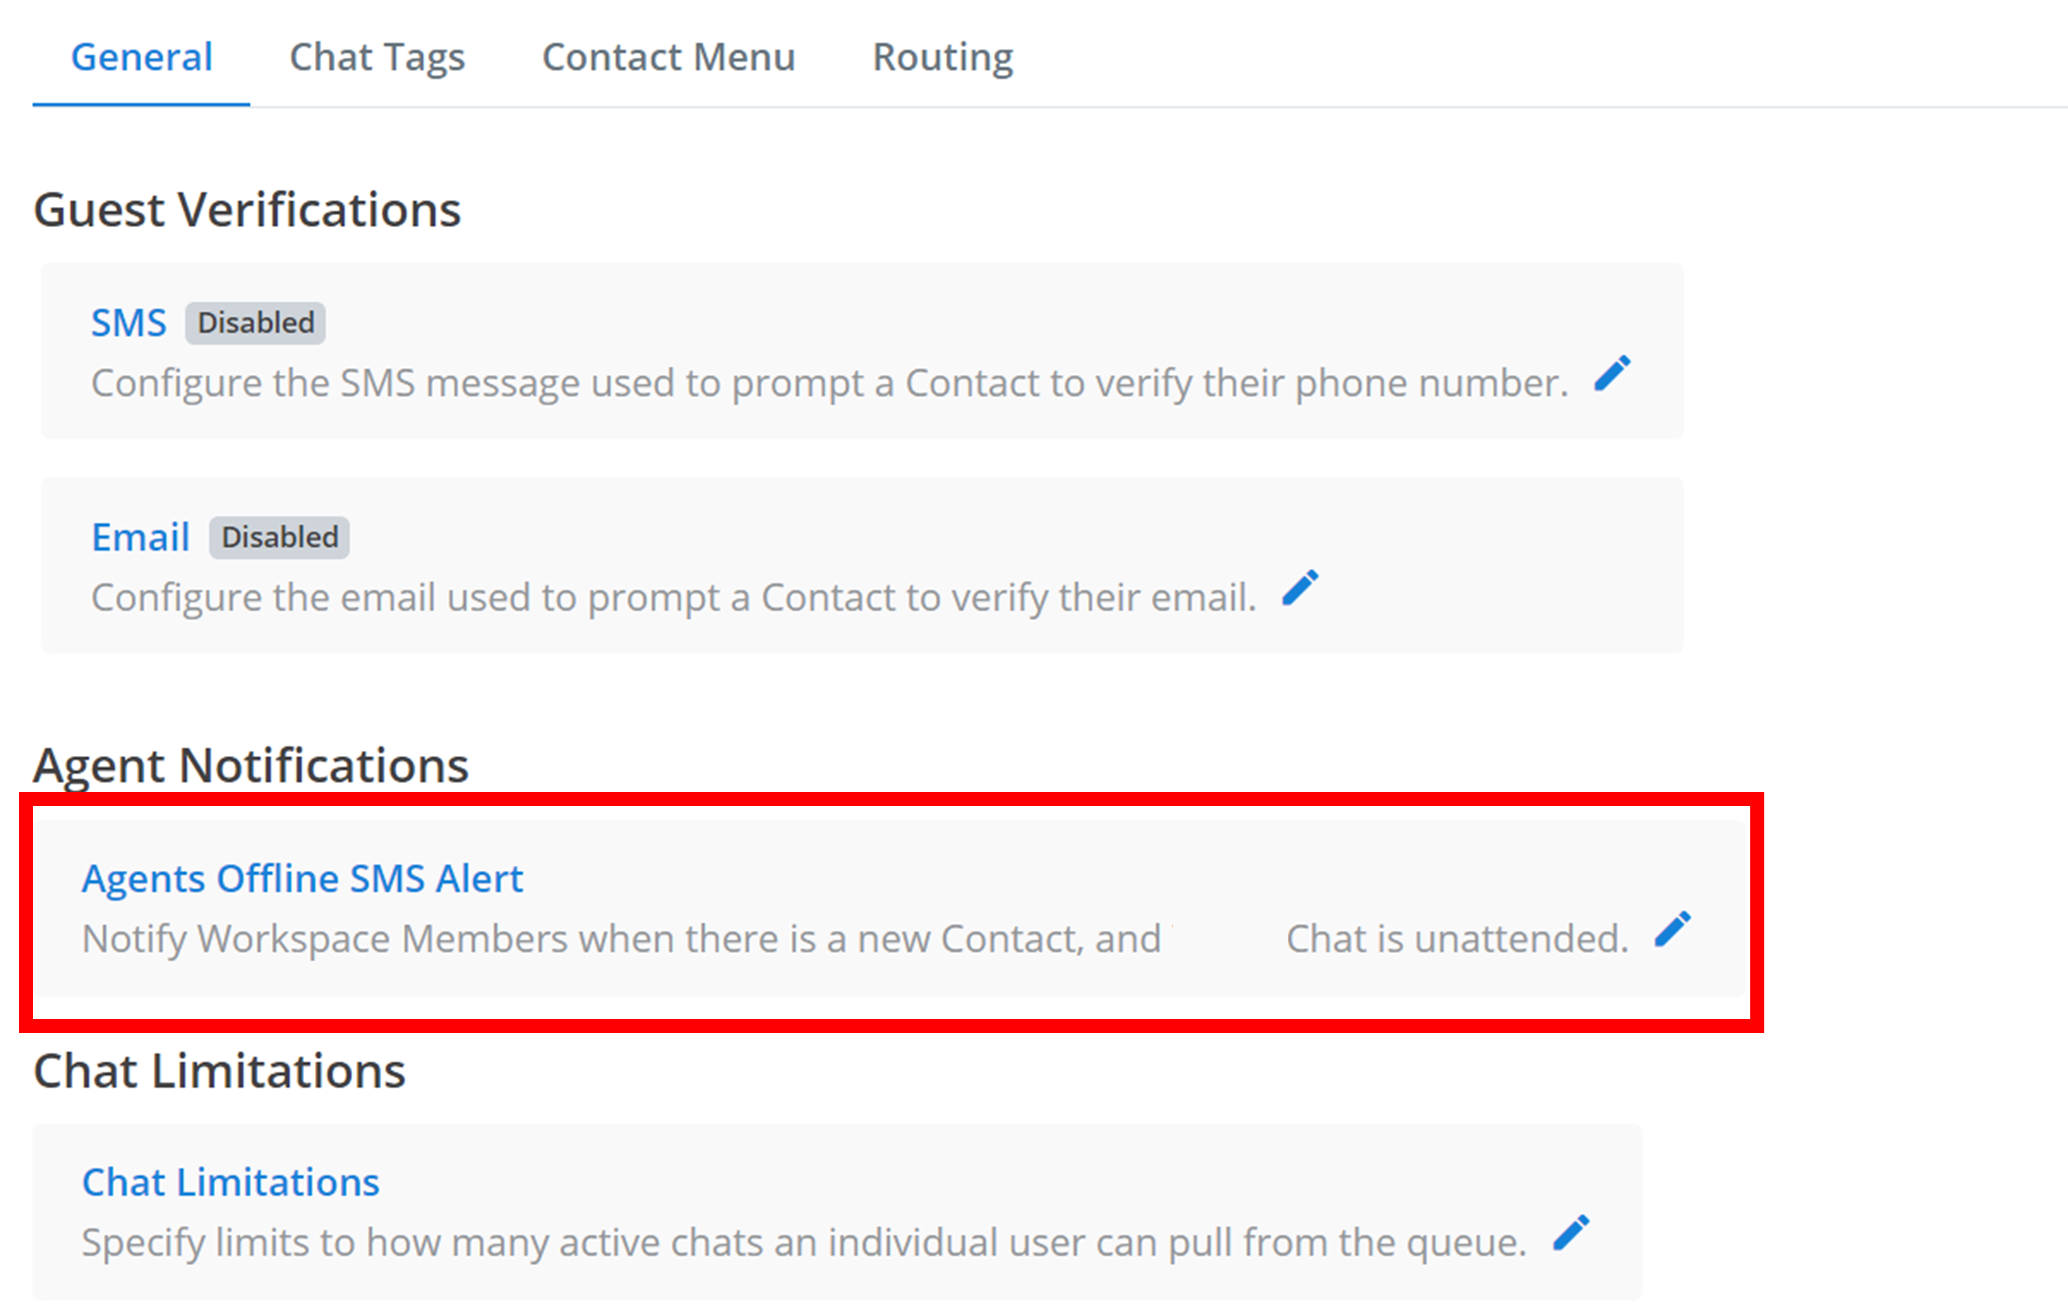
Agent Notifications
Some agents may have connected an SMS to their account. You can choose to notify this SMS when a new customer appears in the Message2Give Chat queue whilst it is unattended.
Open Settings
To configure the recipients of this notification, click on the setting outlined below.
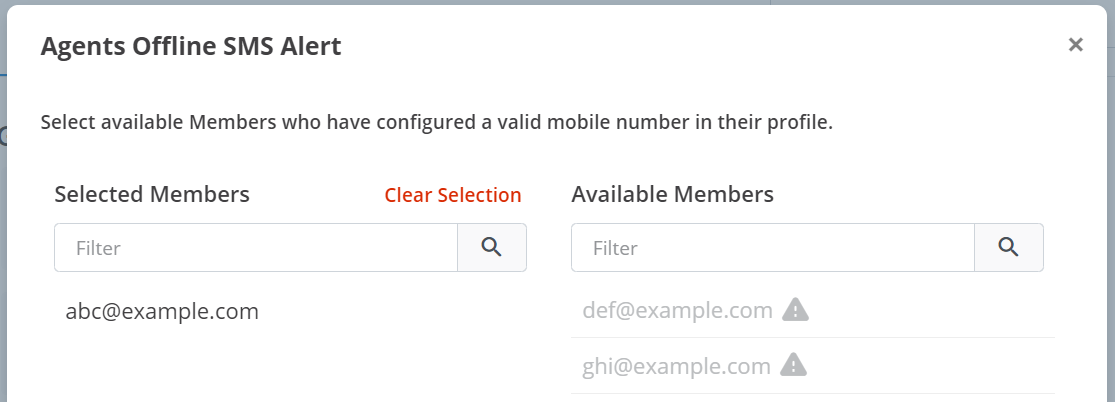
Select Members
A small menu will appear like the one below. The 'Selected Members' will receive the notification, whilst the 'Avaliable Members' will not.
- Click on an 'Available Member' to add them to the 'Selected Members'.
- Click on a 'Selected Member' to remove them from the 'Selected Members'.
- You can remove all members from 'Selected Members' by clicking 'Clear Selection'.
- You can search members by name using the 'Filter' text box.
Apply
To save and apply the new setting, click Apply.
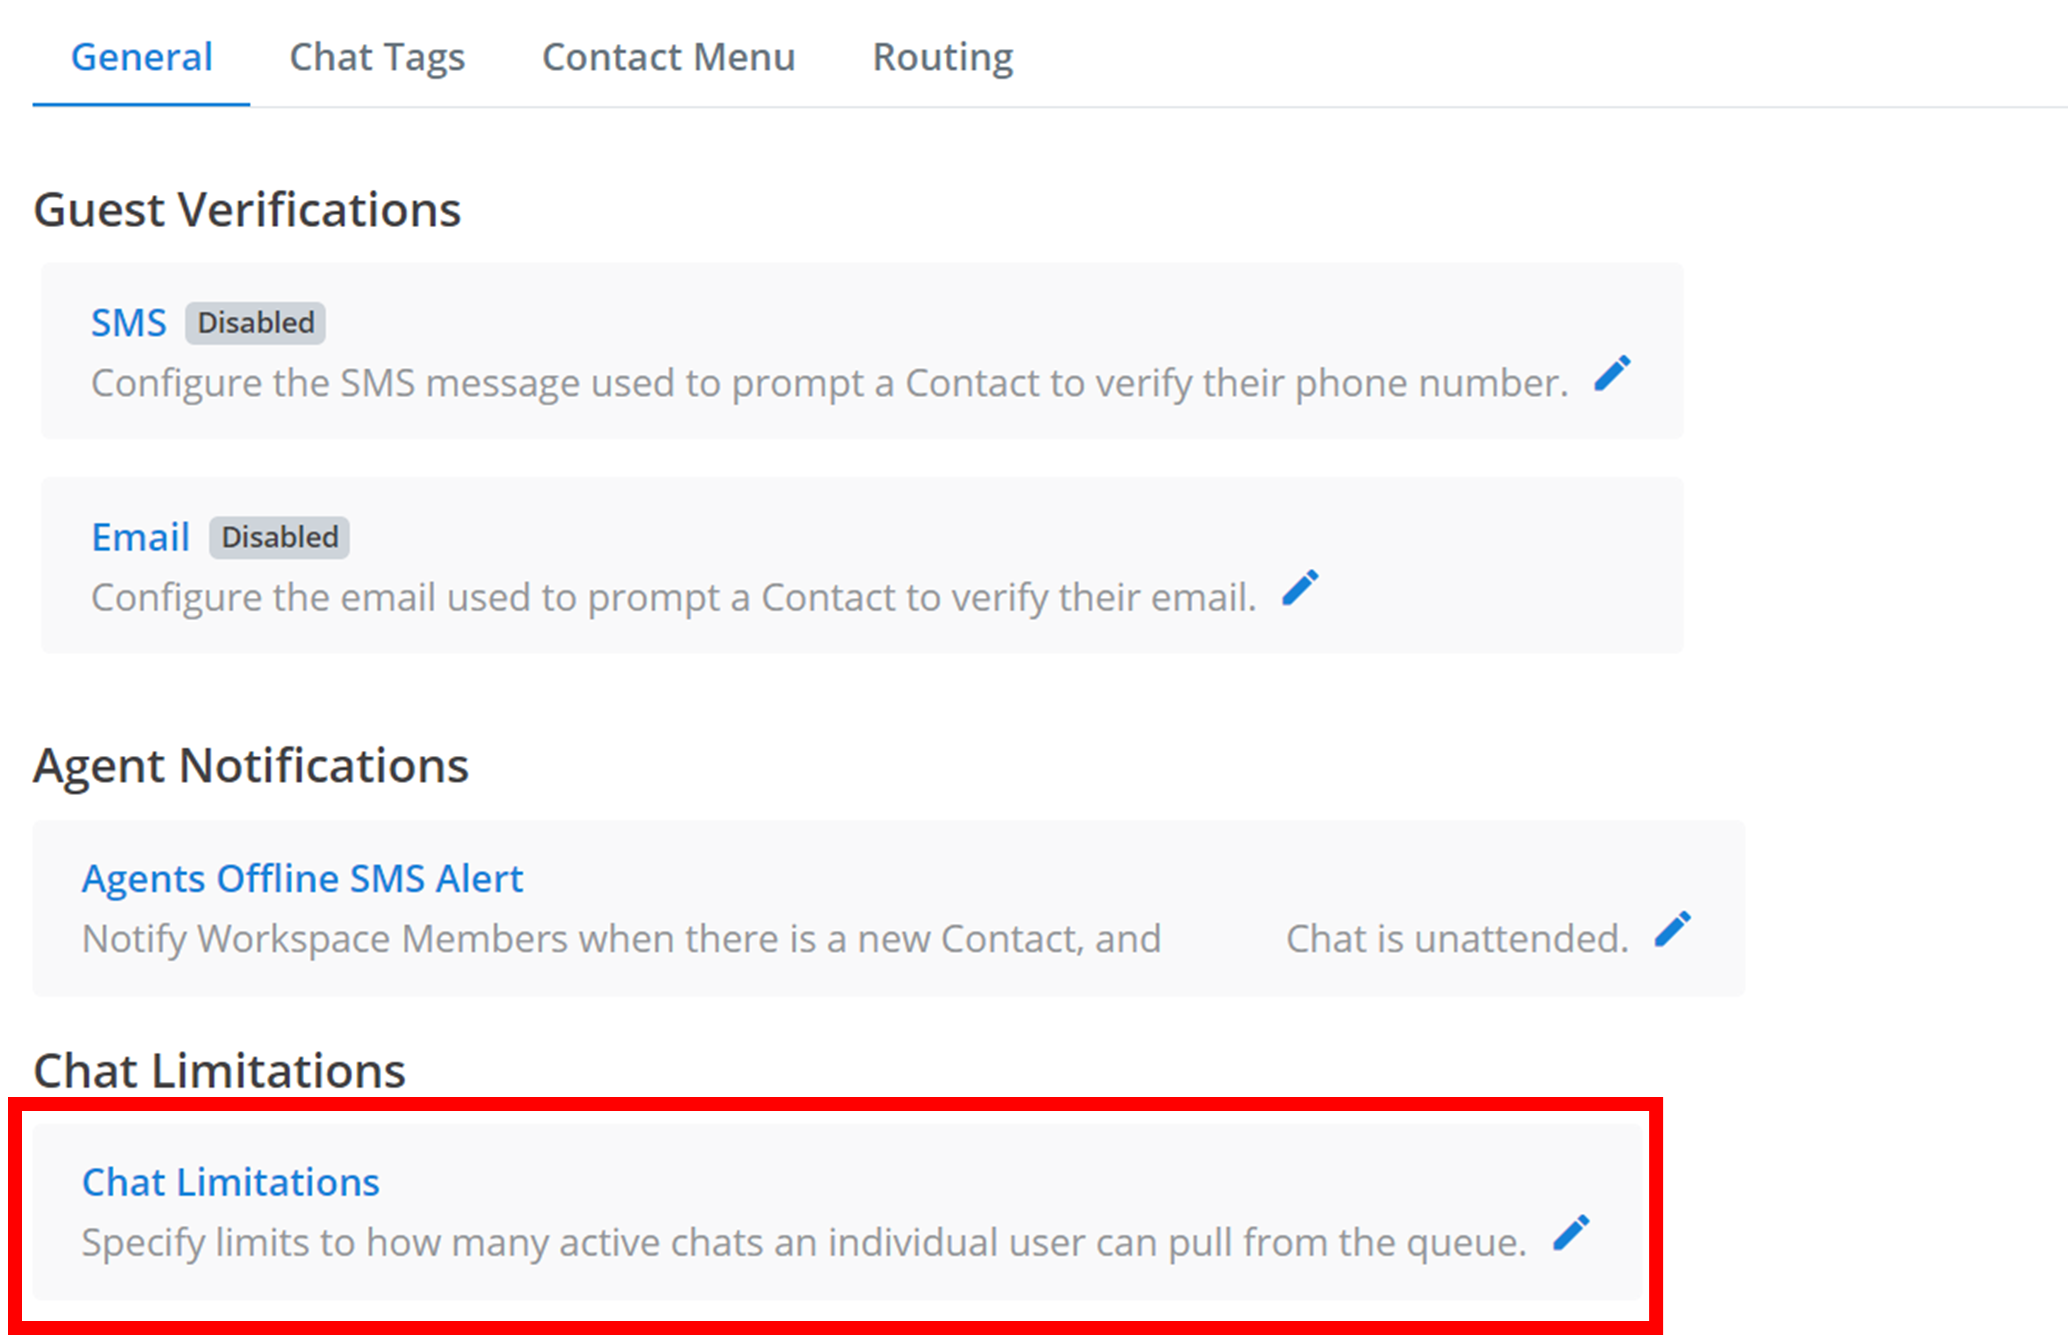
Chat Limitations
You can choose to configure a maximum number of Active Chats for agents to have running at the same time.
Open Settings
To configure these chat limitatoins, click on the setting outlined below.
Configure Limits
A small menu will appear like the one below. Maximums are optimal for every category. You can choose to specify a maximum number of total active chats an agent can have, and/or you can specify a maximum number of each type of active chat (Web, SMS, Email).
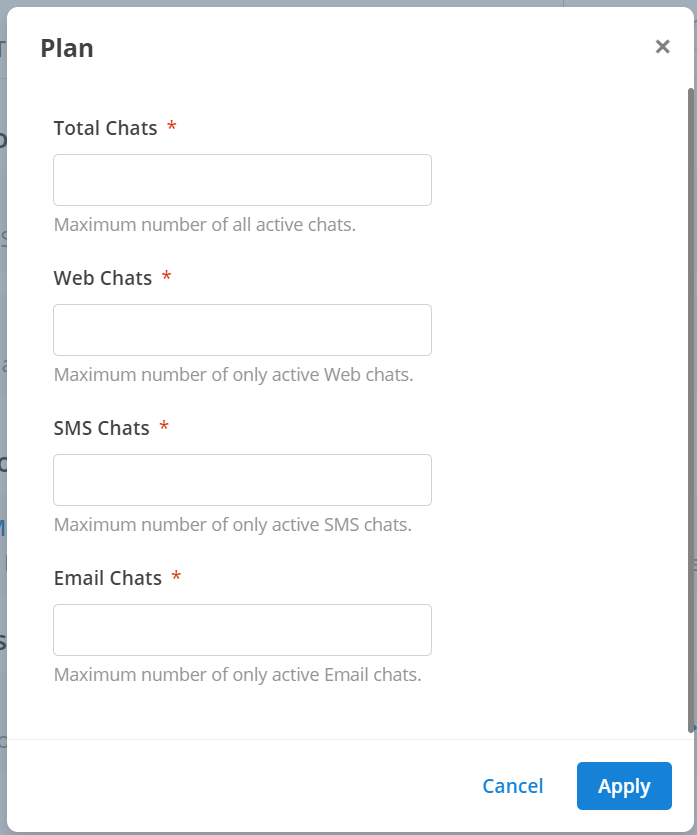
Apply
To save and apply the new setting, click Apply.
Chat Tags
Create
Chat tags are used to record and document the outcomes of various chat sessions. Read more about the use of chat tags here.
Start Creation
To create a new chat tag, click the + Chat Tag button.

Configure Tag
Next, a small menu will appear where you can create the new chat tag. Enter the name of the new tag in the text box outlined below. You can enable/disable this chat tag from being active in the workspace by toggling the 'Enable Tag' button.
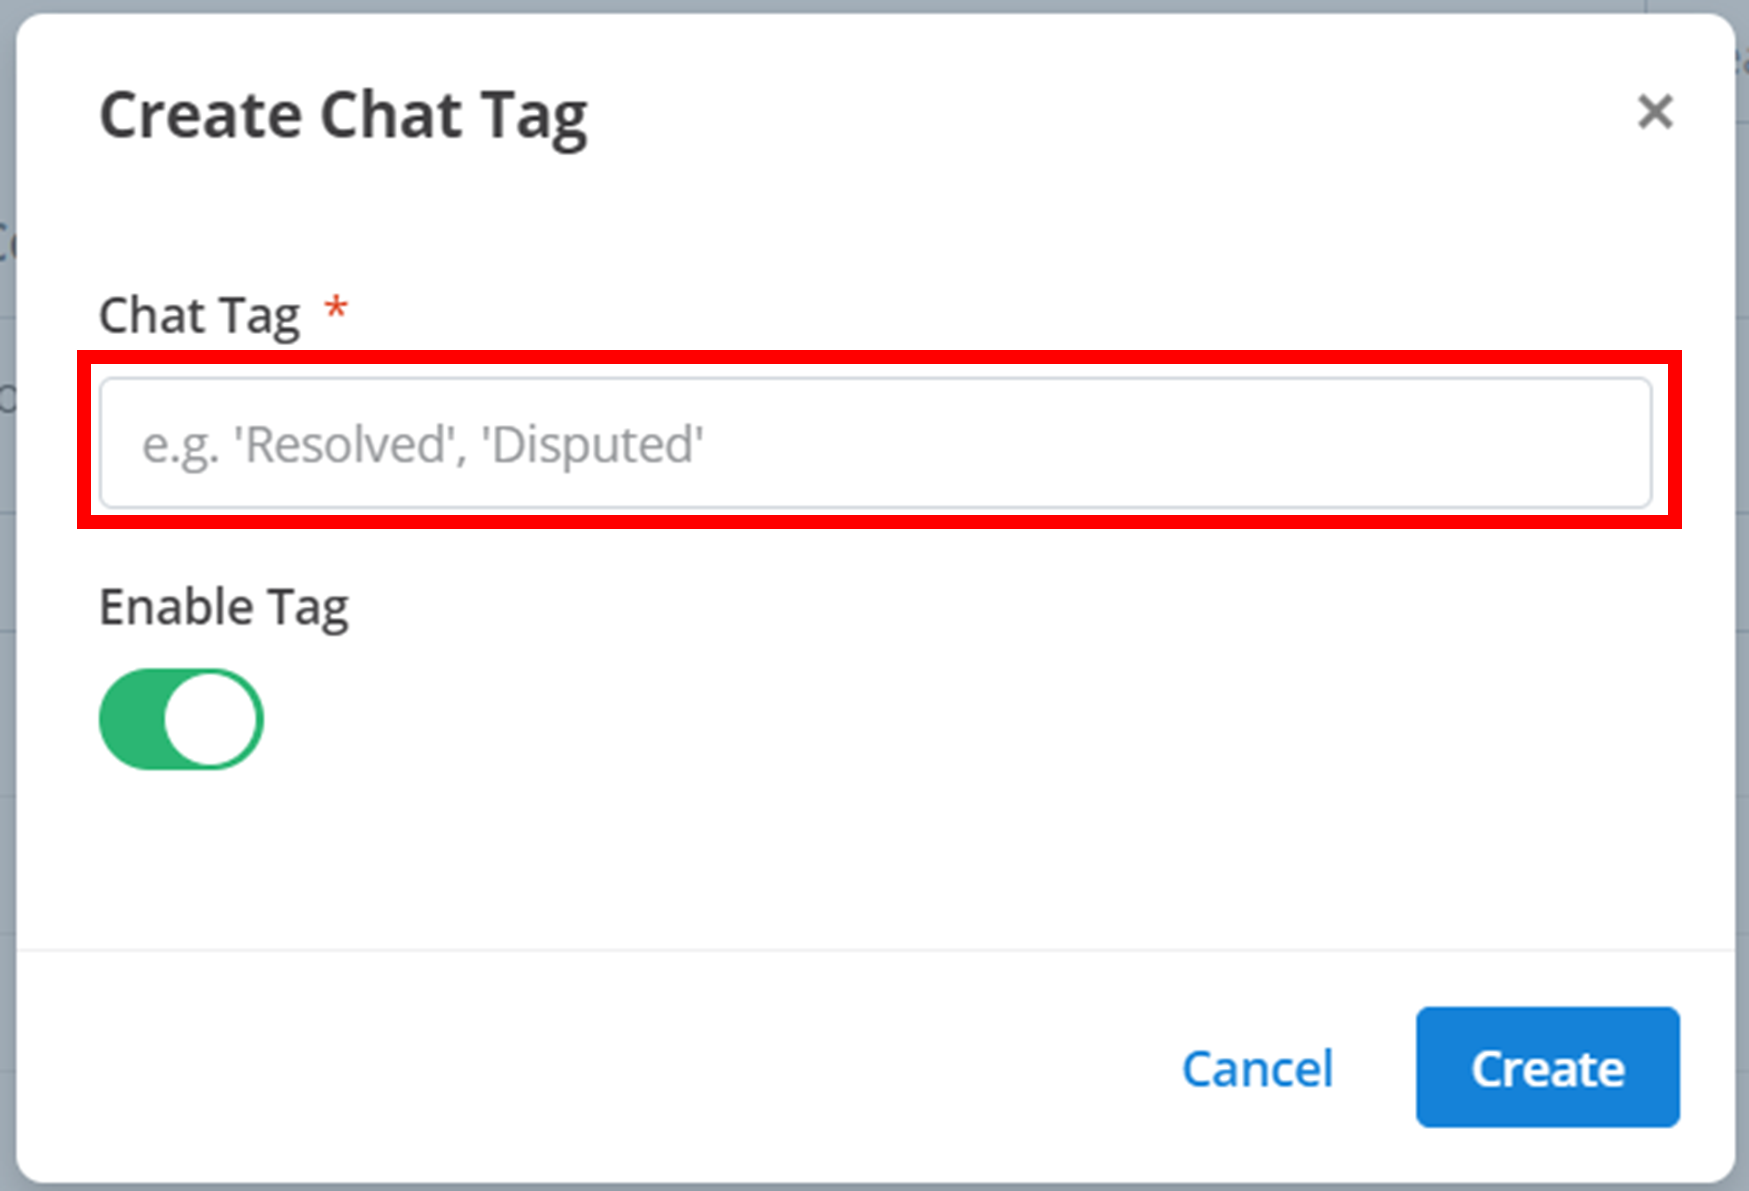
Create
Then, to add the chat tag to the workspace, click Create.
Remember
Chat tags are used to indicate outcomes of a conversation. For example, if a problem was solved during the conversation, then 'Resolved' would be an appropriate tag.
Manage
All of your chat tags will appear here:
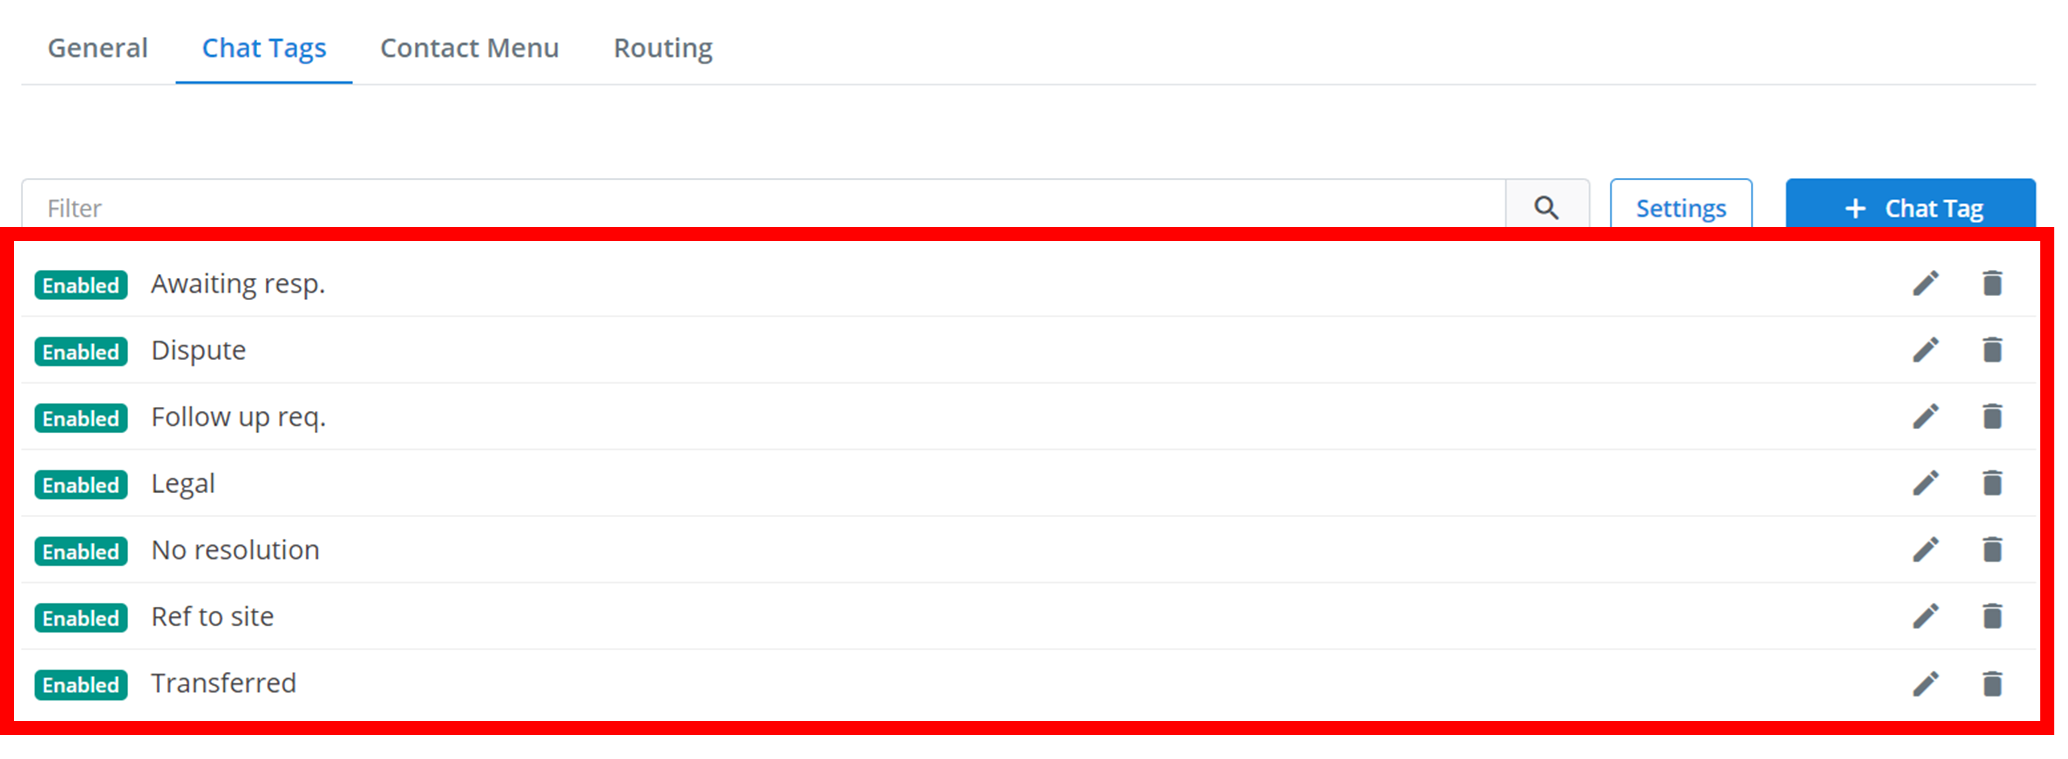
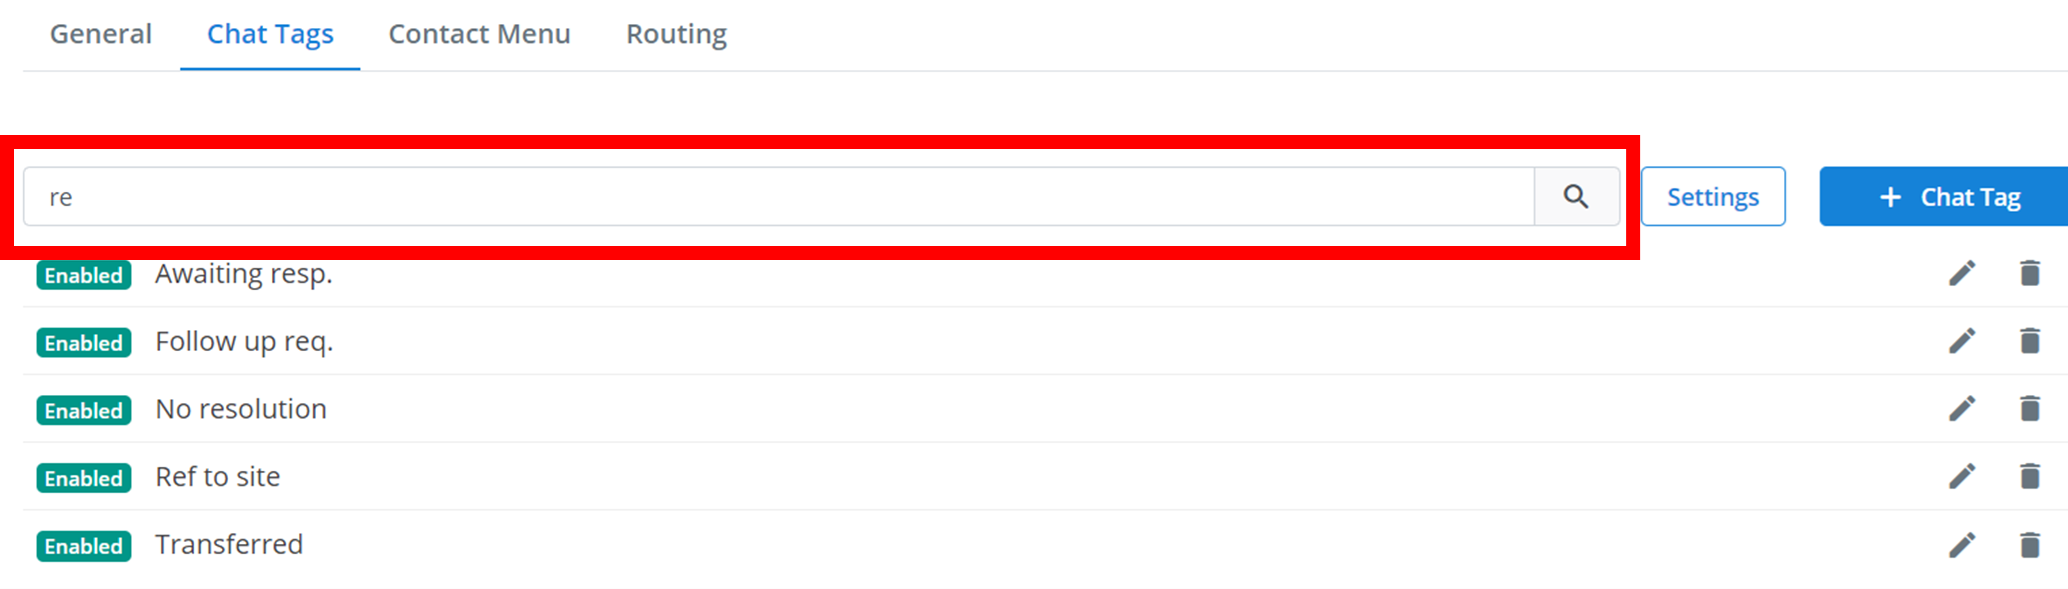
Filter
To search through your chat tags, type into the 'Filter' (outlined below). Only the chat tags that have the searched text in their name will appear. In the below example, only the five chat tags that appear have 're' in either their title or message.
Actions
To edit any of the chat tags, click on the pencil icon. To delete a chat tag, click on the trash icon and then click 'Confirm'.

Settings
Open Settings
To configure the minimum and maximum required chat tags on a concluded session, click on the Settings button.

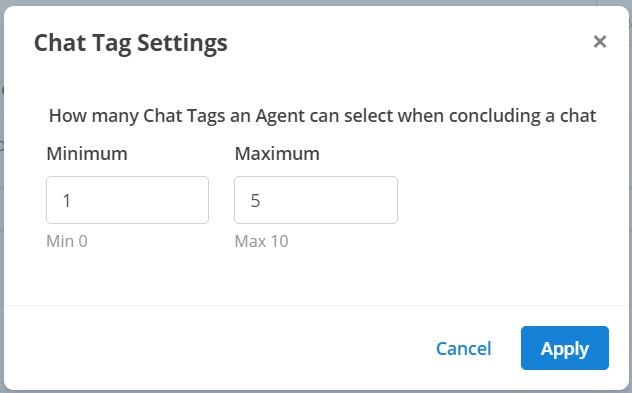
Configure Limits
This will bring up a small menu like the one below. 'Minimum' is the smallest number of chat tags needed on a concluded chat, and 'Maximum' is the largest number.
Apply
Finally, to apply the settings to the workspace, click Apply.
Contact Menu
Changing the Order
In the Message2Give Chat, there is information stored about every customer. In the Message2Give Chat, this information is listed under Details. The information that is stored there can be configured under Contact Attributes.
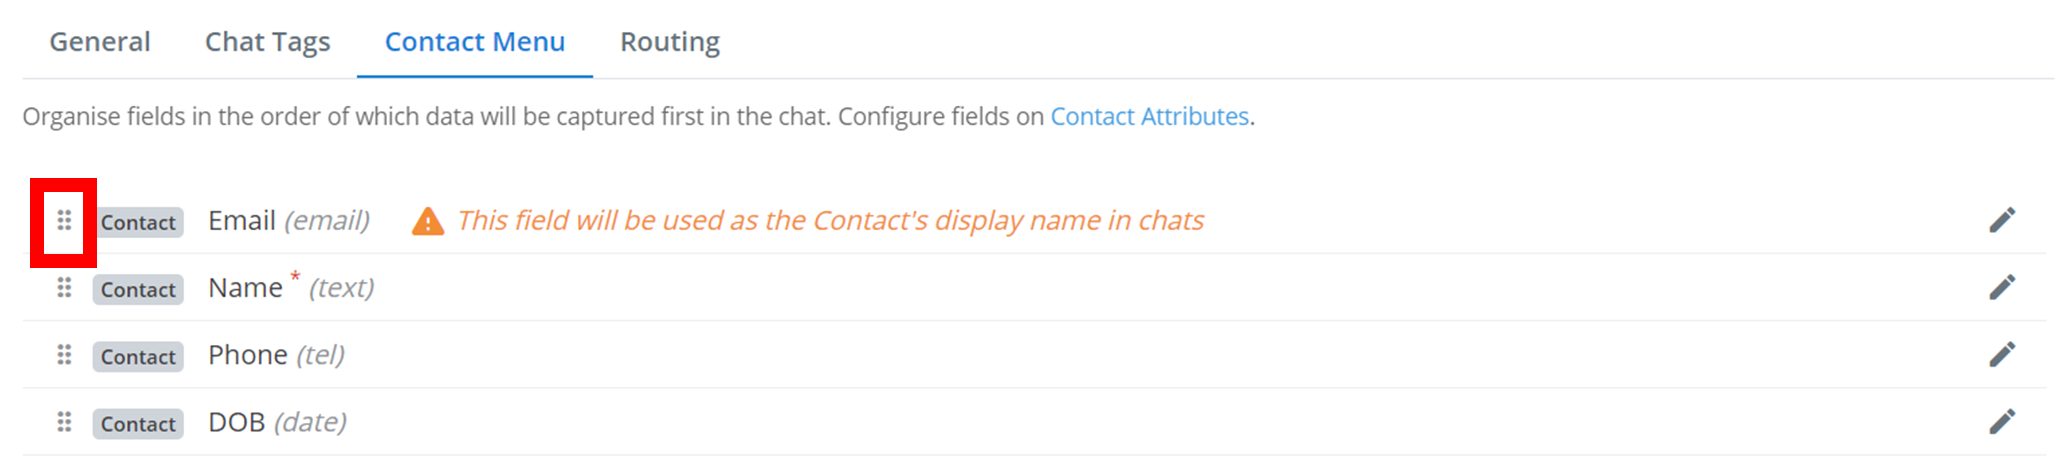
You can change the order in which customer information appears in the Details section here. All of your workspace's registered Contact Attributes will be listed. They will also be listed in the order that they appear in the Chat Details section.
Reorder Attributes
To change this order, hover over the six dots ⠿ (outlined below) and then drag and drop the contact attribute to the new desired spot. The first contact attribute in the order will be the display name of the chat.
Save Order
Then, to confirm this new order, click the Save Order button that will appear on the bottom.
Updating Attributes
You can modify certain properties of each attribute as well, such as where they appear and if they are editable.
Edit Attribute
To modify an attribute, click on the pencil icon to the right of its name:

Configure Properties
This will bring up a small menu where you can configure the properties of the attribute:
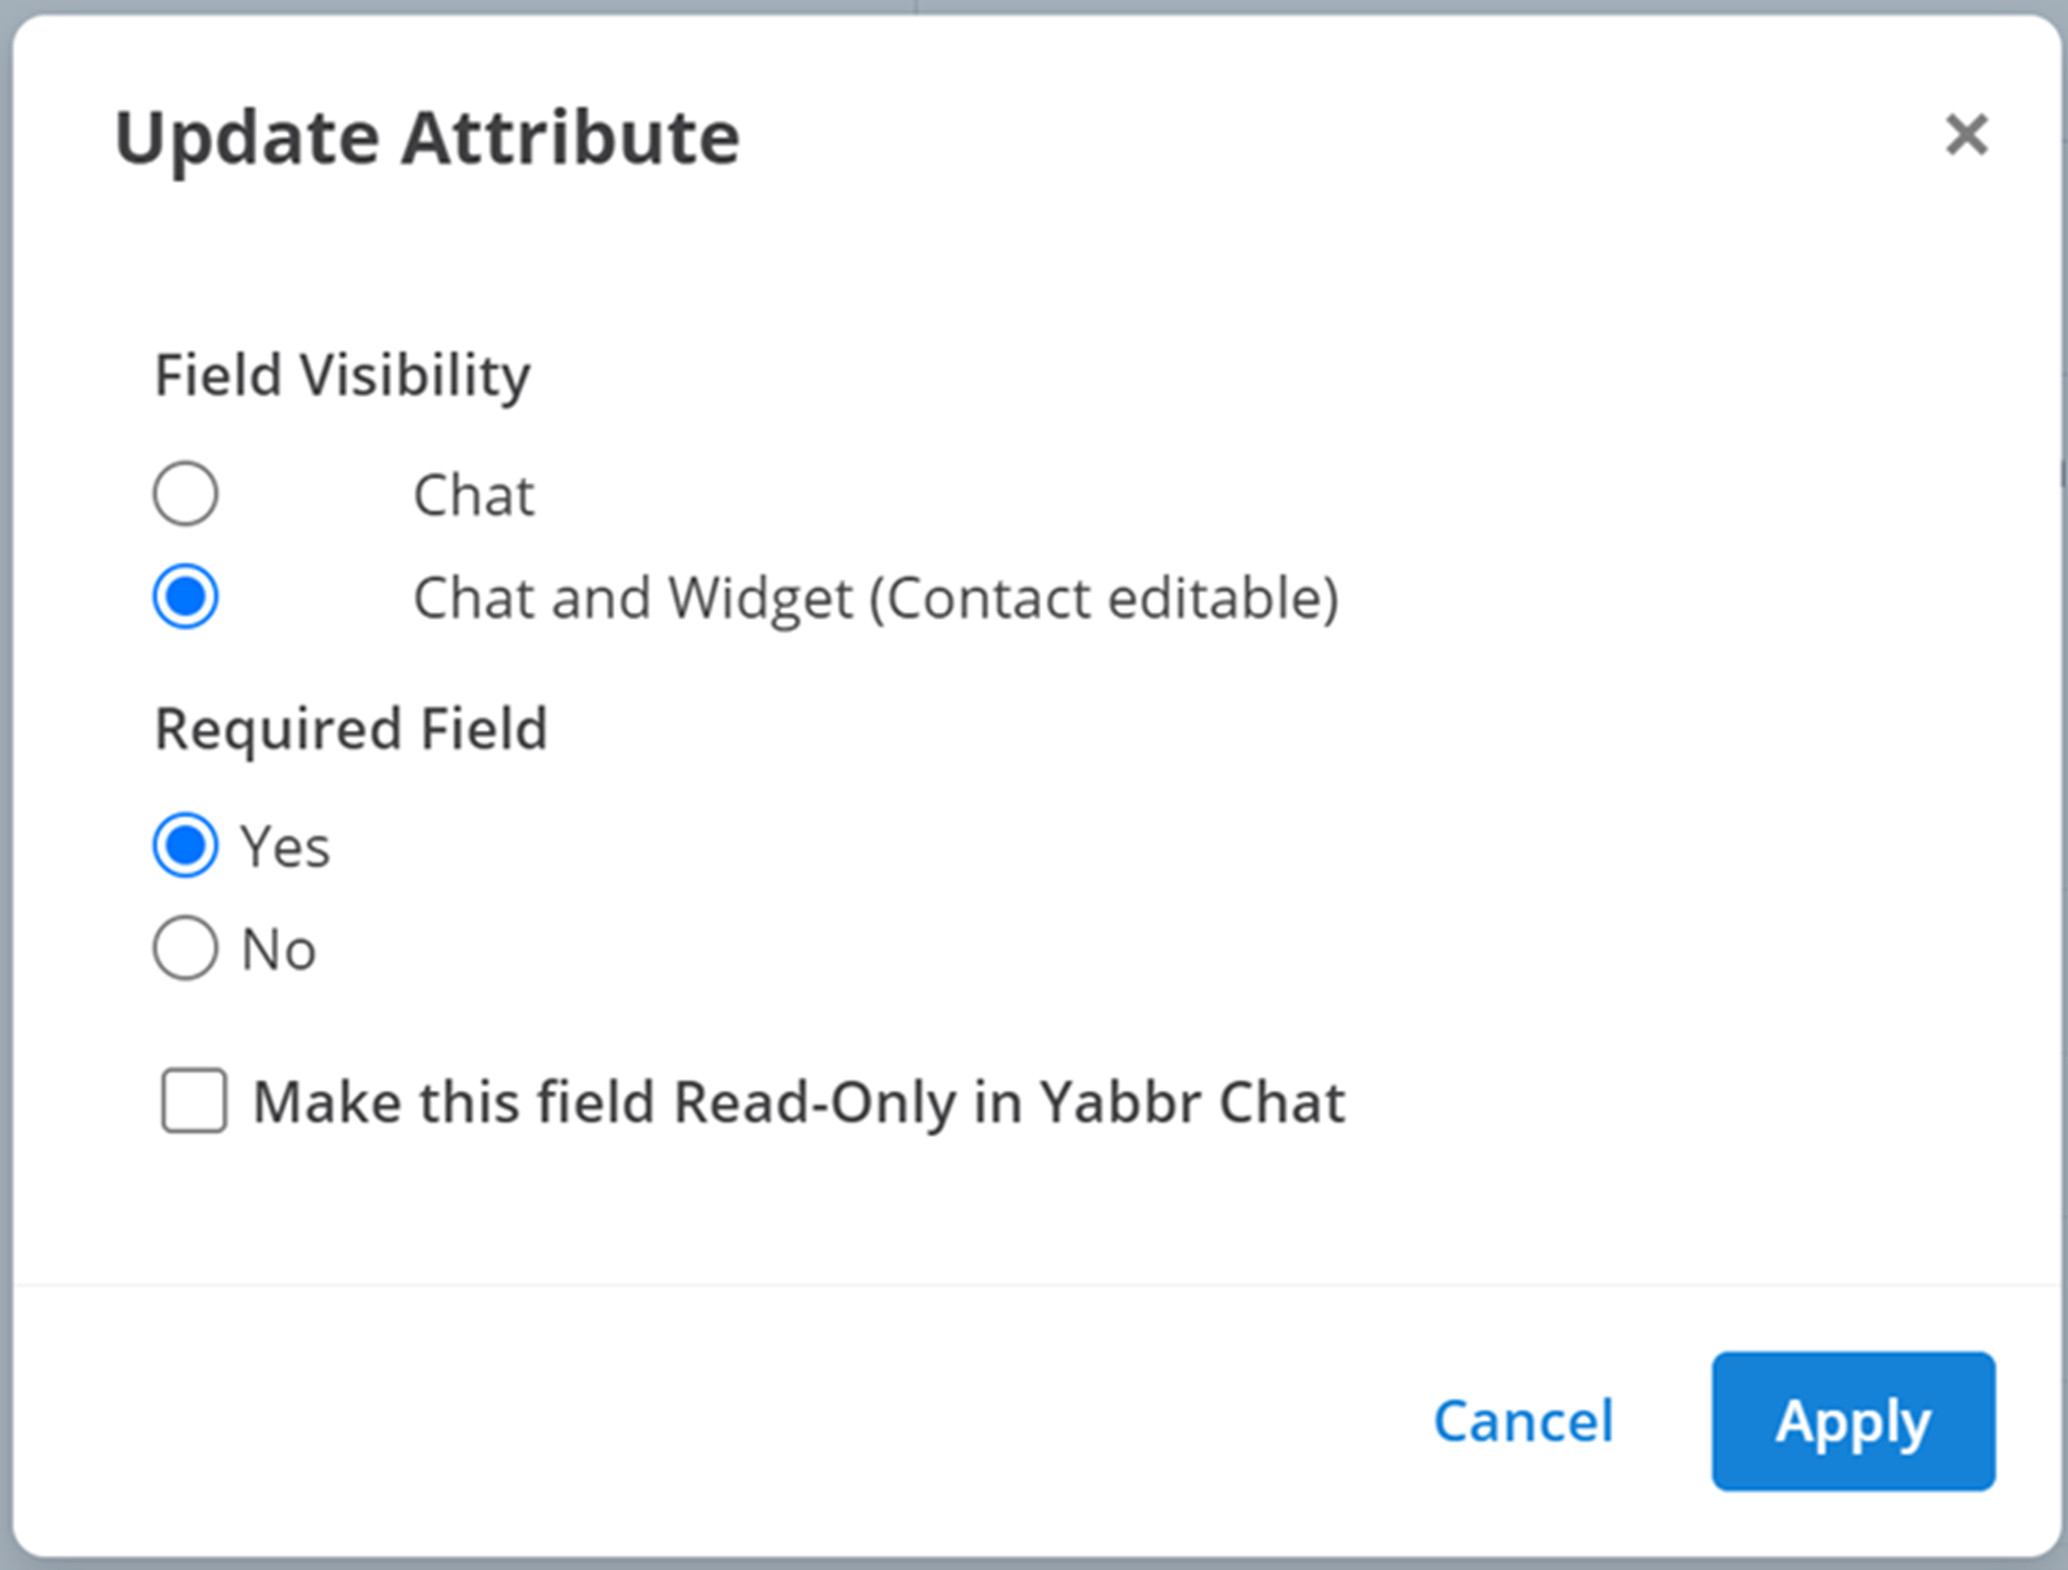
- Field Visibility: where the contact attribute will appear. If it appears in Widget, then it will be editable by default.
- Required Field: does the attribute have to be filled for the contact to be valid?
- Make this field Read-Only in Message2Give Chat: enabling this will disable the editing of this contact attribute in Message2Give Chat.
Routing
Using routing, you can automatically isolate a customer to a group of agents if a set of conditions are met. Read more about groups here.
If an agent belongs to a group, and a customer is routed to that group, then the customer's contact will then appear in a new queue for that agent. The name of this new queue will be the name of the route's assigned group.
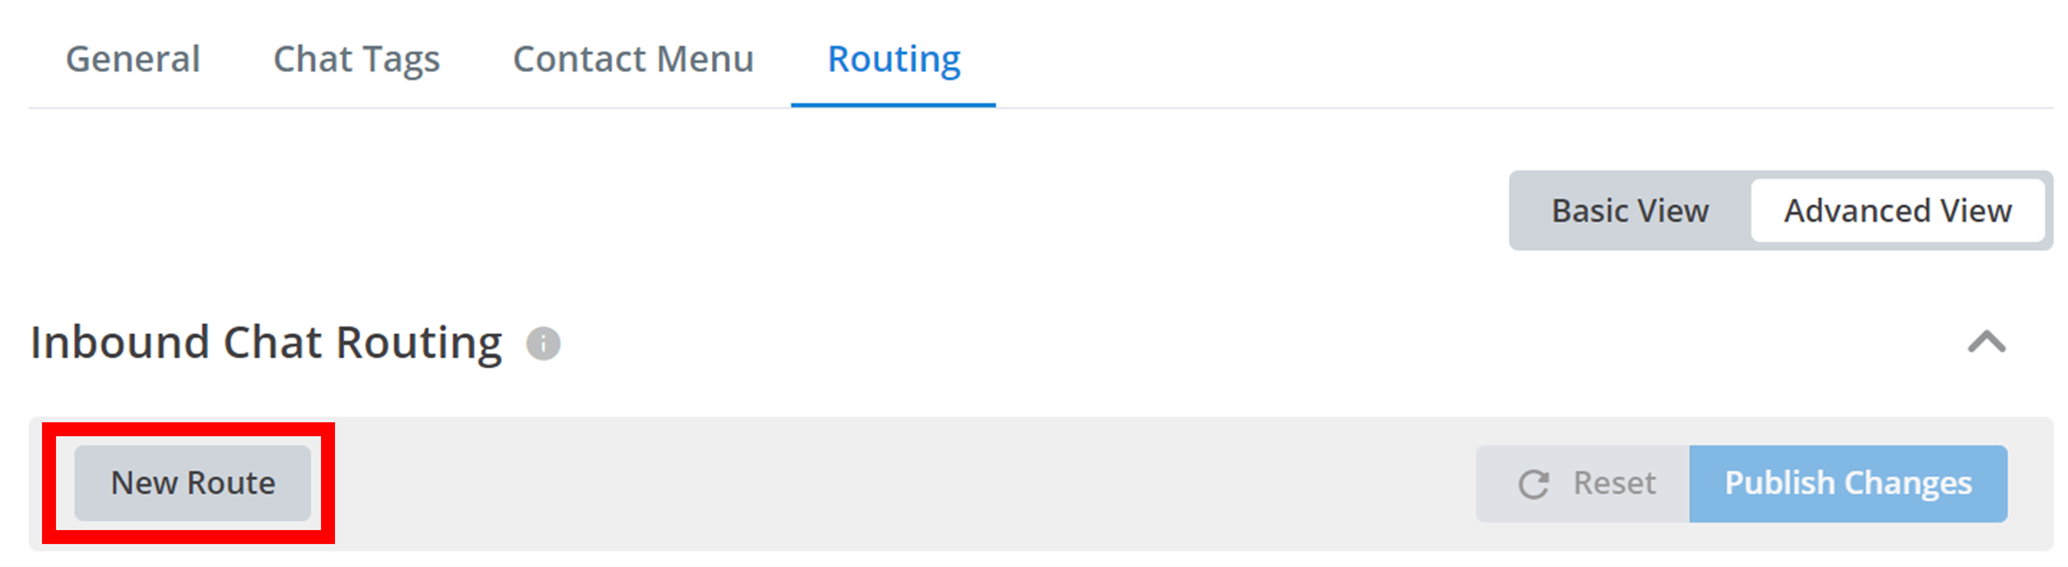
This documentation will be referring to the 'Advanced View' of the Routing outlined and selected below:

Routes
The first step is to create a route. A route consists of a group, and a set of rules. If a customer appears in the Message2Give Chat queue, and they adequately meet all of the rules of a route, then they will activate the route. When a customer activates a route, their contact is automatically redirected to a new queue for all the agents in the group.
Creating a Route
Start Creation
To create a new route, click on the New Route button under 'Inbound Chat Routing' and outlined below.
Configure Route
Clicking this button will bring up a small menu like the one below:

- Route Name: the display name of the route to identify it within your workspace.
- Assigned Group: the group that will receive the customer's contact.
- Enable Route: enable/disable the functionality of the route.
Create
Finally, to create the new route, click Create.
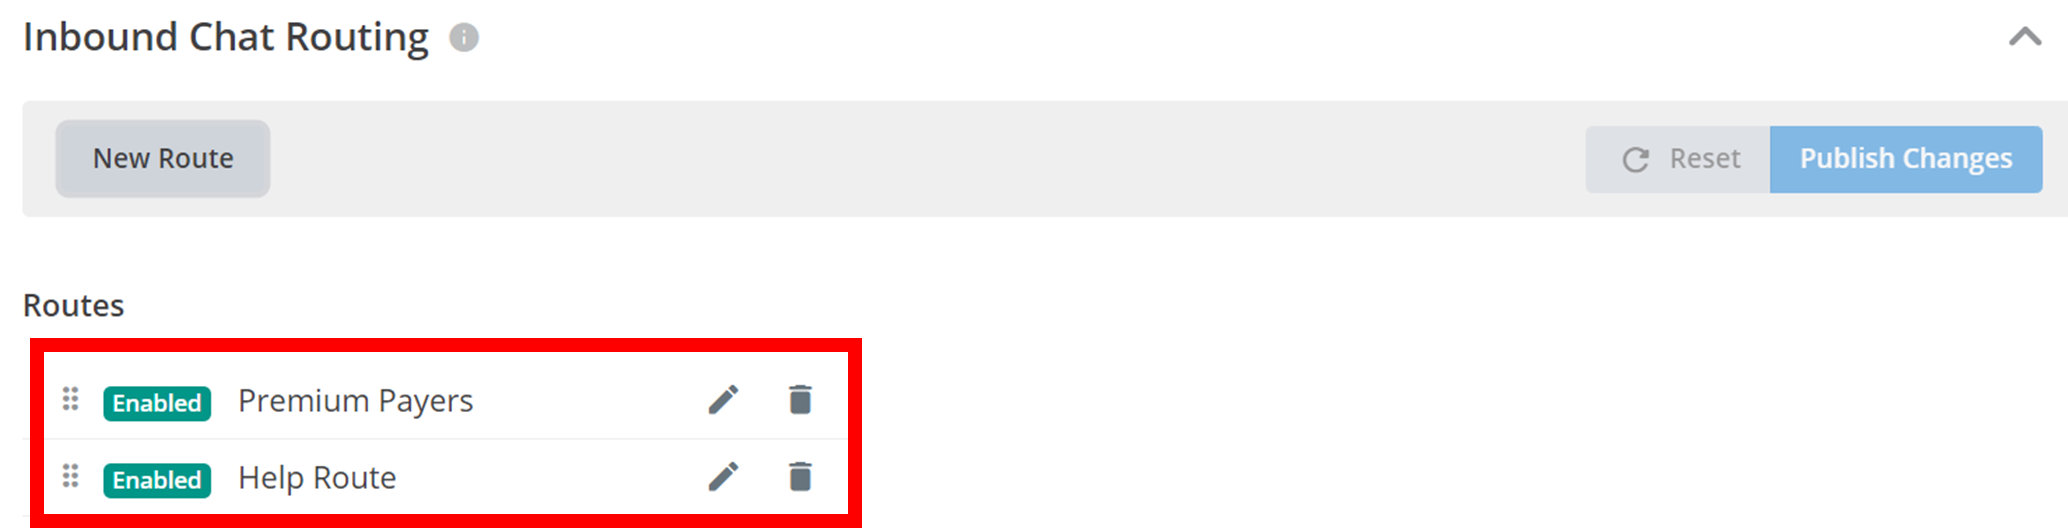
Managing Routes
All of your routes that you have created will appear here:
Applying Rules
As mentioned earlier, each route has a set of rules. When these rules are met, the route is activated. Read more about rules here. Below is what the rule configuration menu looks like.

Select Route
To configure the rules in a route select a route by clicking on it.
Add Rule
Add a rule to the route by clicking on one in the the 'Rules' section.
Remove Rule
Remove a rule from the route by clicking on it in the 'Assigned Rules' section.
You can search the rules by name by typing the name of the rule in the 'Filter' text box.
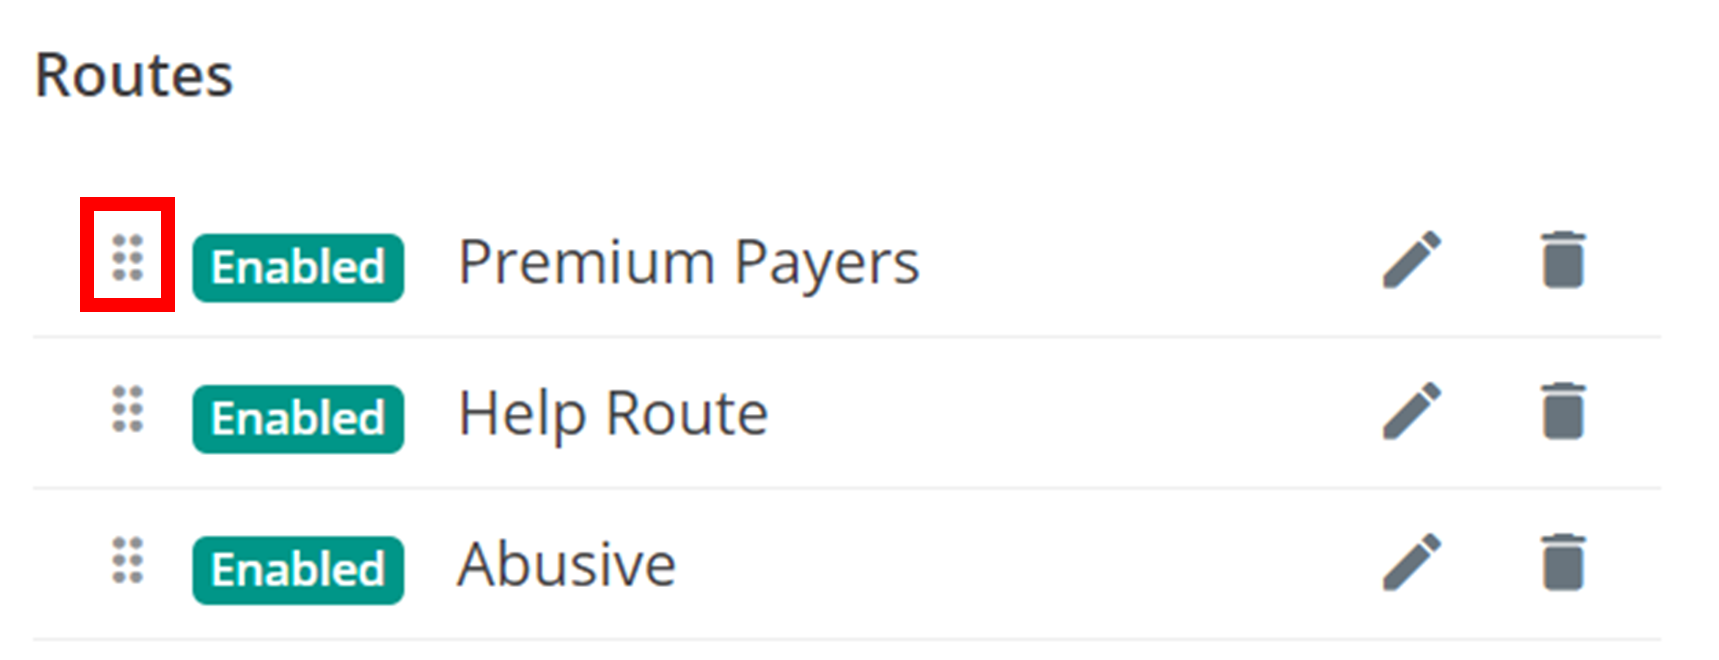
Ordering Routes
Routes that appears higher up in this list will have higher priority than routes beneath it. Routes with higher priority will be activated first. For example, if a customer's contact meets the rules for two different routes, then the route with higher priority will be activated. You can reorganise this order by holding down the six dots ⠿ (outlined below) and dragging and dropping each route into the new desired location.
Actions
You can edit a route by clicking the pencil icon, and you can delete a route by clicking the trash icon.

Saving Changes
You need to save any changes made to your routes (this includes adding new routes and modifying old routes). You can do this by clicking the Publish Changes button outlined below.

Rules
As previously mentioned, a customer will activate a route and be redirected to a new queue if a set of rules is met. These rules can be about the customer's details (name, date of birth etc), or a message that they have sent to a registered contact in your workspace.
Creating a Rule
Start Creation
Firstly to create a new rule, click the New Rule button underneath 'Routing Rules' and outlined below. Then, select the type of rule you want to create:
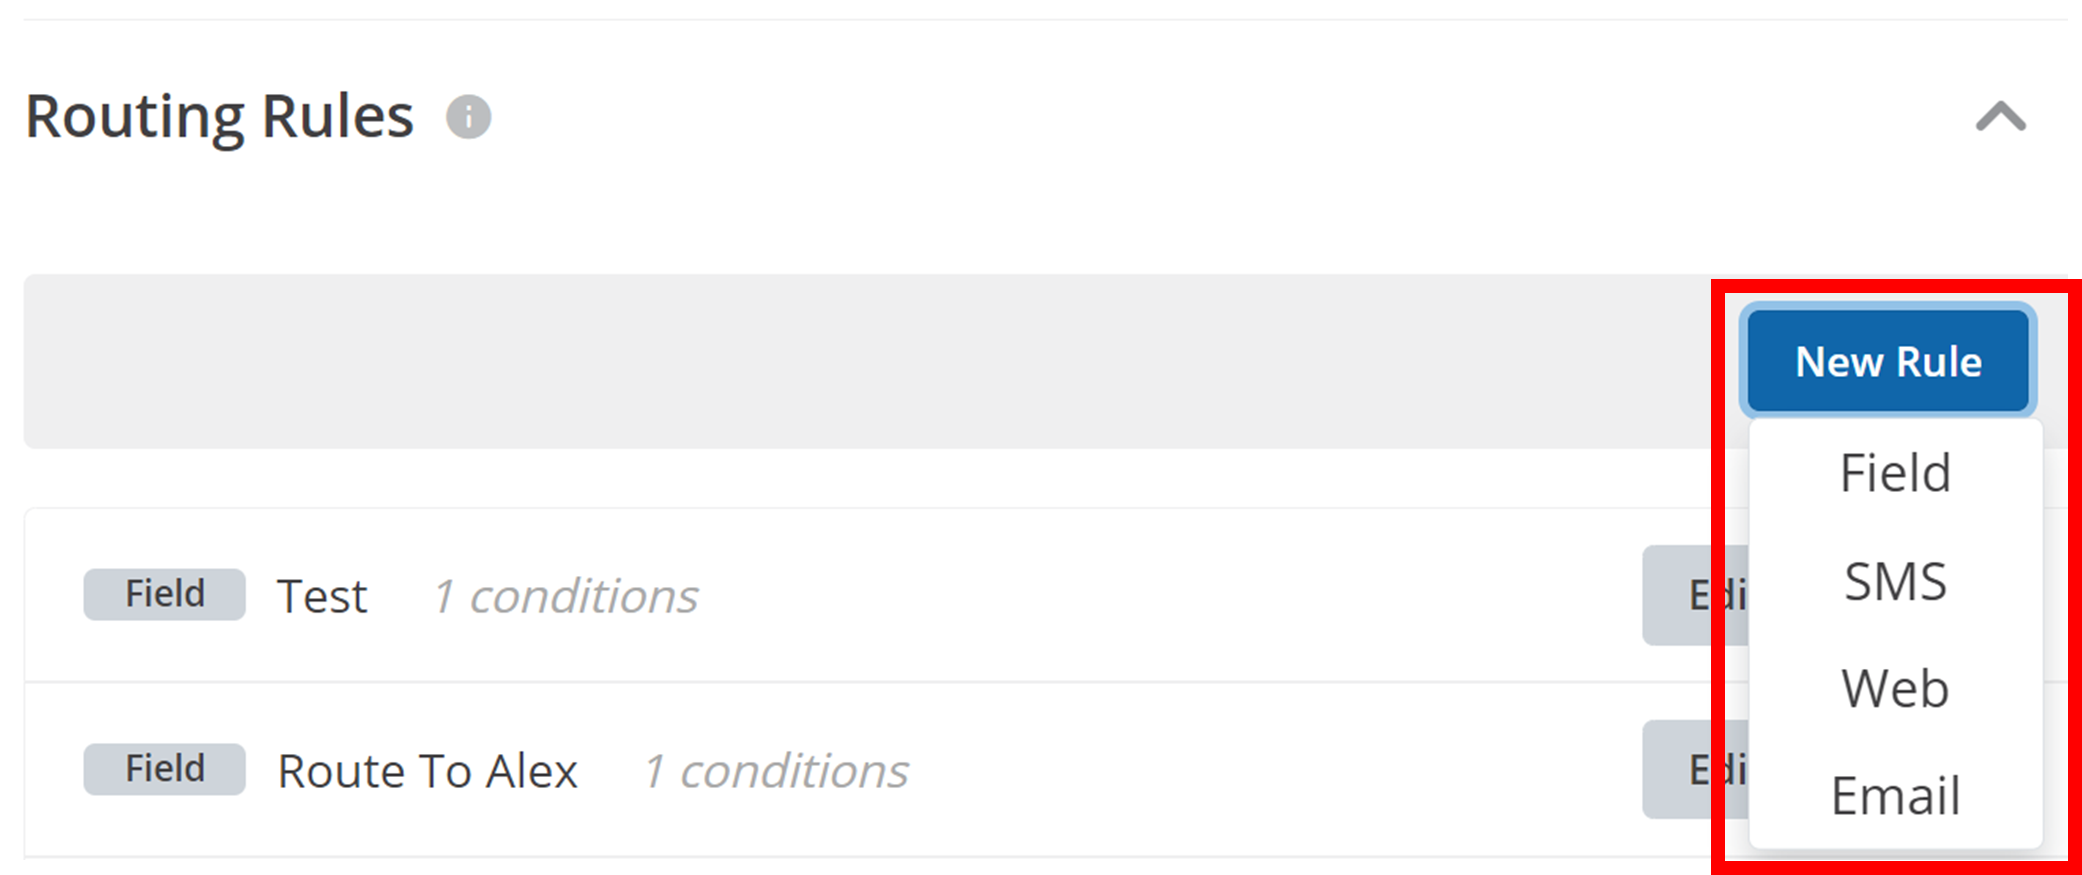
- Field: checks the contact attributes of the customer (eg name and date of birth).
- SMS: checks the details of a customer's SMS message.
- Web: checks the details of a customer's Web message.
- Email: checks the details of a customer's Email.
Configure Rule
After selecting a rule type, a small menu will appear like the one below:
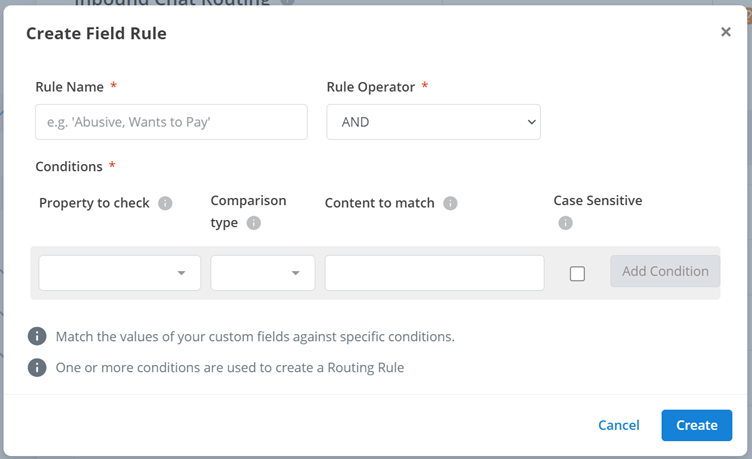
Rule Properties:
- Rule Name: the display name of the rule. This is used to identify the rule within the workspace.
- Rule Operator: you can have multiple conditions for one rule. Selecting 'OR' means at least one of the conditions has to be satisfied for the whole rule to be satisfied. Selecting 'AND' means all of the conditions must be satisfied for the whole rule to be satisfied.
Condition Properties: A condition compares two values - a property and a value. The value is fixed. If the customer's property (eg name, contact number, message content) meets a specific criteria, then the condition is satisfied.
- Property to check: this refers to the specific customer attribute or characteristic being evaluated by the condition. For example, it could be the customer's name, contact number, or the content of their message.
- Comparison type: this indicates how the property is being compared to the 'Content to match'. For instance, 'includes' would mean that the 'Content to match' appears somewhere within the 'Property to check'.
- Content to match: this is what the 'Property to check' is compared against.
- Case sensitive: enabling this will make the comparison case sensitive - this means that two strings are not identical if they have different capitalisations.
- Add Condition: This will add the condition to the rule.
Create
Finally, to add the new rule, click Create.
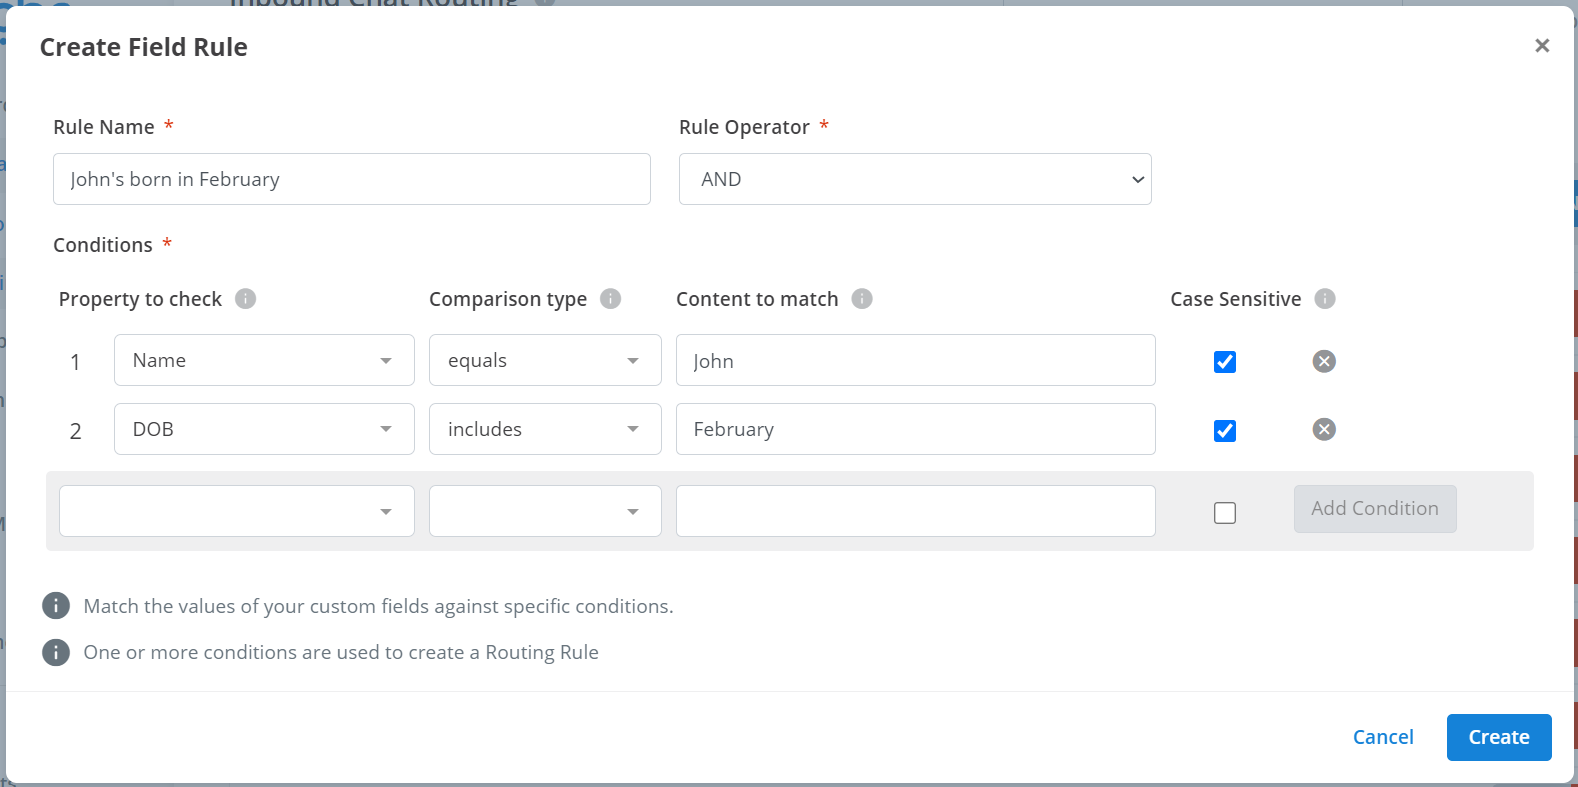
Note
You can edit a rule after it has been added. You can also remove a rule by clicking the 'X' on its right.
In the below example, the rule is satisfied when: The customer's name is exactly John AND the customer's birthday is in February.
Managing Rules
All of your rules that you have created will appear here:
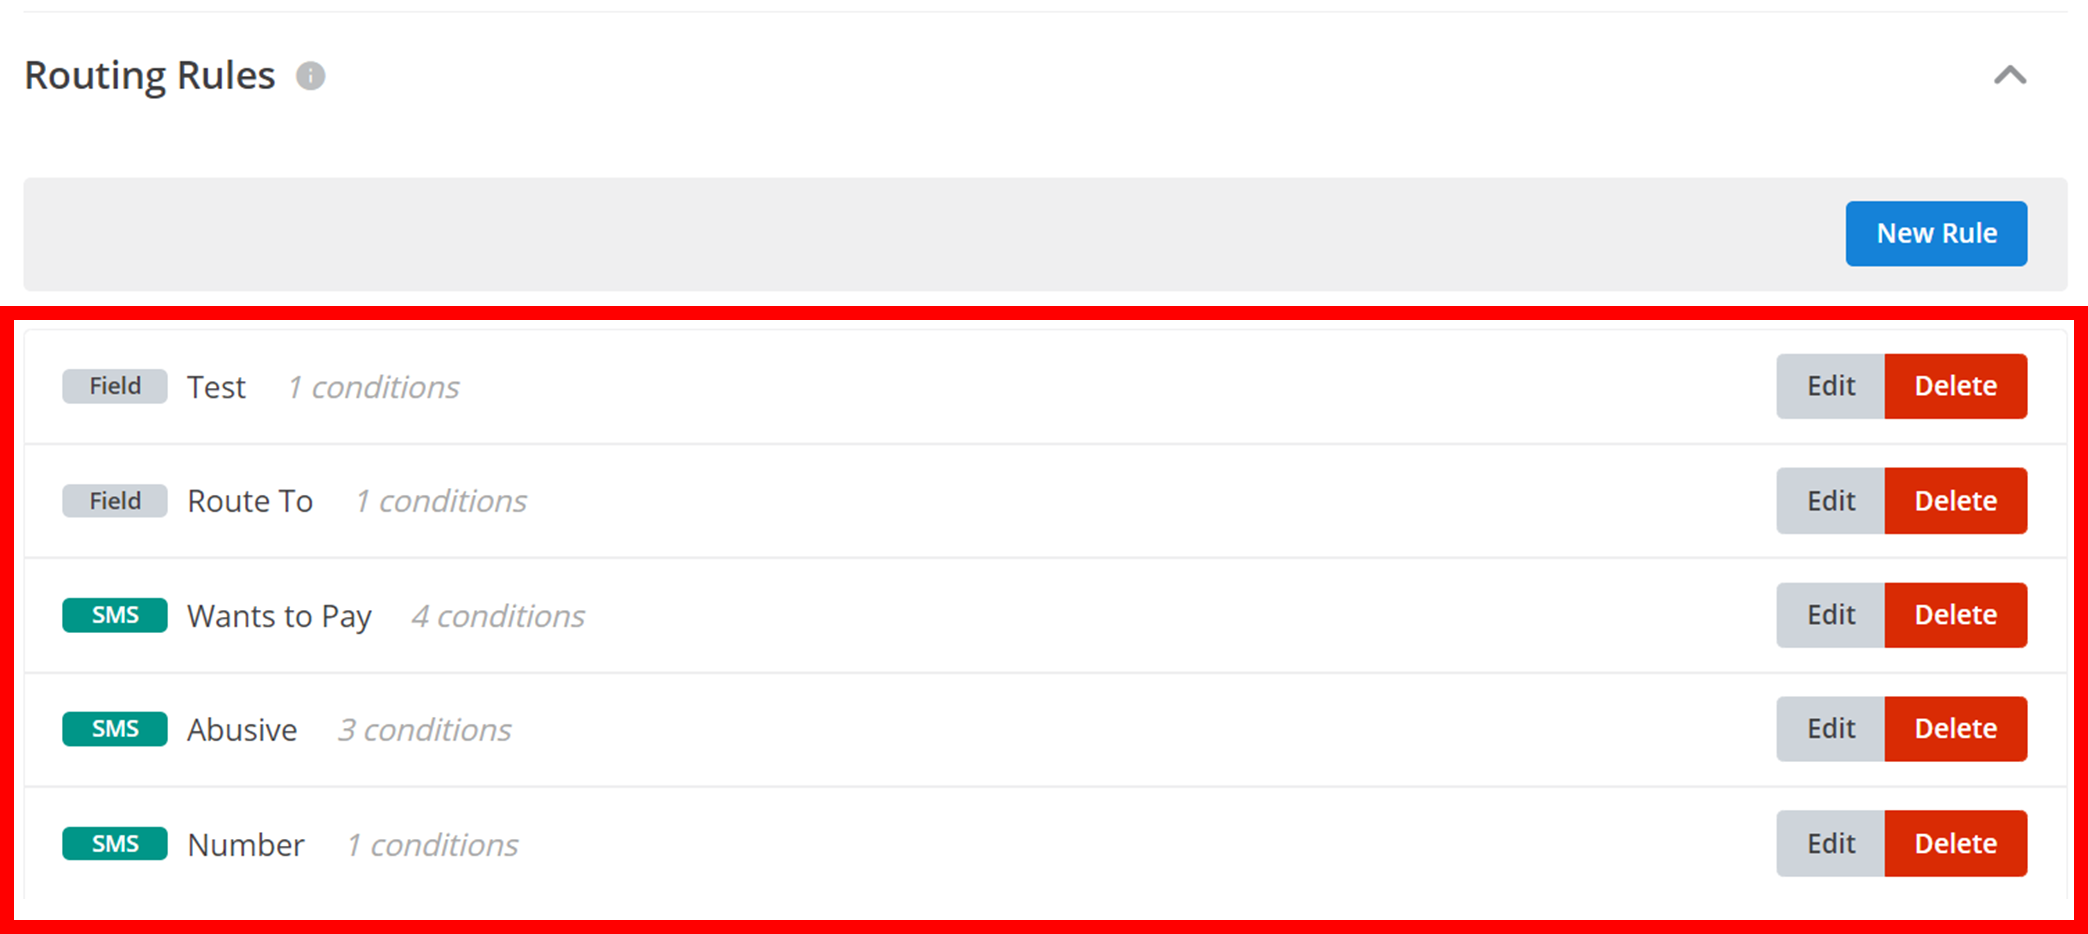
You can edit a rule by clicking the Edit button, and you can delete a rule by clicking the Delete button.
How is this guide?