Opt-Out Lists
Message2Give includes a flexible system for managing opt-out requirements across all supported communication channels. Opt-Out Lists can be used in Campaigns to automatically manage recipients who opt out of further messaging, along with granular management via Message2Give Chat Actions in the Chat Console.
Setup
To access the Opt-Out Lists section in your workspace:
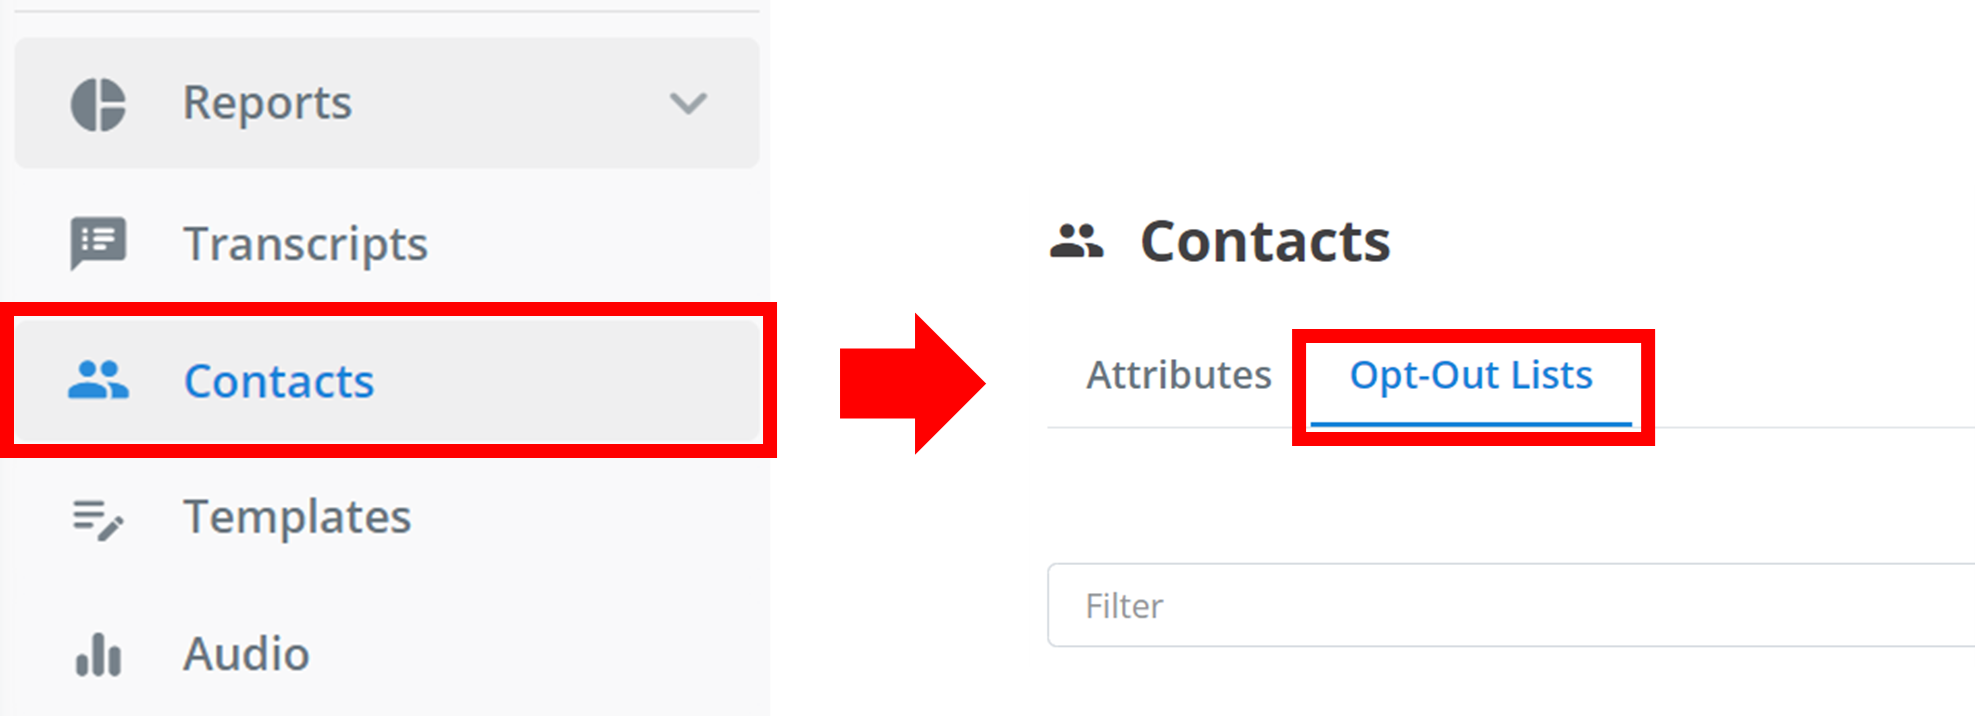
Navigate to Contacts
Navigate to Contacts in the left sidebar.
Open Opt-Out Lists
Click the Opt-Out Lists tab at the top of the page.
Create
To create a new Opt-Out List, click + Attribute.

Configure
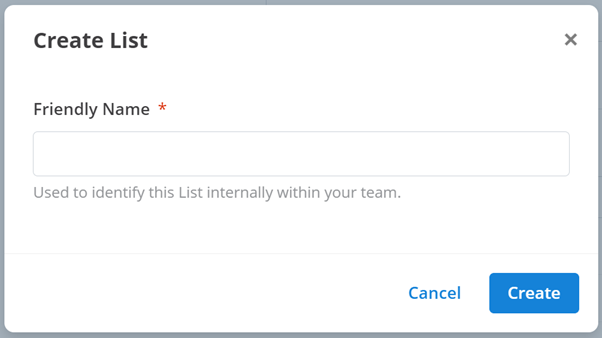
A configuration menu will appear as shown below:
To create a new opt-out list:
Name the List
Enter a name for your Opt-Out List under Friendly Name to identify it within your workspace.
Create List
Click Create.
Management
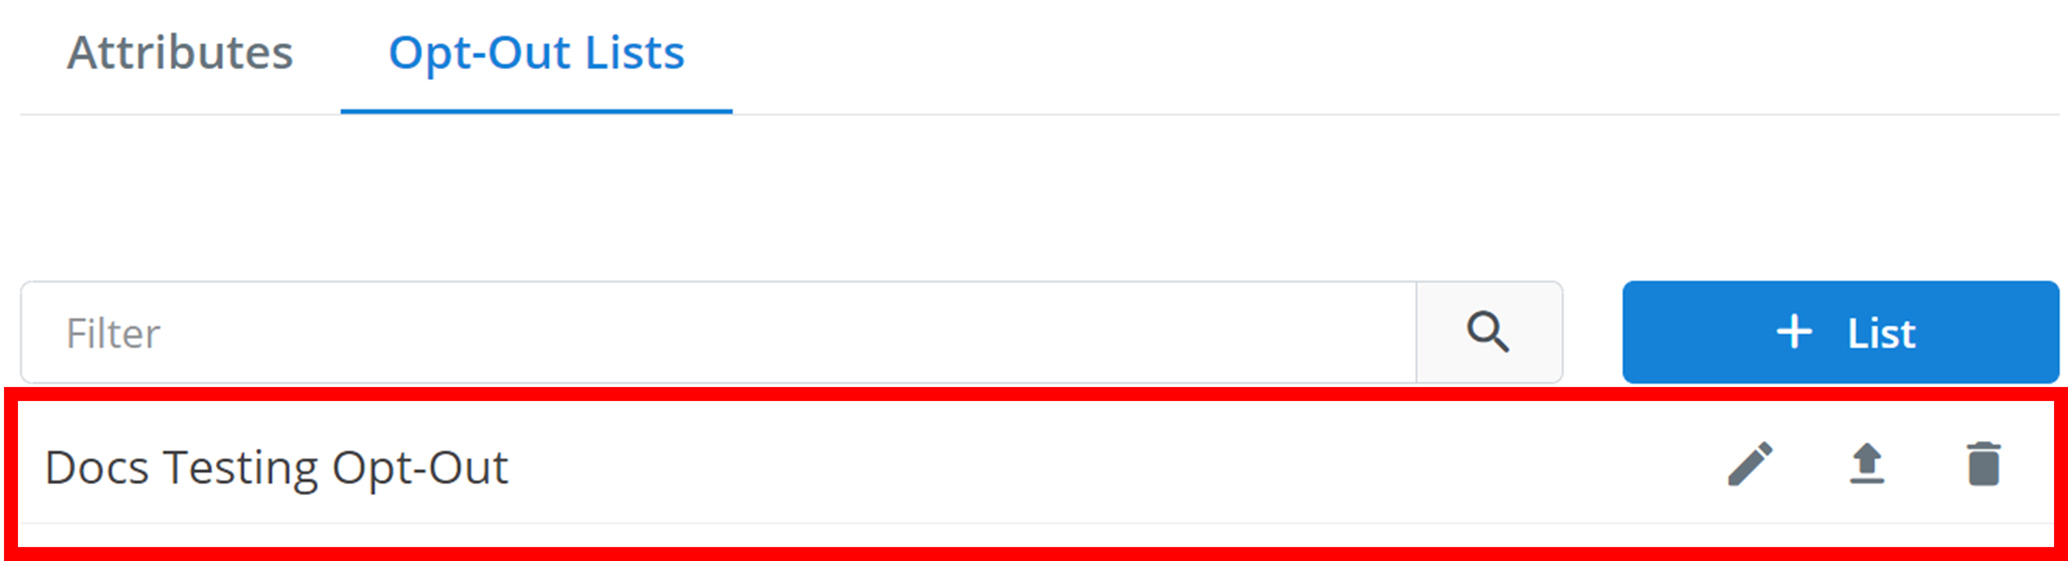
All workspace Opt-Out Lists are displayed here:
Tip
You can search the Opt-Out Lists by name using the Filter text box.
To edit an opt-out list and add/remove contacts, click the pencil icon. To add/remove multiple contacts at once, click the upload button. To delete an opt-out list, click the trash icon:

Edit
Clicking the pencil icon opens the following menu:
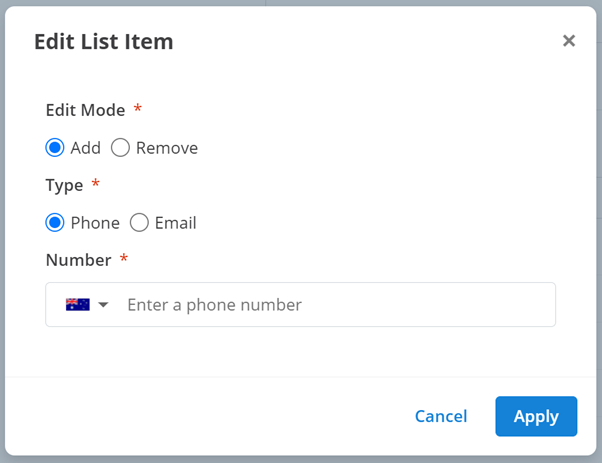
To add/remove a contact:
Select whether you are adding or removing a contact.
Select the contact type (email address or phone number).
Enter the contact information.
Click Apply.
Bulk Edit
Clicking the upload icon opens your file explorer. Select a CSV file containing the contacts you want to add/remove from the list. This opens the following menu:
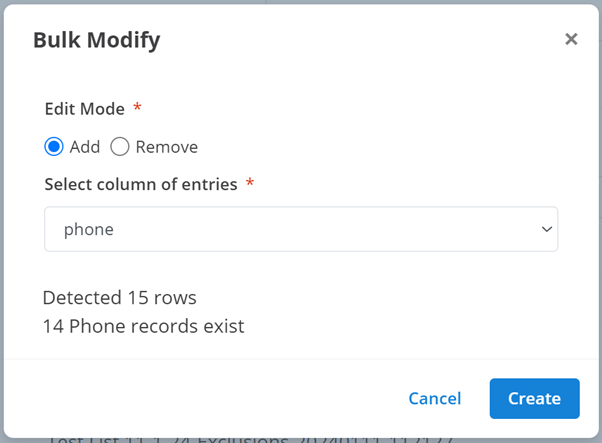
To bulk add/remove contacts from your CSV file:
Select whether you are adding or removing contacts.
Select the column title in the CSV file that contains the contacts.
Click Create.
You can also add or remove members from individual lists manually.
How is this guide?